This article, “Turn a Beautiful and Functional Funnel,” is from the pages of American Woodturner and is brought to you by the America Association of Woodturners (AAW) in partnership with Woodworker’s Journal.
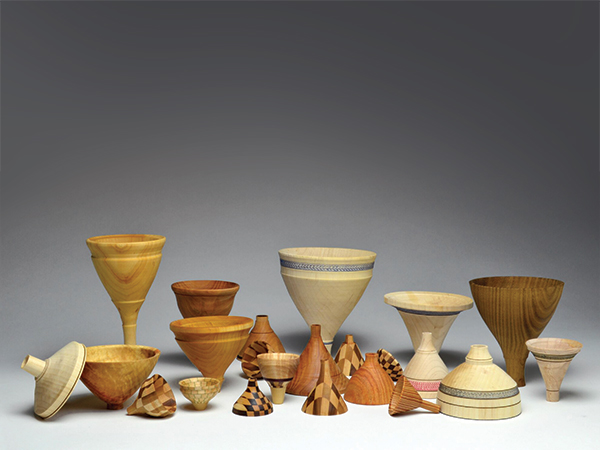
Your kitchen is likely filled with items that could become woodturning projects. Recently, I saw my wife using a plastic funnel and decided to challenge myself to turn one out of wood. I started by looking at a variety of already-made funnels. Some are tall and narrow, a shape you might want for pouring cooking oil from a large bulk container to a smaller, everyday one. Others are wide with a long stem, the kind you might use to pour gasoline into your lawn mower. And yet another type is small with a short, narrow spout, the size you could use to fill a saltshaker.
No matter their use, funnels can be made into beautiful, functional shapes. Plus, they make lovely kitchen displays when not in use. This project is about both the useful and the beautiful.
Getting Started
Regardless of what funnel shape you choose, the basic steps for making one are the same. Any hardwood will work, and the only tools you need are a spindle-roughing gouge, a parting tool, and a detail gouge.
The goal of the example project in this article was to turn a funnel 4″ (10cm) tall by 2″ (5cm) wide. I started with a blank of maple 6″ (15cm) long and 21/2″ (6cm) wide. I recycled project wood from a broken baseball bat.
The Turning Process
This funnel is an endgrain turning project, so the wood grain is oriented parallel to the lathe bed. I mounted the blank between centers and used a spindle-roughing gouge to turn the wood into a cylinder. I then formed a tenon and remounted the workpiece in a scroll chuck.
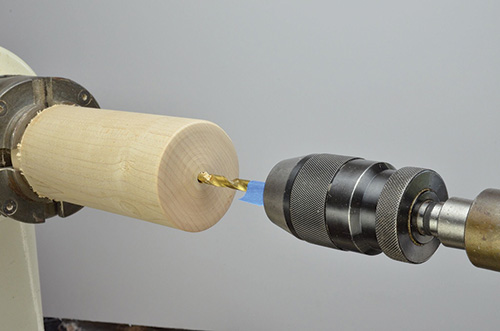
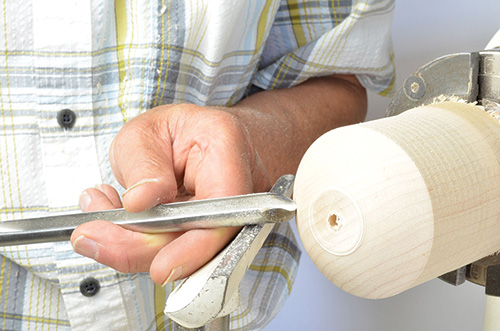
Using a drill chuck mounted in the tailstock, drill a 1/4″- (6mm-) diameter hole 4″ deep. I use tape to mark the depth of the hole on the drill bit.
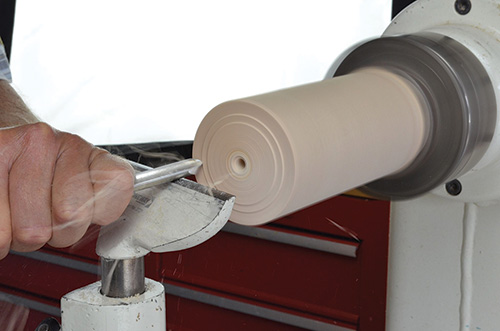
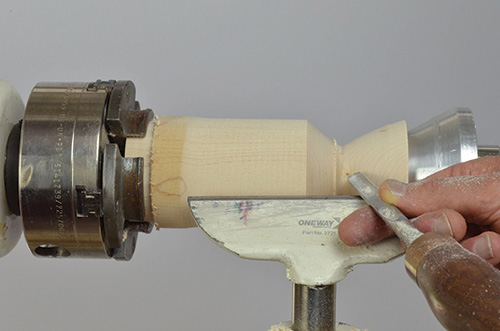
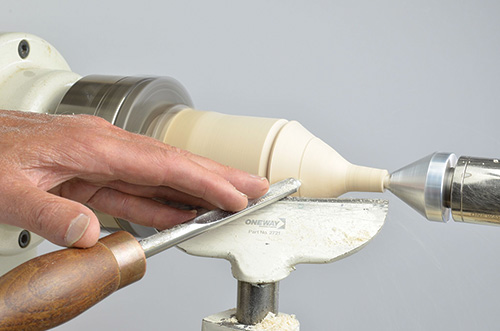
After ensuring the stock is held tightly in the scroll chuck, true the end of the workpiece with a cut across the endgrain. Then begin to form the opening for the mouth of the funnel. For these cuts, I use a small detail gouge with a fingernail grind and a 45-degree bevel.
Hold the tool shaft parallel to the lathe bed (horizontal), and rotate the flute counterclockwise to a closed position (facing left a bit more than 90 degrees from vertical). Start at the hole opening and lightly pull the tool outward and to the left. Without tailstock support, the wood is only supported at the drive end, so take light, intentional cuts with a sharp tool. I continue this endgrain hollowing to a depth of 3″ (8cm).
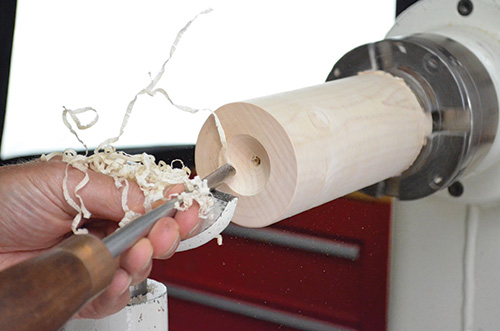
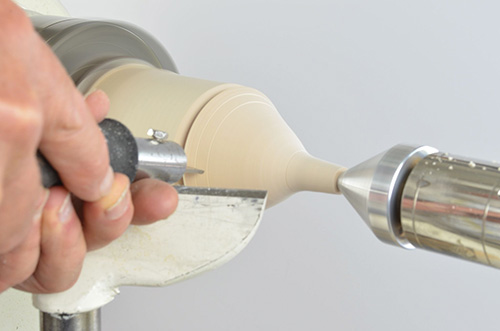
Now I’m ready to begin shaping the exterior, and for this process, I support the work by sliding the tailstock fitted with a cone center into the funnel’s interior. The goal in shaping the exterior is to cut the wall thickness to 3/16″ (5mm), while making the outside of the wall parallel to the interior wall.
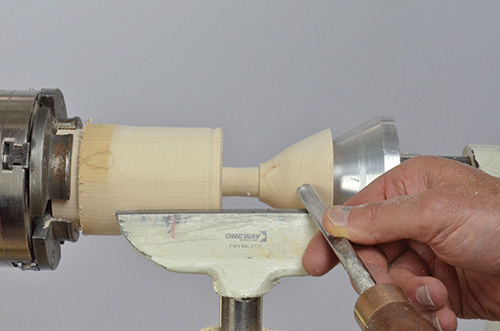
This is also a good time to begin shaping the stem of the funnel. To do this, I often use a parting tool with the cutting edge held slightly askew.
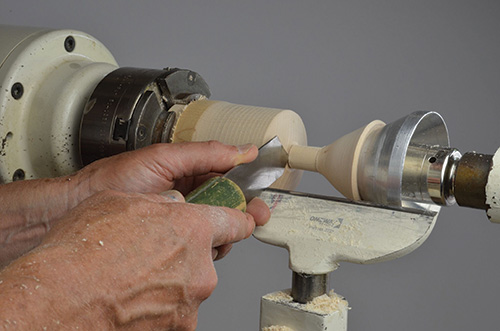
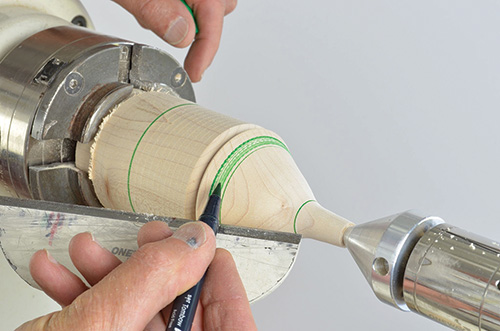
After completing the exterior shape, I use a narrow parting tool to part off the funnel. This allows me to rotate the funnel 180 degrees, remount it in a jam chuck, and make the final cuts.
An advantage of rotating and remounting the funnel on a jam chuck is that you can easily align the funnel’s hole back to center. Because the hole is long and was drilled with a narrow drill bit, it might have wandered off center during drilling.
This can be corrected by inserting the live center into the funnel hole while holding the opposite end in place on a jam chuck. With this realignment, you can cut away any wobble and put the hole back into the center of the funnel.
Final Details
One last detail option is to add chatter work. I chose to cut a small band of chatter near the top and color it with a permanent marker. This subtle detail puts the project into the useful and beautiful categories.
I like to use an oil finish on my funnels, such as linseed or mineral oil. Now look for more woodturning project ideas in your kitchen.
Tim Heil was introduced to woodturning in junior high school woodshop in 1966. He joined the AAW and the Minnesota Woodturners in 2002, and that put his woodturning skills in high gear. His favorite wood is curly maple.


