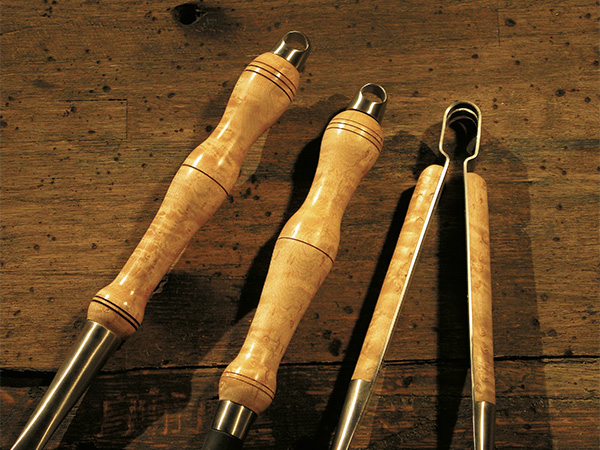
Need a break from slaving over a hot grill this summer? Creating your own handles for your grilling tool set may be just what the doctor ordered.
Using the set of grill tool hardware from Rockler, we decided to put the lathe to use and turn our handles from hard maple. With the set, you get the hardware to create a spatula, basting brush and a set of tongs.
We’ll turn the spatula and basting brush first, then create a split turning for the tongs second — it’s a slightly different process.
Preparing Blanks
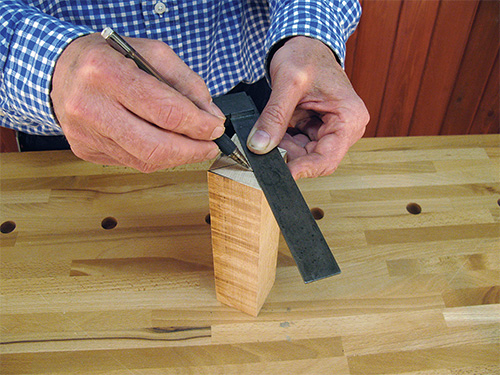
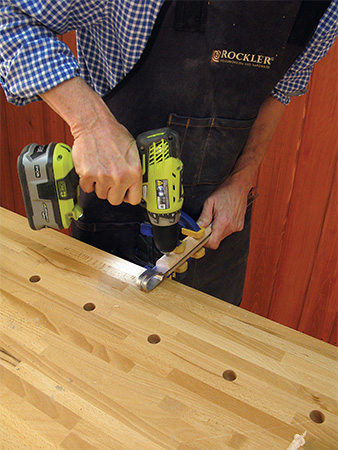
You’ll need blanks that measure 1-1/2″ x 1-1/2″ x 6″. Square up the ends, then mark them with diagonal lines to locate the center.
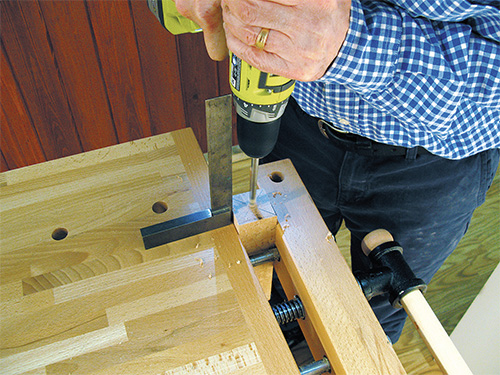
At that center, drill a 1/2″-diameter hole to a depth of 1-1/2″ on one end of each blank. This is where you’ll install the threaded insert hardware that will join the grilling tools to your handle.
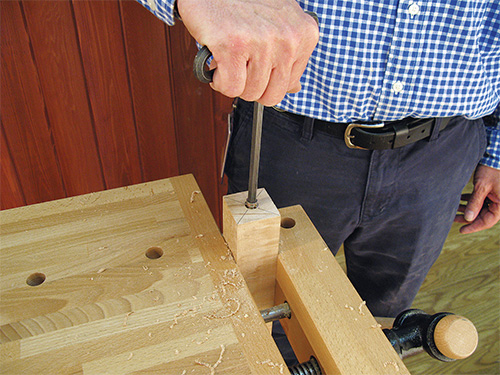
Grab the insert and, using an Allen wrench, turn it into the hole until it is just below the surface of the wood, keeping it square to the blank. If it is loose in the hole, use some CA glue or epoxy to secure it firmly.
Turning Spatula and Brush Handles

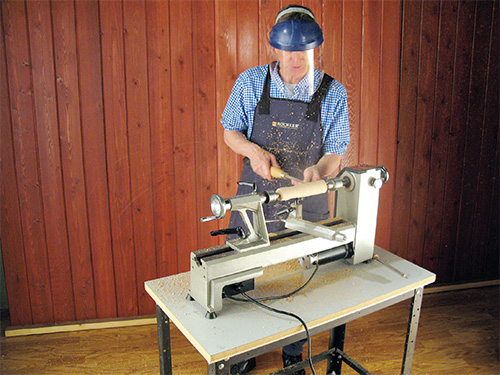
To turn these two handles, you’ll want to first mount a drill chuck in the lathe’s headstock and install a 1″ Shoulder Mandrel with 5/16″-18 threads in it. Thread the blank on the mandrel. With a live center in the tailstock, engage it to the center of the blank and tighten it.
Begin by roughing your blank into a cylinder, then turn it to the profile you want. Your only restriction? The diameter of the hardware: the 1″ shoulder mandrel is sized to match that diameter. You’ll also want to take note that the tail end of the handle has to be turned to 1″ diameter, too, matching the decorative loop cap hardware.
After turning, sand your workpiece up through the grits, and apply the finish you want. I went with a clear wipe-on polyurethane.
Remove the blank from the mandrel and, using an 11/32″ twist bit, carefully drill a 1-1/4″ deep hole centered on the tail end of the handle. The dimple left by the tailstock will locate the hole.
You’ve got one of your tools’ handles almost complete; thread your other blank onto the shoulder mandrel and repeat the process.
To assemble your spatula and brush, thread the tool hardware into the handle inserts. Attach the loop caps at the handles’ tail ends using quick-set epoxy on the loop cap posts, inserting them in the handles. Make sure to immediately wipe away any glue squeeze-out. And, voilà! You’ve now got a hand turned spatula and basting brush for your grill.
Turning the Split-Handled Tongs
The tongs, because of the two-piece handle, are slightly more complicated. Don’t worry, you can handle it! (Get it?)
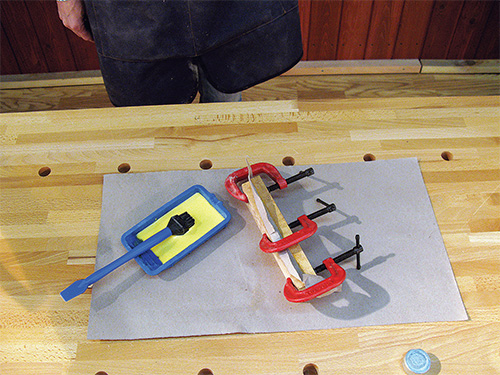
You’ll be using the split turning method, and you’ll need two pieces of wood measuring about 3/4″ x 1-1/2″ x 6″ each. Cut a strip from a brown paper grocery bag or just plain brown kraft paper that’s a little bit longer and wider than your pieces of wood. Spread an even layer of wood glue on one face of each of your wooden blanks and sandwich the paper layer between them. After you get this arranged, clamp them together and let the glue cure. (Could be a good time to get a refreshing beverage and set your steak out to thaw.)
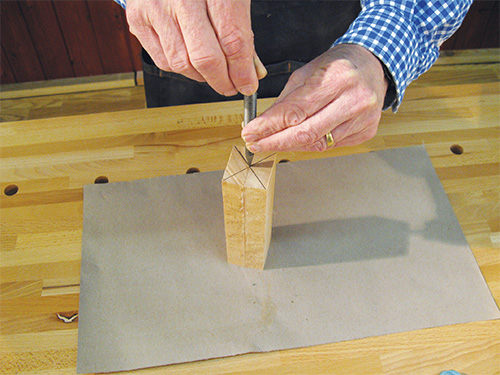
When you come back to your tong turning project, first square the ends of the blank if you need to, then use the same process you did with the other handles to draw diagonal corner-to-corner lines to find the centerpoint. It’s critical this center mark hits where your paper is layered between your two pieces of wood to produce matching halves of your tongs.
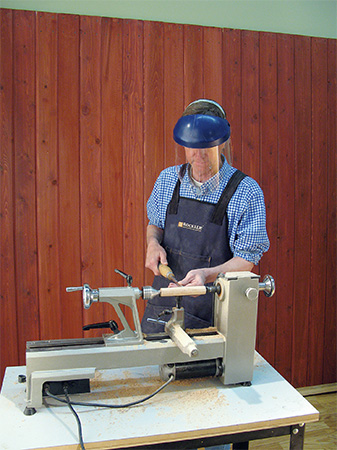
Mount your glued-up blank assembly between centers on your lathe — no mandrel this time. Make sure the points of the drive and live centers are on the center marks on the blanks’ ends.
Carefully — you absolutely must wear a faceshield for this operation! — rough your blank into a cylinder, taking slightly lighter cuts than usual. Then turn the blank to your desired profile, making sure the ends have a 1″ diameter.
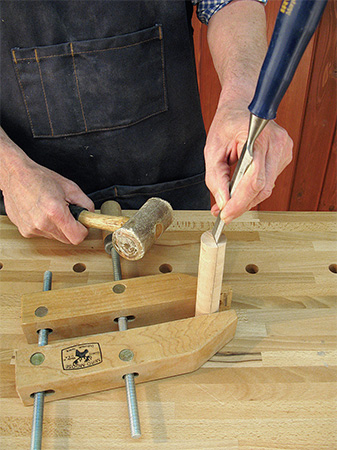
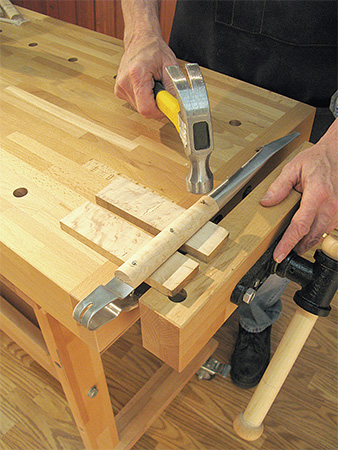
Remove the blank from the lathe, then stand it on end on a solid work surface and carefully position the cutting edge of a sharp 1″ chisel on the paper line. Strike the chisel, using gradually increasing force, to split the blank along the paper layer.
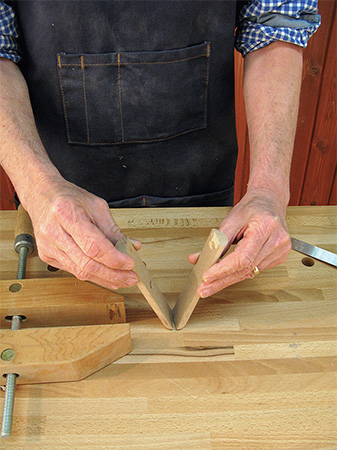
Sand off the residual paper and glue from the flat sides of your blanks.
Assembling the Tongs
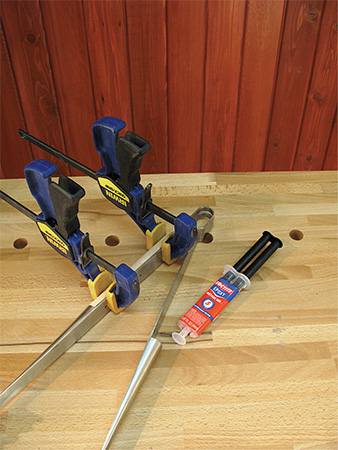
It’s time to mount the handles to the tongs. Rough up the mating surfaces of the metal and wood with sandpaper. Apply quick-set epoxy to one of the handle blanks and press it onto one side of the tongs, aligning the blank to the edges and tight against the curved shoulder. Wipe away any squeeze-out and clamp the handle until the epoxy cures.
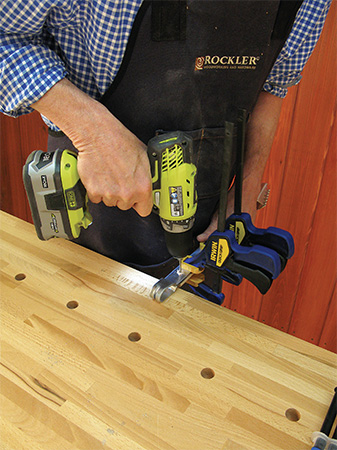
Next, squeeze the tong handles together and use clamps or tape to hold them in this position. Use the holes in the metal tong hardware as a guide to drill 1/8″-diameter holes perpendicularly through the wood handle for the pins.
Now glue the other handle in place as you did before. This time, drill the 1/8″-diameter holes in the second blank, using the holes in the first handle as a guide.
Now that you have all these holes in your handles, insert a pin into each of them. If they’re loose, use (CA) glue or epoxy to secure the pins. Once they’re tapped in place, file the pins close to the surface of the handles before you do your finish sanding.
Cover the metal on the surface of the tongs to protect it as you sand through the grits — it takes some care to avoid scratching the metal edges next to the wooden handle pieces.
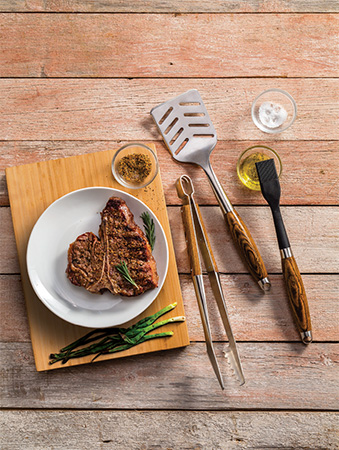
After you’ve applied your finish and let it cure, you’ve got custom tongs to go with the rest of your grilling tools, and the set is complete. Time to celebrate! How about a nice porterhouse?
Grill Tool Turning Hardware
Rockler Grill Tools Hardware Kit #51066
Mandrel with 5/16”-18 Threads #43469


