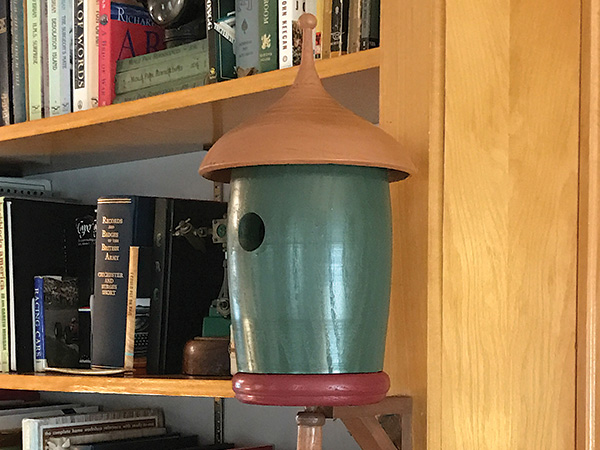
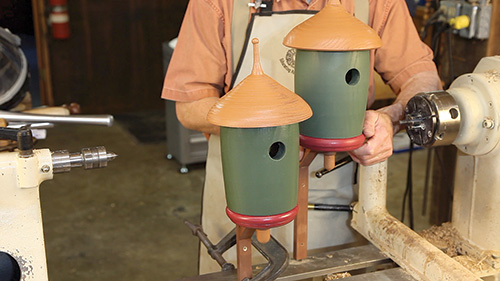
Birds have fascinated humankind for as long as we have been orbiting the sun. Perhaps it is the freedom that flight inspires or their beautiful form. Whether you’re a birdwatcher looking to attract specimens to fill out your life list, or you just like to decorate your home’s interior with flights of fancy, this turned birdhouse can fulfill either function.
The coopered birdhouse is a good lathe workout because it is a nice combination of spindle and faceplate work and, on top of that, does not require a large lathe. (Coopering is using stave construction to produce a hollow wooden vessel or form -— like wooden casks, barrels, buckets or even butter churns.)
I have built quite a few of these birdhouses for gifts, mostly in batches every decade or so. It’s a project that lends itself well to production runs, with 10 to 20 being a good batch size. The original birdhouse design was inspired by woodturner Andy Barnum, former teacher of woodturning at Purchase College. For my version, there are six parts to make.
Start with the Staves
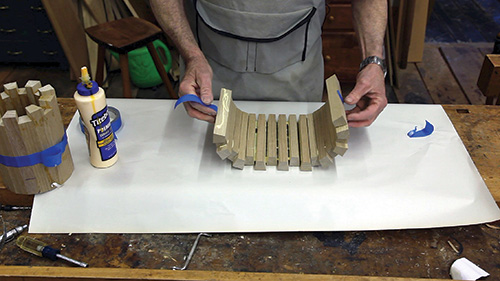
The first order of business is to cut and glue up the staves to make the barrel-shaped walls of the house. Nine are cut to 6-3/4″ long, and nine are at 7-1/2″ to create breathing holes under the eaves that evoke dentils. I rip them in a table saw with the blade tilted to 10˚, giving each stave an included angle of 20°. I use masking tape to hold the staves in line so I can wrap them up and clamp them with hose clamps. Pressing the staves down onto masking tape laid sticky-side-up on the bench allows a trial fit.
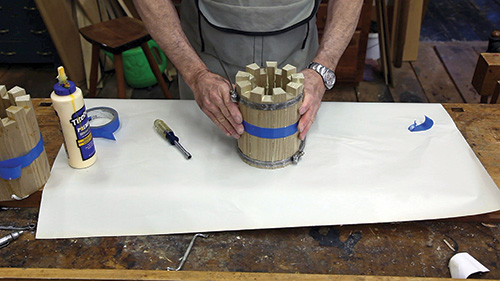
I also squirt liberal amounts of waterproof Titebond II between the staves before the final wrapping and clamping. Automotive hose clamps at each end secure all the staves tight. Allow at least 12 hours of drying time.
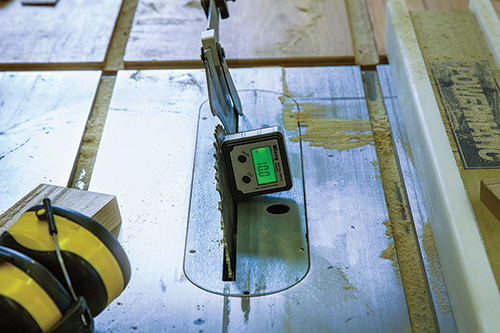
The Wixey Digital Angle Gauge helps greatly in obtaining a nearly perfect 20° to each stave. It is nigh impossible to get each stave to be exactly 20° in a table saw. While I have sometimes scoffed at electronic devices in the workshop, I found this one (item 57097 at rockler.com) quite useful. Magnets stick it to the blade and it reads within a tenth of a degree, giving much more accurate miters than the tilt scale on my high-end table saw.
With this many staves, I still seldom get a perfect match between the last two staves, but it is good enough for this project. If you want all the miters to be perfect, the trick is to wrap up all of the staves dry. Look at the angle between the last two and correct with a hand plane or a disk sander. Now apply glue and clamp.
Starting at the Lathe
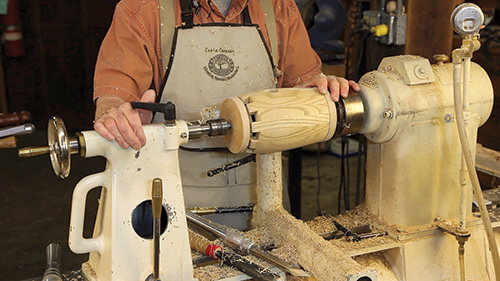
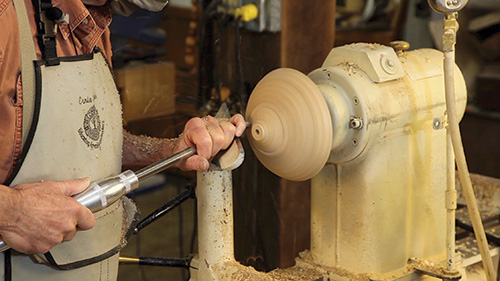
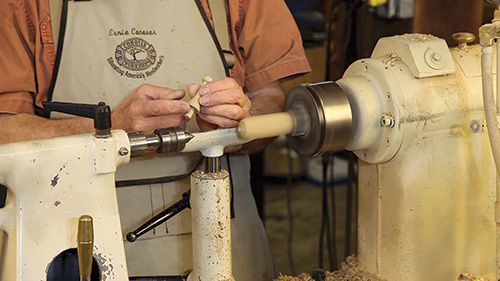
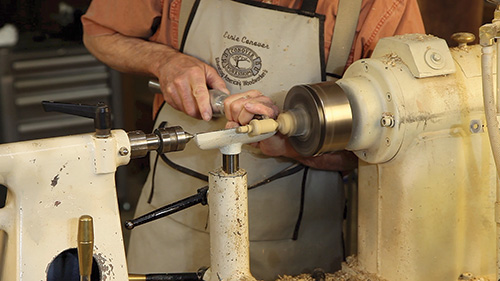
Once the glue is dry, the outside of the resulting barrel can be spindle turned between shop-made cone-shaped plates with a tapered tenon. They center the cylinder and hold it as it’s turned. Mount the first cone on a screw chuck, then catch the second one with a live center in the tailstock. This traps the barrel between two cones and makes the outside concentric with the inside. Use moderate speed; I turn mine at about 700 rpm.
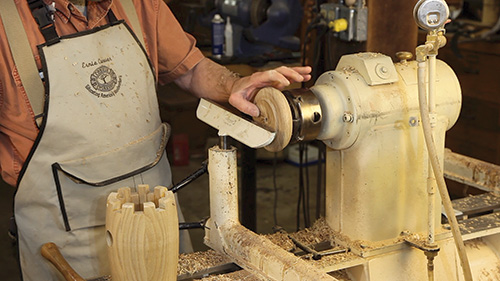
I drill the bird’s doorway (hole) before turning. The diameter of the hole is important for what kind of bird you want to attract. Bluebirds like a 1-1/4″-diameter hole, while chickadees prefer 1-1/8″-diameter. An Internet search will give you the correct diameter for most birds. Unless your birdhouse is to be art, resist the temptation to install a perch below the hole. It will only be a spot for predators to wait for the occupants.
Closing It Up
tool is guided into the piece at a 45˚ angle. When their order is reversed,
they stack up nicely.
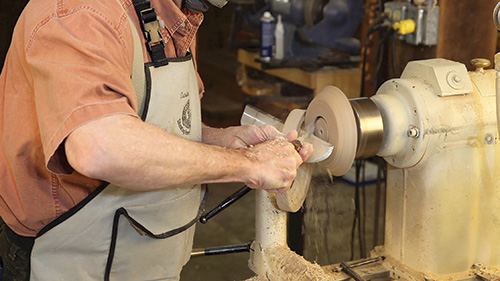
The floor is turned on a screw chuck. You raise a tenon that loosely fits the inside of the walls and the outside edge sports a 3/8″-wide bead. It is made from a 5-1/8″ round x 1-1/4″- to 1-1/2″-thick disk of wood. Turn the tenon 9/16″ long, test fitting it inside of the barrel, then shape the 3/8″-wide bead on the outside. The bottom profile is then rounded to meet the bead (see the full-sized Drawings). The end of the tenon is dished to promote water drainage from the drain hole.
For my painted artistic examples, meant for indoor display, I spindle turn a decorative acorn on a 3/8″ by 3/8″ long tenon that glues in the center hole used for screw chucking. (You could also choose another shape.) This precludes water drainage, so if you want to add this embellishment to an outside house, you will have to drill an angled hole that misses the tenon but comes out near the center on the inside.
The roof rings are made by using a cutoff (parting) tool at a 45° angle to separate two 1-1/4″-wide bands from a piece of stock band sawed to a 7-3/4″ circle. The resulting three rings are then stacked, with liberal amounts of Titebond II between, to form the conical roof. Once the glue has dried 12 hours, the outside is faceplate turned to shape on a screw chuck.

I use an extended screw on a set of tower jaws in a Oneway Stronghold Chuck, but you can make this chuck by drilling a slightly undersize hole for a 3/8″ lag screw in an appropriate piece of wood on a faceplate. Turn the wood to fit up into the roof and register against the topmost section. Scrape the end dead flat, cut the hex off the lag, and epoxy it into the hole. You now have a custom screw chuck.
The Last Details
Finish the job by turning a steeple for the roof and, if desired, the acorn. I keep the steeple short and simple, with another 3/8″ x 3/8″ long tenon for attachment and a base that matches rooflines.
With the pieces turned and sanded, apply the finish of your choice … paint, exterior polyor even just oil. You can hang it as you deem fit, but we did provide details of a mounting bracket (see Drawings).
Now all that remains is to put your piece of art on display in the family room or mount it outside in May and find the binoculars to watch a pair of birds raise a family.
To Download the Full-size Patterns for the Floor, Roof Rings and Acorns: Click Here. Download the rest of the drawings and materials list: Click Here.


