I am currently in the process of building all the kitchen and bathroom cabinetry in our new house and am building raised end panels and raised panel doors. I found a great article in the April 2000 issue of Fine Woodworking magazine on gluing and clamping. I used this method to glue up my panels. I used 1 x 4s (solid oak) to make the panels.
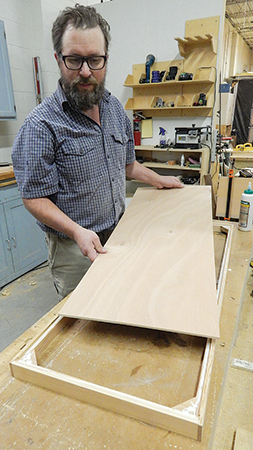
I glued up three panels [making them 8 feet long because I can get three panels out of each with minimal waste]. The first panel consisted of five glued-up 1 x 4s. The second panel took five 1 x 4s and the third took six 1 x 4s. The panels glued up perfectly. I jointed the edges for a clean surface, spread the glue, used clamping cauls to keep them flat, and bar clamps to tighten.
And 48 hours later, I cut the first panels, raised them on the router table, and assembled. Everything went well. About a week later, I went to cut out the panels from the remaining 2 blanks and, low and behold, they were severely cupped. The cupping was bad enough that it was very difficult to raise the panels on the router table. How can I keep my panels from cupping so badly? Is there anything I can do at this point, because I really hate to waste so much solid oak? And what can I do in the future to prevent this?
Here is some additional information to help you pinpoint my problem.
I glued up each panel and kept everything clamped for an hour or so. I used fresh Titebond Woodworkers yellow glue. I unclamped everything and scraped off the excess glue from the jointlines while it was still somewhat soft, yet had a skin over it. This worked perfectly! Then I stored this panel on my shop floor. My shop is in my basement – in a brand new house.
I laid down some 2 x 4 scraps, then plastic to prevent moisture from getting into the panels. Then I set my panels on the plastic. Then I repeated these steps for the next two panels, and stored them on top of each other. I did not use spacers between the panels when they were stored. Like I said earlier, I cut my first panels out of the glued-up blank within 48 hours, but the other two sat for a week, and now they are cupped pretty badly. Could I screw a couple of cleats to the back of each panel to flatten it? Once I got the frame and panel assembled, I would then remove the cleats for installation onto the ends of my cabinets. But I really need to know how I can prevent this because it will be a bit more critical when it comes to making the raised panels doors.
Rob Johnstone: I can’t say I know the exact reasons the glued-up panels warped. Here are a few things that may help in the future. A 3-1/2″ wide board is just fine for gluing-up into a panel, but you should look at the end of each board and alternate the orientation of the growth rings as they are presented in each piece. If you are using plain sliced lumber this is more important than if you are building with quartersawn stock. As you look at your clamped up panel, it should remind you of “smile, frown, smile, frown, smile”. Some folks recommend an uneven number of pieces in a laminated panel as a way of increasing stability and eliminating a center line. Always allow lumber a period of time to acclimatize to your shop before you use it, but never store it on a cement floor. In my opinion, a piece of plastic is not sufficient to shield the wood from the cement’s moisture, and I think that was the biggest problem you ran into. The panels were exposed to moisture in some way, and it seems the moisture had an easier time getting to one flat side of the board than the other.
(Once, when I was about sixteen, I was painting a whole series of plywood display panels at my father’s shop. The end of the work day arrived, and I left about 150 panels overnight on a humid August evening with a seal coat on only one side. The next morning I was greeted with 150 plywood potato chips … a lesson learned the hard way. The rest of the crew found this quite amusing; my father did not.)
Here’s what you can do to salvage the lumber. First, get the panels off the floor and store them with the convex side of the panel exposed to the air (the cup pointed down). Let them sit for a few days at least. If I am right about why the panels cupped and you are luckier than most woodworkers, the panels may flatten out. If that doesn’t take care of the cup, take them to your table saw and rip them into about 2′ wide strips, alternate the ring orientation and re-laminate the panel. Then sand or plane them flat.
Michael Dresdner: Two things come to mind immediately. First, did you remember to reverse the grain of every other board? That won’t prevent an individual board from moving, but it will tend to mitigate the overall cup. Second, you must sticker and stack panels while storing them. Make sure they are well off the ground of a basement, and be certain plenty of air moves through them, even if you have to run a gentle fan through the stack. In fact, stickering the wood properly and running air through it will probably reverse the cupping you already have. (You can also wet the concave side to make it all happen more quickly.) Use a piece of plywood or waste stock at the very top of the stack.
Ian Kirby: I don’t know the moisture content of the stock at the time you purchased it, but I would guess it was a lot higher than the workshop where the panels were glued up. I’m also guessing that it was flat-sawn material.
The stock should have been cut to length, then left on stick (piled with inch square stickers between layers) for a month or so. It would have lost moisture and cupped during this time. It then would need to be jointed and resawn to bring it back to flat. Leaving it in stick for a longer period would help if there were any doubt about its stability.
The solution now is to rip the panels into narrow boards and reglue them into a flat panel. The reason wood distorts in any of its four ways – cup, twist, bow or spring – is because of the shrinkage differential between the radial and tangent tissue.


