Check out all the cool custom features that are part of this Router Table Organizer Cabinet project. Many router tables feature an open base that is unused space. Chris Marshall built custom storage cabinets and shelves to fill the empty space under his Rockler router table.
Video Script
Rockler’s standard router tables, with these steel leg sets, are a good choice for table routing. But, there’s lot of empty space down here that I thought could be put to better use. Because when you think about it, we use quite a few different supplies and accessories at the router table that need to be stored somewhere!
There’s all manner of router bits, plus collets and collet wrenches. You might have a wrench for a router lift too, and probably some push pads or push sticks. I often use a couple of featherboards, and then occasionally other jigs — like this box joint jig. And, what about guide collars, bit inserts or specialized, boxed bit sets like this? Here’s a lot of odds and ends here that need a place to go.
Well, that’s why I’ve designed this Router Table Organizer: to give many of those supplies a storage place right where I’ll be using them. It appears in the February 2019 issue of Woodworker’s Journal. And it’s made of 1/2” and 3/4” Baltic birch plywood, but you could use off-the-shelf plywood from a home center, too.
And, this is a shop project, so I’ve kept the construction process nice and easy. It’s all dadoes and rabbets … nothing fancy. So, you can have one of these put together and ready for finishing in a long weekend. Now, let’s take a look at the major features.
I’ve got a LOT of router bits, and if you’ve been woodworking for a long time, I’ll bet you’ve got a big collection too. So, I wanted this project to have a bunch of storage space for bits. And, it does! It’s got one of these bit storage racks on each side that hold 35 bits per rack. And, if you’ve got more than 70 bits, you could stagger the bit locations on the shelves to hold even more bits.
Now if you look closely here, the bits are held in place with these blue plastic inserts. They fit into 5/8”-dia. holes in the shelves. And, they’re stepped on the inside, so you can store either 1/4”-shank bits or 1/2”-shank bits. And that’s really convenient!
These plastic router bit storage inserts are a fairly new item for Rockler. They come in packs of 10 and sell for $8 per pack.
I like the fact that these inserts will hold either shank size, so you only have to drill one hole size. But, there’s a second plus here too: If you’ve ever built a storage rack for bits out of plywood or solid wood like this one, you probably already know that the bits can get stuck in these holes. All it takes a little dust build-up or wood movement, and bits can be really hard to get out. That’s not a problem with these blue inserts, because they fit into oversized holes to begin with, and the plastic is soft enough to “give” a little bit. So, no more stuck router bits.
In between the bit racks and under the router, there’s a deep drawer here that rides on full-extension drawer slides. It’s 00” deep and about 00” wide, so it holds a fair amount of stuff. And, the construction is simple: the corners are held together with rabbet-and-dado joints and glue.
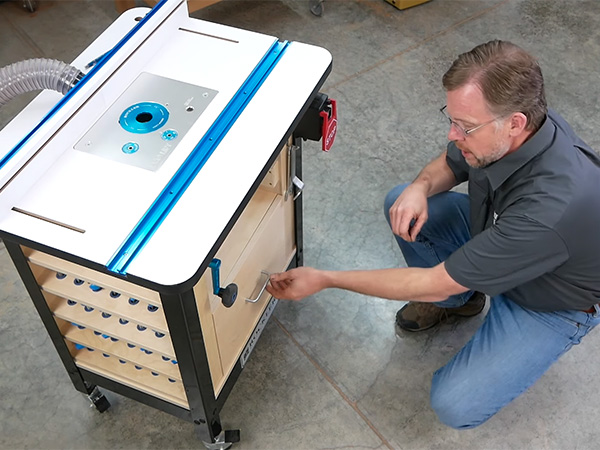
Now, I’ve got one of Rockler’s new ProLift router lifts in my table, and it has an offset hex wrench to move the router up and down. That needs a storage spot, so I made a holder out of some built-up scraps of 1/2” Baltic and mounted it here, on the back of a bit cabinet.
Rockler offers a set of five aluminum insert rings for the ProLift as accessories. I’m storing these in this little compartment over here where they’re always be within easy reach.
And, even if you don’t have a router lift, you’ve probably got a couple of collet wrenches for your router. These get constant use, so I’ve hung mine right next to the On/Off switch. And to do that, I just picked up an inexpensive coat hook from a home center.
And, here’s one last feature hiding in back: a place to stow your featherboards! It’s a length of Rockler’s 3/4” miter track screwed to the back of the project. To hang featherboards, just set one of their expanding miter bars into the track, and tighten the lock knob. It will hold two or three featherboards without taking up any drawer space.
Now, you might be wondering if you’ll have to take your router table base apart to install this big project. And the answer is, No. My design is actually modular, with the big parts installing separately. The base board goes in first, screwed to these cross members on the legs. Then, you slide in the bit racks and fit the drawer cabinet in between those. Everything is held together with screws, driven from inside the drawer cabinet. So the installation is easy!
I think this Router Table Organizer is going to be one of those projects that fits my needs like a hand in a glove. And if you’ve got dead space under your router table, just think what it could do for your productivity, too. Remember, you can find plans for it in our February 2019 issue.
I’m Chris Marshall with Woodworker’s Journal Magazine. Thanks for watching!


