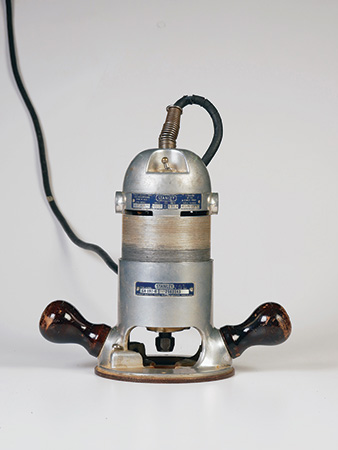
Whether you use a router made long before you were born, like the 1950s Stanley or one of the technologically advanced models built today, either machine can perform a range of essential woodworking tasks that can’t be bested by any other power tool. If you’re a woodworking novice, I’ll go so far as to say it should rank near the top of your “short list” of tools to buy first, even ahead of a table saw — routers are that useful.
A router can help you turn sharp edges into decorative profiles of all sorts. It will machine dadoes and grooves, rabbets, dovetails, mortises, tenons, box joints and more. Need to duplicate a bunch of parts? That’s no problem for a router and a template. It can even surface plane, joint edges flat, carve lettering, cut circles and bore holes. The “can-do” list goes on and on.
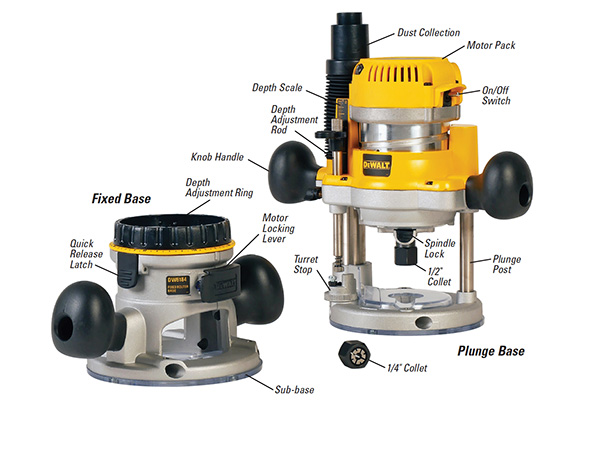
The reason a vintage router or a brand-new one work almost equally well has to do with the tool’s simplicity: strip away the advanced electronics and feature enhancements made over the past two or three decades, and all routers really boil down to a few basic parts. A universal motor points downward and is held in a base that typically has a couple of handles to help you steer it over a workpiece. A sharp bit attached to the end of the motor’s spindle does the cutting work.
Routers have two styles of bases. The “fixed” base has a large collar, a threaded rod or other height adjustment feature that enables you to move the motor up or down inside the base to change the cutting depth of the bit. Once you set and lock the motor where you want it, the base remains otherwise “fixed.”
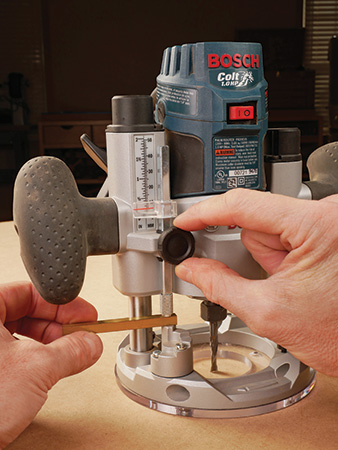
“Plunge” bases turn that relationship on its ear: the motor clamps into a top housing on the base, and the housing can be raised or lowered on two spring-loaded metal posts to adjust the cutting depth — here, the motor is “fixed,” but the base plunges it to different depths. You control cutting depth using an adjustable rod that makes contact with a stepped and swiveling turret. Each click of the turret changes the cutting depth incrementally by about 1/8″, and those changes can be read off of a depth scale behind the rod.
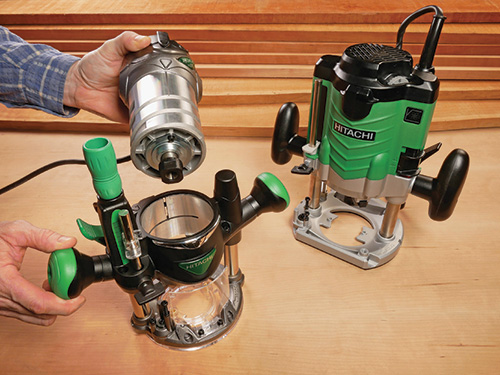
Manufacturers still produce a few dedicated plunge routers where the motor and base are integral. They were once commonplace, but most routers these days are modular: a removable motor pack fits both fixed and plunge bases to maximize versatility.
Collets: the Business End

The bottom end of the motor’s spindle that holds the cutting bit is tapered on the inside and threaded on the outside. A slotted, tapered collet fits into it and grips the shanks of router bits around their circumference like a vise. A nut surrounds the collet and threads onto the spindle to tighten bits into place. Collets are sized to accept either 1/2″- or 1/4″-dia. shank router bits. Mid-size and larger routers often include both collet sizes.
Other Helpful Features
Today’s routers are chockfull of good features that give them the edge over predecessor machines made 20 or more years ago. Almost all new routers have variable speed — and you’ll need to dial the speed down to operate large-diameter bits safely. Many motors have “soft start” that ramps up power to prevent jackrabbit starts that can jerk the tool in hand. Top quality routers also feature electronic feedback circuitry, which keeps the bit spinning at a consistent speed, regardless of the load being applied to the bit.
Some routers have spindle locks, so you can change bits with one wrench instead of two. Dust collection capabilities have improved, too, thanks to plastic shrouds that fasten or clip inside the base to corral the debris created by the bit; a port on the shroud connects to a vacuum hose. A few manufacturers even outfit their routers with LED lights that shine down into the bit area to help you see what you’re cutting — it’s a wonderful feature to have.
Sub-bases & Guide Bushings
Below the metal router base, there’s a smooth plate called a sub-base that fastens to it with screws. Router bases and their sub-bases will either have a round footprint or a combination of round and flat edges. The goal here is that you can feed the sub-base along a straightedge or other guide surface consistently. The sub-base’s smooth face also protects workpieces from marring during routing.
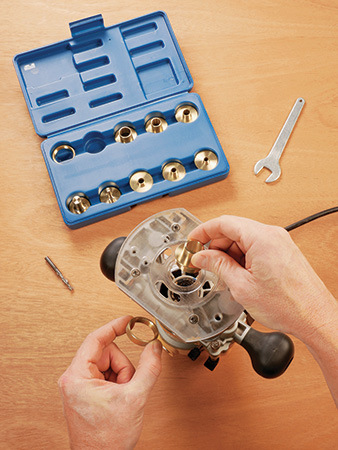
An indispensable feature of many sub-bases is that their center cutout is sized to accept threaded metal guide bushings, with 1-3/16″-dia. bushings being the industry norm. Guide bushings (also often called template guides, rub collars or guide collars) have a protruding bushing sized in a range of diameters from 5/16″ O.D. upwards to 1″ or more. They’re invaluable for all sorts of template work and even necessary for use with many dovetailing and mortising jigs.
Some larger-diameter bits won’t fit the openings of sub-bases designed for guide bushings, so an optional subbase with a larger bit cutout may be included with the router, too.
Routers by Size
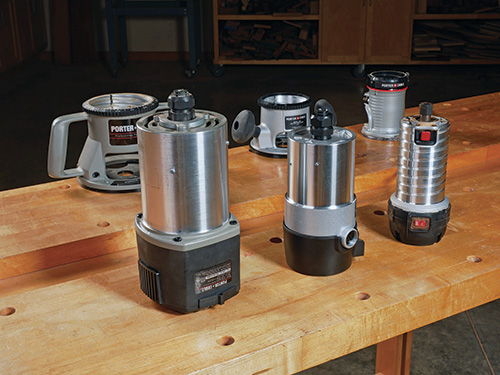
Routers subdivide into three principal machine sizes: full-size, mid-size and a category that goes by several names, depending on the manufacturer — “compact,” “palm” or “trim.” The delineation of full, mid or compact routers mostly has to do with the peak horsepower their motors will produce, but each size also has proportional and functional characteristics worth considering, too.
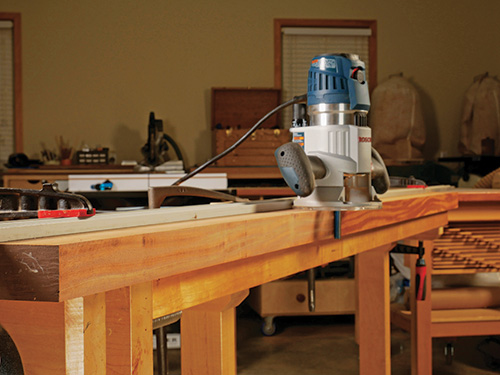
– Full-size routers are the largest and most powerful options you can buy. They have either 3 or 3-1/4 hp motors, and they require larger plunge or fixed bases to hold the hefty motor packs. (Incidentally, here’s where you can still find the remaining new “dedicated” plunge router models.)
A full-size router can accept any router bit made — from tiny roundovers to the largest panel-raising cutter — and its motor delivers enough power to drive all of them with ease. But, the counterpoint to “fullsize” is that the weight and bulkier proportions of these routers can make them hard to maneuver by hand over small workpieces or along narrow edges. Oftentimes, routing successfully with a router held in hand requires some finesse. In these situations, a full-size machine weighing up to 15 pounds can make nimble control much more difficult.
– Mid-size routers are the industry’s answer to a “happy medium” among the routing family. Rated at 1-1/2 to 2-1/4 hp, with proportionally smaller bases than their bigger cousins and tipping the scales at several pounds lighter, midsize routers still pack enough punch to spin all but the biggest cutters. They can be outfitted with both 1/4″- and 1/2″-dia. collets, so you aren’t limited by the sizes of router bit shanks you can use.
There was a period of time in the early 2000s when the industry put substantial R&D into developing combination kits that included both fixed-base and plunge-base options with an interchangeable motor pack. That trend caught on like wildfire, and its afterglow continues today. “Combo” kits offer well engineered fixed and plunge bases that will serve a broad spectrum of routing applications well, for a price that won’t break the bank. Premium mid-size models also include user-friendly features like soft start and feedback circuitry. This “family sedan” of the router market offers solid value to both novices and pros alike.
– Compact routers took a big step forward for woodworking in 2005 when Bosch brought its Colt™ Palm Router to market. Prior to that time, when woodworkers wanted the trimming or profiling capabilities of a router small enough to be used one-handed, the only real option was a laminate trimmer — a countertop fabricator’s tool. While these early “trim” routers were up to task for light-duty edge profiling work, their sub-1 hp motor capacity was limiting. Laminate trimmers also lacked plunge bases, because fabricators could simply tip the tool down into the work to punch through plastic laminate and start a cut. Mortising or controlled depth-cutting weren’t necessary tasks.
Bosch raised the bar for compact routers with the Colt by boosting its motor capacity to 1 peak hp, which opened the door to more woodworking applications and router bit options. De-WALT and PORTER-CABLE upped the ante even further around 2010 by introducing compact routers with both plunge and fixed bases. From that point, the race was on for other manufacturers to bring their own versions of more powerful, capable “tiny” routers to market. And that sea change has meant that today’s compact routers typically have around 1-1/4 peak hp. You can still buy a few traditional laminate trimmers, but most models have gone the way of the dinosaurs in favor of the gutsier and more versatile “next generation” compacts.
Compact routers have even blurred the lines between what must be done with a mid-size machine versus the tinier tool. While compact routers are limited to 1/4″-shank bits, I use them often for cutting mortises and for general template work. Their easy handling and ample power makes these machines surprisingly useful and unintimidating.
They won’t replace a mid-size router by any means, but a compact router is really handy to have as an option.
Configurations
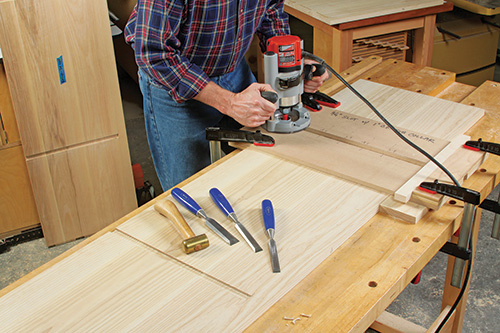
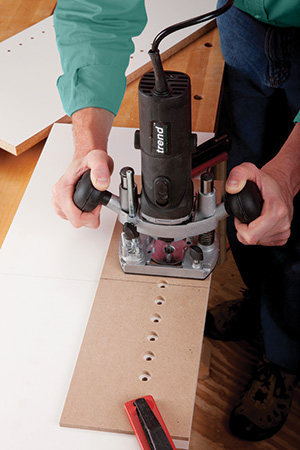
I’ve already alluded to using a router “in hand.” When workpieces are large enough to provide a stable platform under the tool — think wide boards, panels or sheet materials — or when you’re bringing the tool to an assembly like a cabinet carcass or a chest, holding the router by its handles may be your better or only practical option. Many dovetail jigs also require a router to be fed over a template on top of the jig. But, when you’re routing particularly small or narrow workpieces where the tool’s size becomes a hindrance, a second option is to invert the router and mount it underneath a router table instead. This way, you can feed the workpiece across the table and past the bit without having the router’s weight and proportions working against you. Router tables also have the added benefit of a movable fence that can be set and locked to make straight cuts, like grooves, in from the edge of a workpiece. Fences with faces that open and close also allow you to present just a portion of a router bit’s cutting profile to the workpiece at a time, for cleaner and safer cutting passes. A miter slot in the table expands its capabilities even further for tasks such as dadoing and angled cuts. Or, attach a simple jig to your miter gauge, and a table-mounted router will cut box joints with ease.
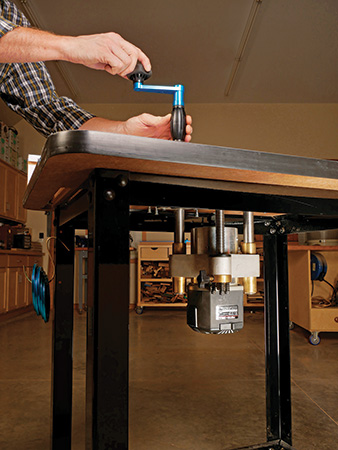
Some router bases, particularly on mid-size machines, are designed with “through-the-base” depth setting adjustment: when they’re inverted and mounted under a router table, you can raise or lower the cutter by fitting a wrench through the router base and adjusting it from above. Here’s where two base mid-size combo kits are really handy: mount the fixed base to your router table and leave it there. Move the motor to the plunge base for handheld situations.
Still, I think the ideal choice for a router table is a full-size motor pack, because its weight is a non-issue in the table configuration, and a 3- or 3-1/4 hp motor offers plentiful power for any routing operation that comes your way. My full-size router motor has hung under a router table its entire life, handling everything from delicate edge trimming to precision dovetailing to rigorous and demanding panel-raising.
Top 10 Bit Styles

Even a modest collection of carbide-tipped bits can help your router perform a wide range of tasks. These 10 styles find their way into many of our magazine’s projects. If your router accepts 1/2″-shank bits, choose this size for larger cutters, when possible.
Earning Its Keep
Now that you know the sizes of routers and the two ways they can be configured for use, let’s take a quick walk through the various operations that will make a router an invaluable addition to your tool arsenal.
– Edge Profiling: Flat, square edges may be a requirement for many assemblies, but they can be awful dull to look at. A router, equipped with various edge-profiling bits, can add shape and shadow lines to tabletops, shelving, plaques and other flat or curved edges. Roundovers, coves or chamfers also help to “soften” edge and end grain so surfaces are more pleasant to touch and less likely to splinter, chip or cause injury. In days of yore, various molding planes handled profiling duties, but routers and bits took their place as a power tool alternative. Routing edge profiles is typically how new users gain confidence with the tool, and it’s a routine operation for experienced woodworkers, too.
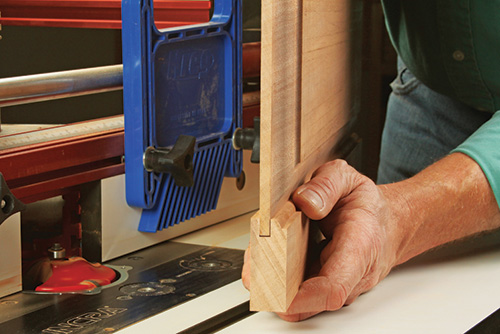
– Joinery: There aren’t many woodworking joints that fall outside of a router’s wheelhouse, if you own the right bits. Chuck a straight or spiral bit into the tool, and it will mill dadoes, grooves, spline slots, laps, mortises and even the tenons to fit into them. A rabbeting bit will tackle rabbets, of course, plus stub tenons for cabinet doors. Most rabbeting bits come with several sizes of pilot bearings to make changing the proportions of rabbet cuts easy.
Add a dovetailing bit and an adjustable or fixed-template dovetailing jig to your shop, and you’re set to make half-blind or through dovetails for drawers or other boxes. Guide the router against a straightedge, instead, and it will make sliding dovetail joints, too.
Ever wish you could make biscuit joints but don’t want to spend the money on the power tool to do it? Well, just buy a slot-cutting bit for a fraction of the price of a biscuit joiner and you can cut them on your router table instead. This one tool can do the joinery work of a table saw, dado blade, shaper, biscuit jointer and hollow-chisel mortiser. No other single power tool can beat this range of joinery applications.
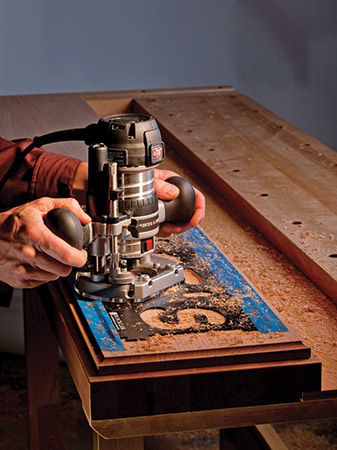
– Template Routing: Templates and woodworking go together like a hand in a glove. We use them to produce matching part shapes and to follow tricky inside cutouts. Templates control the proportions of all manner of shallow mortises for hinges, inlays and locks. Letter templates enable you to rout professional-looking signage, too. You can do all of these tasks with templates you buy or make from scrap, used in tandem with a piloted flush-trim or pattern bit or with a straight bit nested inside a guide bushing. I’ve accumulated dozens of templates for various projects, and every one is made for a router.
– Surfacing, Jointing: Projects incorporating slabs are red-hot these days if you follow social media trends, but those mammoth chunks of lumber are impossible for most of us to flatten in our surface planers. Here’s how to save the day: chuck a planing bit in a mid- or fullsize router and build a sled to ride over the slab. It’s a nifty workaround to using a big planer or drum sander.

Maybe you don’t own a stationary jointer, or you’re faced with a plank that’s too large to feed safely over the jointer you do have. No problem: run your router and a long straight bit against a clamped straightedge instead, to flatten those edges.
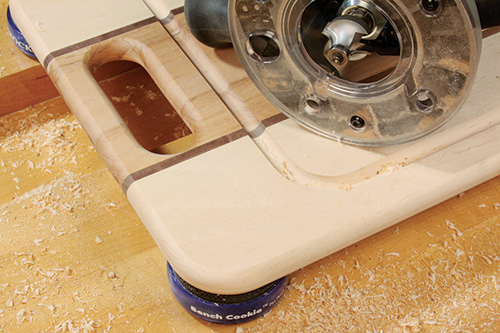
I often use a short mortising or dish-carving bit in my compact router to trim protruding plugs, dovetails and box joints flush. It works as slick as a hand plane.
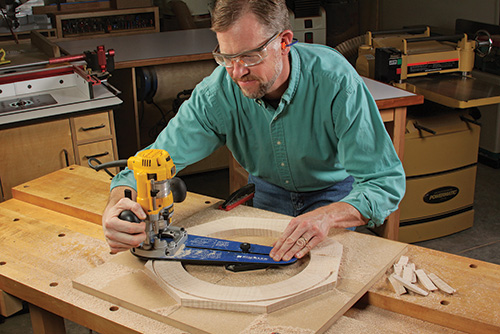
– Cutting, boring: A router, straight or spiral bit and a straightedge can make quick work of trimming large panels or plywood to size cleanly. Circles and ellipses are easy to cut, too, with a router mounted to a trammel or ellipse/circle jig.
You can even bore rows of shelf-pin holes for cabinetry or dowel joints with a plunge router, template and guide bushing — and a sharp router bit will cut them more cleanly than a drill and twist bit often will.
– Door-making: Once upon a time, the best tool for raising panels and milling cope-and-stick joints for cabinet or passage doors was a shaper. Now, router tables are a safe and suitable “Plan B” for doormaking. You can buy horizontal- or vertical-style panel-raising bits in all the popular door styles, plus matched cope-and-stick bits to connect the rails and stiles. Here’s where a full-size motor in your router table really delivers for this heavy-duty application.
Cordless Compact Routers are on the Rise
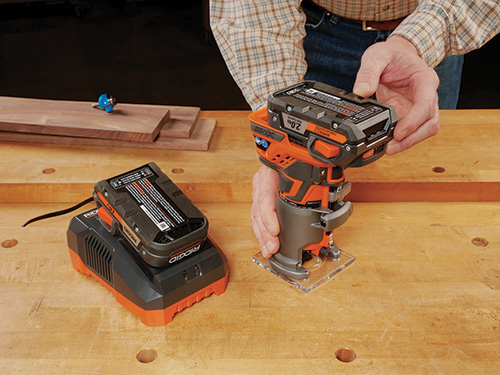
The options for cordless tools are burgeoning these days, as manufacturers continue to pursue battery- powered alternatives for every benchtop, handheld and yard-and-garden power tool. You may know that Bosch, Makita, RIDGID and RYOBI now offer cordless compact routers among their 12- or 18-volt product lines, and more choices are probably on the horizon. But, do you need to “cut the cord” for a router? If you’re already invested in a battery platform, adding a cordless model might make sense, especially if electric outlets are scarce. Plus, the cord will never be in your way again. However, a big battery can make the router feel top-heavy, and if you have to buy the router, batteries and charger, you’ll spend significantly more than for a corded router that will never need charging — or eventually, new batteries.
Choosing Router Bits

While you may only spend two to three hundred dollars on a router that will last for decades, that’s not where routing gets expensive. The real cost outlay over time is in router bits. Prices for quality carbide-tipped bits start at around $10 to $15 for the simplest options. From there, price tags climb steadily to $150 or more for packaged sets, specialty bits and door-making kits. Stocking up ain’t cheap, but you can’t rout without the cutters.
Here’s the good news: you don’t need drawers full of bits to get most projects done. Instead, buy bits only as you need them, considering the “Top Ten” styles I suggest. Skip the big “bargain” collections, because they usually contain a few oddball bits you’ll never use anyway. Invest in 1/4″-, 3/8″- and 1/2″ straight or spiral bits, roundovers and coves. A single 45° chamfer bit, a rabbeting bit with various sizes of bearings and at least one flush-trim and pattern bit are essential, too. Quality bits last a long time, and choosing carefully will help you explore your router’s rich potential affordably.


