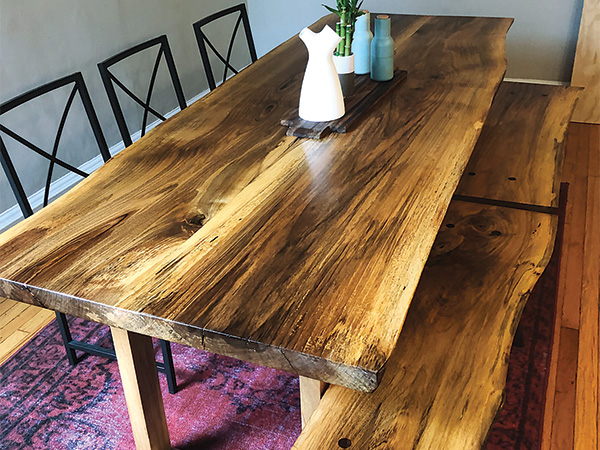
My friend Ken Zahka’s son, Alex, married a German woman, Anna, who grew up on a farm on Lake Constance (Bodensee). Fifty-plus years ago, Anna’s mother, Silvi, had planted a fast-growing Carpathian walnut tree on this farm, right next to the house. In 2014, the tree was cut down because it had grown large enough to threaten the house and block their view of the Alps. On a visit to Germany, Ken admired the stem of the recently felled walnut and remarked to Silvi that he would love to build a table for Alex and Anna out of it. Silvi then had the walnut milled into 2-3/8″ slabs, kiln-dried, stamped bug-free for export and shipped to my shop.
I opened the crate and stickered the live-edge slabs in my woodshed, where they languished until April of this year. Then, Ken and I set aside a solid week to build an 8′ live-edge table and two live-edge benches. We spent Monday morning moving the stickered slabs from the shed to the shop for inspection. At 2-3/8″, they were too thick for our Festool TS 55 Track saw, which has a maximum depth of cut of 1-15/16″, so I called my friends at Doll Lumber to see if they would plane them down to 1-7/8″. After running a metal detector over the slabs, we schlepped the wood to Doll’s yard — one of the smartest things we did all week. Suddenly, the wood came alive, showing us grain and character. As we sorted the wood back at the shop, Ken and I instantly agreed which slabs belonged in the table and the slab that would become the two benches. The wood spoke to us, and we were listening!
Scale Model for Testing
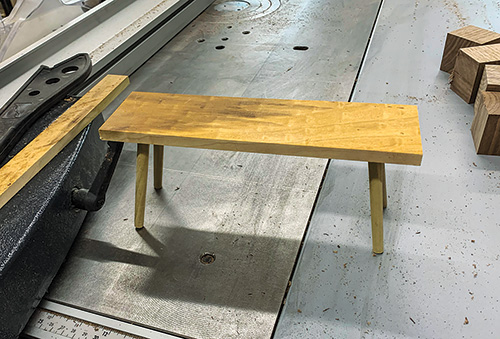
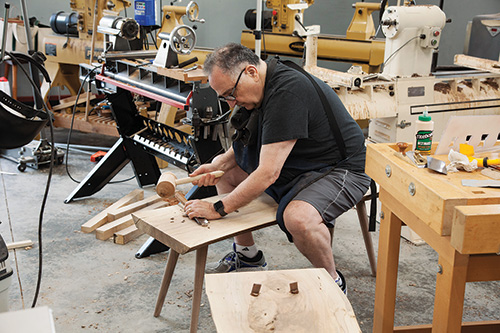
On Tuesday, we worked on the benches. We decided on a turned leg reminiscent of the designs of George Nakashima, who brought live-edge furniture to its zenith in the 1950s. We wanted a simple taper with a 1″ wedged through tenon in the slab, with the legs splayed at a 15° angle outward to where imaginary corners of the bench would be.
We tested the idea with a 1:50 scale model that we glued together with butt joints and super glue. This allowed us to ascertain the looks and the tip-over resistance of the design before fabricating a simple jig to drill the leg mortises through the slabs.
Wednesday morning, we picked slabs for cutting the trestle leg parts. With careful layout, we were able to get all the pieces for the trestles, plus a live-edge stretcher between, from two slabs.
Each support consisted of two uprights and two trestle crossmembers. In our design, it doesn’t matter which part of the supports is the “top” or the “bottom”: they can be rearranged so that the stretcher is either at floor level or abuts the underside of the table. The stretcher attaches to the uprights with heavy-duty knockdown hardware, allowing the table to be transported in pieces and easily assembled or disassembled.
Thursday was spent sanding all the pieces, including the table top and bottom. We beveled the trestles before assembly with a sharp 45° beveling bit to create absolutely uniform chamfers for a pleasing look.
For one large check in the wood, we chose to glue in a filler piece. First, we taped a piece of paper over the crack and rubbed the area with a soft pencil. We then glued this tracing to a suitable piece of walnut and band sawed the filler piece with the table set to 2°. This put taper into the walls, allowing the piece to be tapped into the void with lots of glue for lubrication. Once the glue was dry, we hand planed the patch level and it became nearly invisible.
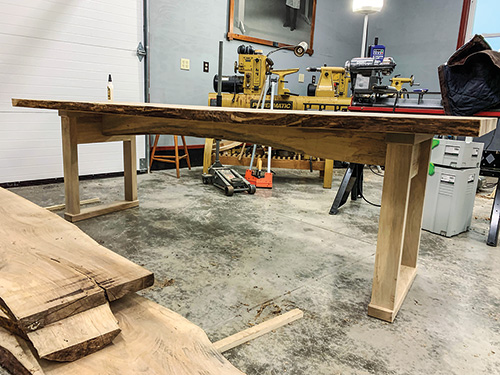
Holding Up to the Sit Test
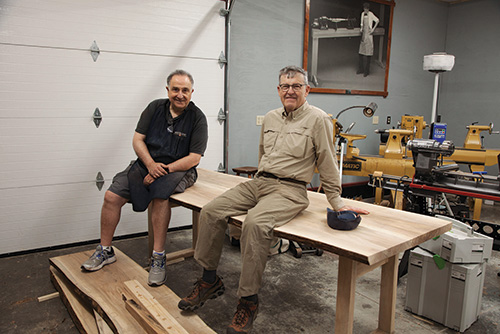
Friday was spent in all the details that are part of any project. We cut elongated holes in the trestle for attachment to the table and screwed metal inserts into the underside of the top so that it could be attached with machine screws and was free to expand or contract independent of the trestle. Once assembled as conceived, the table was rock-solid. Ken and I could both sit on it, and no gyration would budge it.
We disassembled the table and loaded it in my truck for the trip to Ken’s garage, where he spent the next 10 days applying an oil-based Waterlox finish that really brought out the color of the wood. The table now graces a Chicago apartment and will become a Zahka family heirloom. All in all, it was an action-packed week but very, very satisfying.

