
We test and review nine different blade honing guides.
Traditionally, honing dull tools means it’s time to get out the oilstones and employ elbow grease mixed with a good dose of skill to bring edges back up to arm-hairshearing sharpness. While careful freehand sharpening can produce excellent results, unpracticed techniques typically yield inconsistent results and tools that aren’t as sharp as they could be.
An attractive alternative to working freehand is using a honing guide, which can help you attain a wickedly sharp edge without hours and hours of practice. In this article, I’ll give you a driver’s seat view of nine different honing guides and systems that range in price from less than $20 to nearly $200. All of these guides are designed to sharpen typical thin, straightedged tools, like plane irons and chisel blades. Some also handle tools with tapered shanks, like dovetail chisels; short blades, like spokeshave irons; and/or thick-shanked tools. Depending on the style of the guide, honing is done using either a standard whetstone (oil or water), diamond plate, or a honing plate with an abrasive film.
Alisam Sharpening Sled #SS1 Review
Guide Type: Back-and-forth on-stone roller
Street Price: $70
Maximum Capacity: 2-5⁄8 ” wide
Honing Angle Settings (degrees): 15, 20, 25, 30, 35, 40, 45
Skewed Blade Honing Possible: Yes
Useable Stones and Honing Places: Bench stones or honing plates up to 3″ wide and 1″ thick.
Optional Acessories: Side plates that allow use of thicker bench stones.
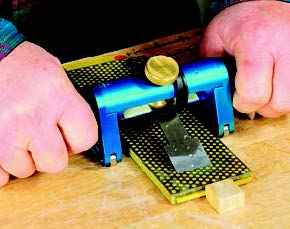
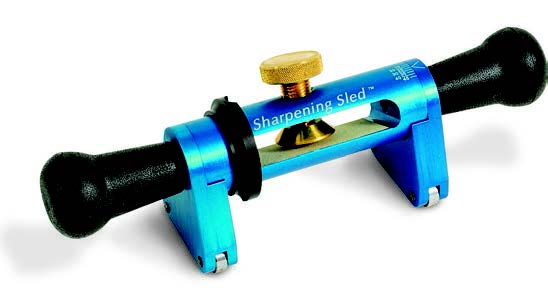
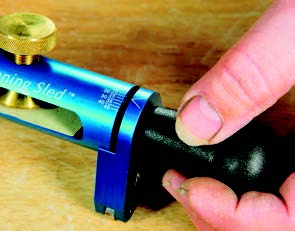
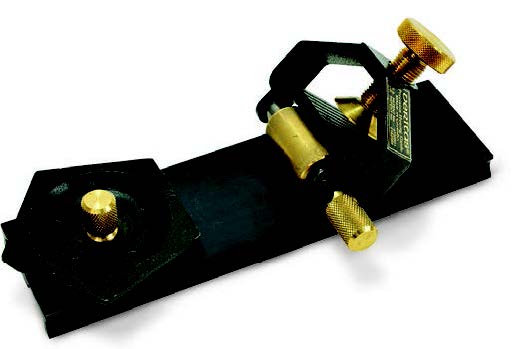
Anodized a brilliant blue, Alisam’s #SS1 is a wheeled sharpening guide that’s designed and used differently than other wheeled guides. This guide has a cylindrical body with a central slot through which the blade is inserted. A plastic flanged ring around the outside of the cylinder helps square the blade, while a large-diameter brass screw with a knurled knob locks it in place. The screw has a large foot to put more even pressure against the blade, and there’s a piece of abrasive paper on the bottom of the slot to keep the blade from slipping out of position. The #SS1’s body is straddled by two side supports, each with a pair of wheels on its lower edge. The supports attach to the body via threaded studs on a pair of large plastic knobs that serve as handles. To set the bevel angle, you loosen the handles and select one of 7 detent settings between 15 and 45 degrees. In use, the Alisam guide straddles the bench stone or rides atop a honing plate, working with a back-and-forth action. The sealed roller bearing wheels at the front of the guide are spring-loaded, allowing the blade to be pressed down onto the stone with just the right amount of pressure during honing.
PROS: Large clamping screw and abrasive pad hold tools very securely. Guide’s handles give the user a good grip, so you can apply ample pressure while maintaining excellent control.
CONS: Can’t use the #SS1 with wide bench stones and, unless the stone/plate is narrow, you can’t use the full surface of the stone (Alisam also makes the wider #SS3). If subsequent stones vary in thickness, you need to readjust the projection of the blade each time. Only a limited number of honing angle settings are possible.
General 809 Guide Review
Guide Type: Back-and-forth off-stone roller
Street Price: $21
Maximum Capacity: 2-9⁄16″ wide
Honing Angle Settings (degrees): None
Skewed Blade Honing Possible: No
Useable Stones and Honing Places: Works with just about any bench stone or honing plate.
Optional Acessories: None
This inexpensive guide is made mostly from cast plastic. There’s a pressed sheet metal clamping head which secures the blade to be sharpened with a large plastic knob. Another knob at the guide’s midsection sets the angle of the jig and hence, the angle of the blade relative to the sharpening medium. Two plastic rollers at the back end of the 809 guide are made to roll on either a sharpening plate (glass, granite, etc.) and keep the blade at a constant angle during sharpening or honing.
PROS: Inexpensive to buy and works with virtually any stone or sharpening plate.
CONS: Guide doesn’t offer much stability when sharpening narrower blades. Roller doesn’t roll all that well and mine squeaked.
Kell #2 Honing Guide Review
Guide Type: Back-and-forth on-stone roller
Street Price: $85
Maximum Capacity: 2-5⁄8″ wide*
Honing Angle Settings (degrees): None
Skewed Blade Honing Possible: No
Useable Stones and Honing Places: Works with just about any bench stone or honing plate.
Optional Acessories: Kell also offers a brass bevel checking gauge.
* A 1″-capacity version is also available.
Precisely built in England from solid brass and stainless steel, the Kell jig is simple to set up and use. It clamps a plane or chisel blade between two wheels made of Ertalyte TX (a low-friction, wear-resistant plastic) that roll along the top of a stone or plate during honing. A pair of clear plastic washers on the clamping faces cushion the tool and prevent it from slipping out of position. The amount that the blade projects from the jig determines the honing angle. Kell’s #2 guide accepts blades up to 2-5⁄8″ wide (their smaller #1 guide handles blades up to 1 in. wide).
PROS: Because of the jig’s low center of gravity, it’s especially good for honing short blades as well as thick tools, like mortise chisels.
CONS: When honing wide plane blades (2-1⁄2″ or so), the guide’s wheels end up so far apart that the guide only works on honing plates or very wide bench stones. Won’t work with tapered-shank tools, skew chisels or irons with angled edges.
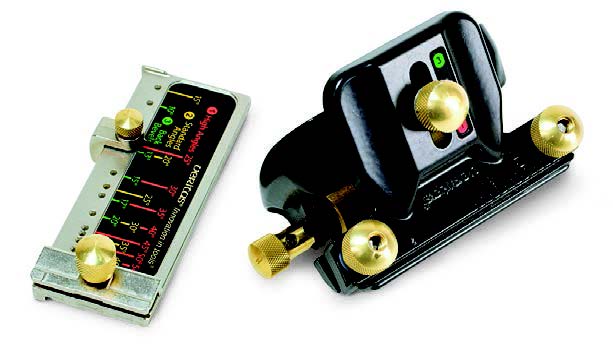
M-Power’s Precision Sharpening System Review
Guide Type: Side-to-side sliding guide
Street Price: $100
Maximum Capacity: 2-1⁄2″ wide
Honing Angle Settings (degrees): 25, 30
Skewed Blade Honing Possible: Yes
Useable Stones and Honing Places: Uses special DMT diamond hones.*
Optional Acessories: Extra coarse, fine and super-fine diamond hones.
* System includes preparation and finishing hones.
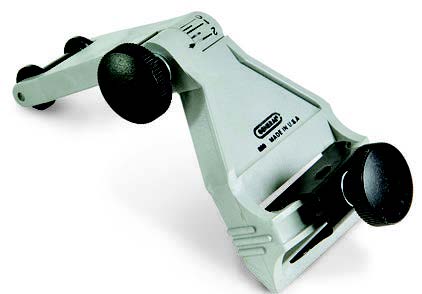
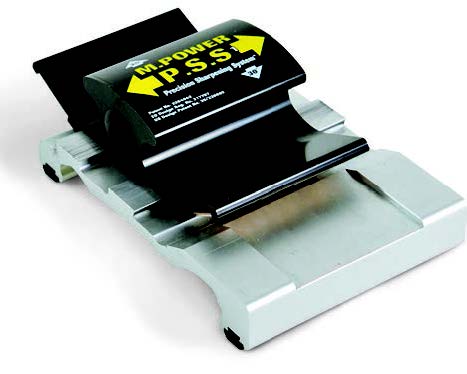
This unique honing guide has an aluminum base with dovetailed ways that engage a weighted sled that slides sideto- side during honing. The sled is two-sided: One side is used to create a 25-degree primary bevel, then it’s reversed on the ways to finish a blade with a 30-degree secondary bevel. A strong button magnet on each side holds an interchangeable diamond-grit insert. The Precision Sharpening System (PSS) comes with two DMT made inserts: coarse and fine. A channel machined in the base keeps the blade square to the sled. You hold the tool against the side of the channel while you slide the sled back and forth to hone the blade’s edge.
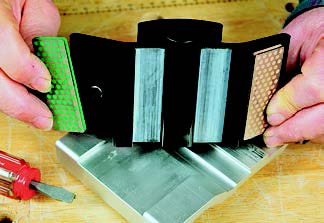
PROS: System comes complete with diamond hones; no need to buy separate stones or accessories. Diamond hones cut quickly, and the side-to-side honing action subjectively creates a cleaner cutting edge than with front-to-back guides (see the conclusion section).
CONS: It takes some time to get used to holding the tool while moving the guide’s sliding head back and forth. Only two honing angles are available (although they’re the two most commonly used angles). You can’t use the PSS on tools with tapered shanks or angled edges. Only a narrow band of each stone is used, so they wear more quickly. You’ll still need to buy a separate set of stones/plates for flattening tool backs.
Pinnacle Honing Guide Review

Guide Type: Back-and-forth sliding carriage w/ railed guide
Street Price: $115
Maximum Capacity: 3″ wide
Honing Angle Settings (degrees): 15, 17, 20, 22, 25, 27, 30, 32, 35, 37, 40, 42
Skewed Blade Honing Possible: Yes (with user-made angle block)
Useable Stones and Honing Places: Bench stones or honing plates up to 4″ wide, 12″ long*
Optional Accessories: 20″ guide rails, honing plates and abrasive films, bevel-angle checking gauge.
* Up to 18″ long when jig is fitted with optional 20″ rails.
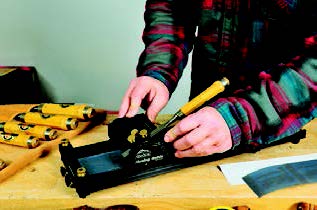
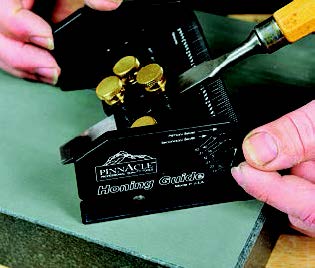
This complete system uses a pair of rails to guide the back-and-forth motion of a sliding sled that holds the blade at a fixed angle. A pair of knurled thumbscrews secure a blade into the sled, and a pair of adjustable fences help square it up. A small pair of thumbscrews on the sides of the sled set primary honing angles between 15 and 45 degrees in 5-degree increments or set secondary angles 2 degrees greater than each primary setting. Cross members between the Pinnacle’s rails secure a bench stone or honing plate at a fixed distance below the sled. Another pair of cross members limit the travel of the sled along the rails. The sled can also be used without the rails to sharpen atop a glass or granite plate fitted with abrasive films. The standard Pinnacle guide comes with 14″-long rails, enough to accommodate stones or honing plates up to 3″ wide and 11-1⁄2″ long; optional 20″-long rails let you use longer stones and honing plates.
PROS: Complete sharpening kit comes ready to go, with honing plate and abrasive films. Easy to add a secondary bevel to the tool without reclamping it.
CONS: Thumbscrews sometimes allowed tools to slip out of position, and they don’t properly secure chisels with rounded or un-flat tops (e.g., dovetail chisels). Only a narrow band of the stone/honing plate is used, unless the stone/plate is repositioned or the tool is shifted in the sled. Changing stones or honing films on plates is time-consuming. Rails prevent using the mounted stone/plate to flatten the back of the tool.
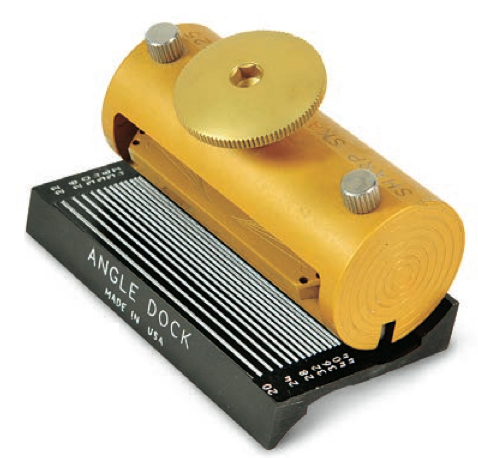
Sharp Skate III Honing Guide Review
Guide Type:Side-to-side on-stone roller
Street Price: $170
Maximum Capacity: 3″ wide
Honing Angle Settings (degrees): All whole angles between 20 and 45*
Skewed Blade Honing Possible: Yes; stops for 15, 20, 25 degrees
Useable Stones and Honing Places: Larger bench stones and honing plates
Optional Accessories: None
* Using the included angle-setting jig.
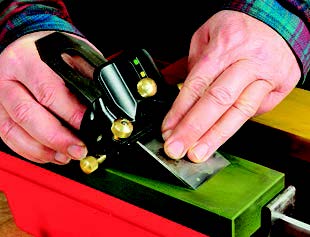
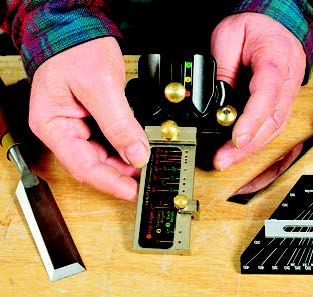
Instead of honing with a front-to-back action like other guides (save the M-Power PSS), the anodized aluminum Sharp Skate III uses hardened wheels that move the guide with a side-to-side honing motion. This guide has a unique blade clamp featuring a large knurled-edged hand screw and a concave V-shaped top jaw. A series of stepped serrations in the jaw help square the blade in the guide and keep it from shifting sideways during honing. The Sharp Skate III comes with a two-sided aluminum angle dock used for setting the honing angle. The dual-sided dock has a series of lines incised at all whole angles between 20 and 45 degrees. With the guide set into the angle dock, you extend or retract the blade until its edge lines up with the desired angle line. The Sharp Skate also handles skewed blades: The clamping plate rotates to any angle between 0 and 45 degrees in either direction, with fixed settings for 15, 20 and 25 degrees.
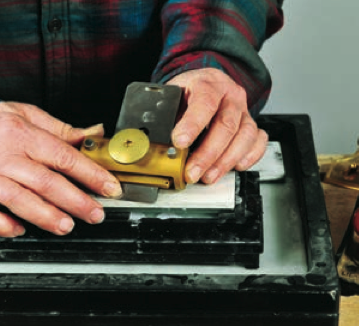

PROS: The blade clamp’s serrations do a very good job of squaring the tool and keeping it from slipping. The side-to-side honing action subjectively creates a sharper cutting edge than with front-to-back guides.
CONS: The most expensive guide in the group. Angle dock won’t work with thick chisels or low-angle plane irons. The concave-V-shaped jaw won’t hold some narrow and thin tools.
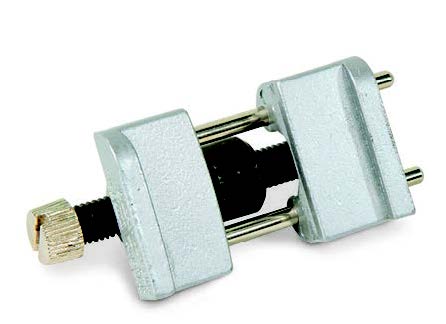
Side-Clamping Guide Review
Guide Type: Back-and-forth on-stone roller
Street Price: $14
Maximum Capacity: 3″ wide (top jaws); X wide (bottom jaws)
Honing Angle Settings (degrees): None
Skewed Blade Honing Possible: No
Useable Stones and Honing Places: Larger bench stones and honing plates.
Optional Accessories: Guide can be purchased with either coarse or fine glass-plate sharpening systems.
This guide, based on the older English “Eclipse,” is offered under various brand names.
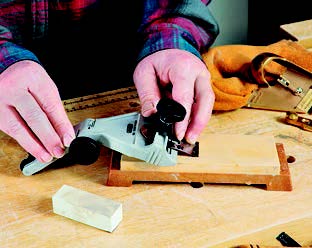
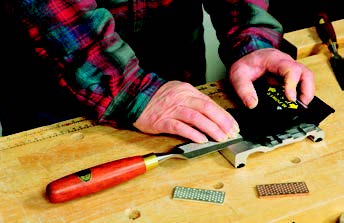
This style of guide is based on the venerable English “Eclipse” guide. It uses a single threaded screw to operate the clamping jaws that grip the edges of the cutting tool and keep it square to a single roller, which guides the tool back and forth over the honing media. The guide offers two different tool clamping positions: A pair of raised lips atop the guide hold plane blades or chisels up to 3″ wide; a lower V-groove holds thin tools from very narrow up to about 1-3⁄4″ wide.
PROS: The guide is very inexpensive and holds a wide variety of tools, including very short palm plane irons and spokeshave blades. Works even atop narrow and short stones and plates. The guide’s 7/16″-wide roller allows you to hone both straight cutting edges or, by tipping the guide a bit, slightly curved edges as well (like the violin planes shown in the photo).
CONS: Narrow wheel doesn’t offer much stability to keep narrow blades flat on the stone. Guide won’t hold some low-angle block plane irons; tapered edge tools like fishtail chisels; or thick tools, such as mortise chisels. Guide’s roller tends to foul with honing grit if not kept clean and well lubricated. The jaws often loosen unless the clamping screw is torqued down heavily.
Veritas MkII Honing System Review
Guide Type: Back-and-forth on-stone roller
Street Price: $65
Maximum Capacity: 2-7⁄8″ wide
Honing Angle Settings (degrees): 13, 15, 17, 20, 25, 30, 35, 40, 45, 50, 54 (using the included angle-setting jig)*
Skewed Blade Honing Possible: Yes, with optional accessory
Useable Stones and Honing Places: Larger bench stones and honing plates.
Optional Accessories: Skew registration jig, camber roller assembly, small blade holder.
* Multiple micro-bevel angles are obtainable by resetting the guide’s eccentric roller.
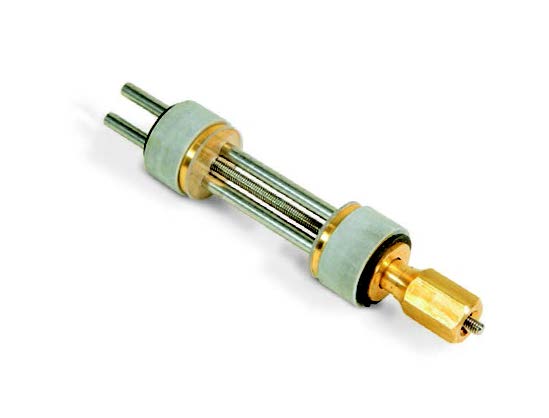
The larger and more sophisticated of the Veritas guides, the MkII is a roller-style guide with a clamping bar that accepts blades up to 2-7⁄8″ wide. Its most significant feature is a registration jig that temporarily mounts to the front of the blade carrier and accurately squares and aligns the blade or chisel to be sharpened and sets the blade’s exact honing angle. A combination of screw stops on the registration jig, as well as three different user-settable positions for the blade carrier assembly, allow a blade to be set at just about any standard honing angle between 15 and 54 degrees. You can also fine-tune the angle setting (typically, to create a secondary bevel) by adjusting the MkII’s eccentric roller.
To expand its usefulness, the MkII system has a few optional accessories: a special registration jig for accurately clamping skewed blades and chisels (see photo, lower right; it’s a camber roller assembly for creating rounded corners on large plane blades — so they don’t dig in when rough planing stock); and a small blade holder for sharpening short blades found in palm planes, spokeshaves, etc.
PROS: Very solid guide with good heft. A very complete sharpening system that handles a wide range of tools. Easy to add a secondary bevel to a tool without reclamping.
CONS: Setting up the guide takes a bit of time. Unless the two locking screws are carefully tightened to apply even pressure, the tool tends to slip out of square. Accidentally mis-setting the eccentric roller can inadvertently change the honing angle.
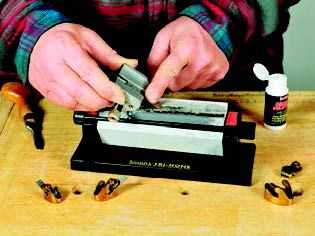
Veritas Precision Sharpening System Review
Guide Type: Back-and-forth on-stone roller
Street Price: $47
Maximum Capacity: 2-3⁄8″ wide
Honing Angle Settings (degrees): 15, 20, 25, 30, 35 (using the included angle-setting jig)*
Skewed Blade Honing Possible: Yes
Useable Stones and Honing Places: Larger bench stones and honing plates.
Optional Accessories: None
* Multiple micro-bevel angles are obtainable by resetting the guide’s eccentric roller.
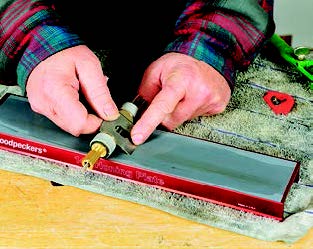
The less expensive of two guides offered by Canadabased Lee Valley Tools — the Veritas Precision Sharpening System — consists of two components: a honing guide and an angle-setting jig. To use the system, you first set the angle jig’s head to the desired bevel setting: 15, 20, 25, 30 or 35 degrees. Then you slide the honing guide onto the blade and tighten its heavy-duty brass screw to clamp a blade in place (taking care to keep it square to the guide’s roller). The guide rolls atop any sharpening stone or using a back-and-forth honing action. Once the primary bevel is done, turning a knurled brass knob resets the guide’s eccentric roller to a slightly elevated angle for honing a secondary bevel (aka “micro bevel” — a very useful sharpening technique).

PROS: The angle setting jig accurately sets blade angles with little fuss. The eccentric roller makes it easy to create a secondary bevel without reclamping the tool.
CONS: Narrow chisels or irons can come out of square, especially if the top surface of the tool isn’t entirely flat. Accidentally mis-setting the eccentric roller can inadvertently create the wrong honing angle.
Honing Guide Review – Wrap-up
If you’ve skipped ahead to this section to find out which honing guide is the best one, I may disappoint you. These nine guides are so very different from one another in both how they’re used and the range of tools that they’ll handle, that I don’t think any one could satisfy all possible uses and users. However, over the course of using the guides to sharpen just about every edge tool I own, I did develop some favorites and have a few recommendations.
As an overall favorite performer, I’d have to choose the Veritas MkII guide. Its clever registration jig and adjustable roller made it a slam-dunk to dial in exact honing angles with great precision and repeatability. This is important, because if you set a blade just 1/2 to 1 degree off in a guide, you’ll end up grinding more material off the bevel than necessary. With its optional accessories, the MkII will sharpen just about any edge tool in the free world.
Once I got used to its side-to-side honing action, I really liked the Sharp Skate III and the absolutely scary sharp edges it put on my chisels and plane irons (it didn’t form the kind of wire edge burr that back-to-front guides seem to create). Hence, I liked it best for honing the precise secondary bevel that forms the final cutting edges on a tool, and not so much for shaping and restoring its primary bevel.
I liked the Alisam guide best for restoring nicked or otherwise damaged edges. The #SS1’s rock-steady clamping and large handles allow you to apply ample honing pressure and remove material quickly. Using a coarse or extra-coarse diamond plate or stone, it’s easy to form a new primary bevel on a tool without the risk of overheating the edge (something all too possible when power grinding).
The Kell #2 jig is simple to set, and it works with a wide range of standard chisels and plane irons. Because of its low center of gravity and strong clamping action, I found it very easy to use with consistently favorable results.
If you’re on a tight budget, an inexpensive side-clamping guide is probably the best way to go. It handles most basic chisels and plane irons and is handy to have on hand, even if you later decide to purchase a more expensive guide.


