I’ve been messing around with wood for a really long time now. And, as those of you who are a bit long in the tooth like me will likely know, as time passes, styles, rules and design ideas change. For example, when I was in my twenties, end grain in most furniture design was to be hidden. Where that was impossible, like in frame-and-panel doors, it was minimized, to be sure. Now, exposed end grain on table legs is common and worked into tons of designs. And, I have to say, in many examples it looks great.
On a personal level, years ago, if you told me to paint a piece of hardwood I would look at you as if you had insulted my mother. Now, I see a place for painted wood in furniture making. (But not too much, please!) In the same vein, my personal taste did not combine metal legs or accents in my woodworking projects. I didn’t even care for metal hardware on my cabinets … so, OK — I was a bit extreme in my views. Now there are some really cool metal legs and other components that I fnd attractive. Who knew?
A couple of years ago I built a table using 3″-thick red oak lumber. I was unconvinced as I started the project, worried it would be crude and clunky, but at the end of the day, I liked the piece and have it in my house right now.
My point, perhaps over-made here, is that I have learned to try new things and see how they go. Which takes me back to slab lumber. It is all the rage right now, and I can see why. It breaks the dominion of the 3/4″ board (as Ian Kirby sometimes calls it), gives us new stuff to try out and can produce some beautiful pieces of furniture.
But it does offer some challenges as well. For example, if you want to keep the waney or live edges of the wood, you can’t really affect the shape of the piece that much. What you see is what you get. So the design elements you have control of are those that you will add to the organically shaped slab.
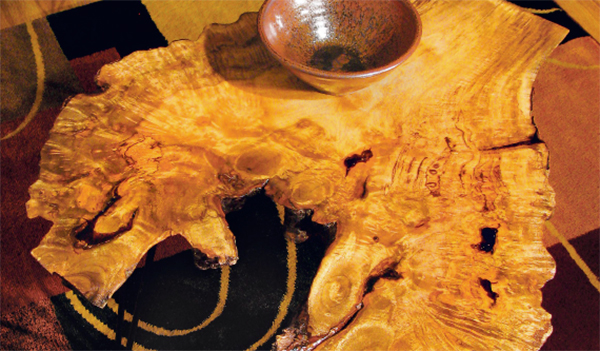
Here we selected a super-cool looking slab of myrtle to make an end table. The next questions were: How would we finish the slab? and What sort of legs would we use for the table? (More on that later.)
Preparing the Top
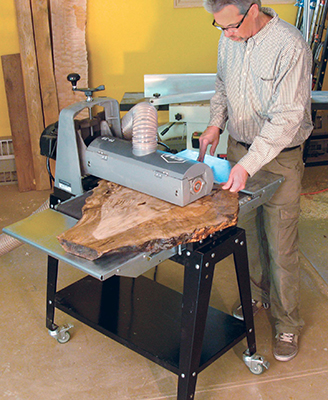
The piece of wood here has spectacular figure as a result of being sliced from a root section of the tree. Irregular shapes like this often bring with them large voids in the surface of the slab, bark inclusions and surface checks. To turn this rough chunk of wood into a practical tabletop, I started by sanding the top and bottom surfaces using a SuperMax 19-38 sander. While that sander is the clear deal when surfacing slabs, I could have done the same job by combining a 4 x 24 handheld belt sander and an 07 hand plane. (I like the SuperMax better — just saying.)
There is no mystery to getting the top ready to finish. The primary task is to sand the surface smooth, removing all the sanding lines from the grit previously used. I set the SuperMax up with 80-grit paper for the initial passes. Once the top was smooth on both faces, I needed to decide which one would be the “top” and, with that fgured out, to fill certain voids that remained.
Selecting the Legs
As mentioned earlier, there is only so much that you can choose to do with a natural edged piece of wood. Whatever shaping you will do to it will be minimal. You can decide to leave the surface rough, sand it really smooth or a compromise between those extremes … but not much more. Where your design choices come into play are with the rest of the project.
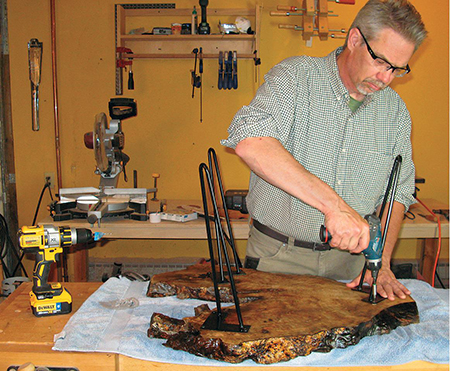
In this table, we looked at three different styles of legs that would give the table three unique looks. First off, we looked at hairpin legs. They come finished black but also could easily be painted if you wished for another color. Simple to install, they just attach to the slab with the provided screws.
If you look through furniture catalogs these days, the retro-industrial look is clearly in vogue. We gave this style a try using 1″ black pipe straight from my local hardware store. I cleaned the pipe using naphtha and a soft cloth, put the pieces together and used floor flanges at the top of the legs to affix them to the top. I did wipe them down with low-gloss polyurethane to make them easier to clean.
Finally, I turned a set of what we called Mid-Century Modern legs from soft maple (another style that is all the rage). I formed what I think is a pretty clever tenon attaching system to mount the legs. Initially, I was certain that I would prefer the wooden legs out of the three variations. But after looking at the legs “in real life” I surprised myself by preferring the hairpin legs. My second choice — the pipe version — also surprised me.
So, as the styles and rules of woodworking continue to change and grow, after giving this a go, I can heartily recommend working with slab lumber. It’s a nice change of pace from your run-of-the-mill 3/4″ woodworking. And, prepare to be surprised by the results.
Hard to Find Hardware
16″ Hairpin Legs (4 pk.) (1) #48624
Slab Lumber


