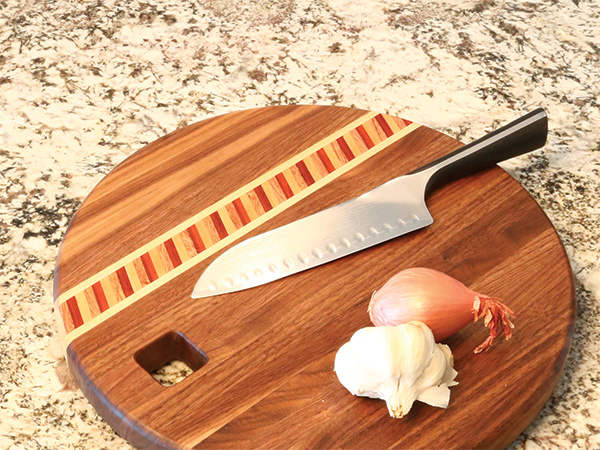
Chop, chop, chippity chop, cut off the bottom, cut off the top, what you got left throw into the pot! Chop, chop, chippity chop! My four kids like to say this fun little rhyme when they are chopping vegetables. And that happens a lot, because my family loves to cook. We spend a lot of time together in the kitchen. So when we needed a new cutting board to replace an old one recently, I wanted to make something diff erent from the usual square or rectangular cutting boards you see in stores. I am a woodworker after all, and surely I could try out a few fun ideas I had in mind.
However, in our home, making something practical is also very important. I try to live by the motto, “if it’s going to be in the kitchen, we better use it.” (Just don’t look at my drawer full of BBQ tools … Yes, I need all those turners and tongs!) But I think I’ve reached a happy medium here. This round cutting board with a multi-species laminated accent is both fun to make and practical as can be.
Let’s Get Rolling
I started by selecting a color scheme and decided to make most of the cutting board from walnut with a bold accent of maple, cherry, mahogany and padauk. These colors work great in our kitchen and really make the cutting board pop! But just about any close-grained hardwoods would be great choices for this board. There are no rules here; my picks were entirely subjective, and my wife really liked the colors. Which supports another motto worth remembering: “Happy wife, happy life!”
Ripping Along
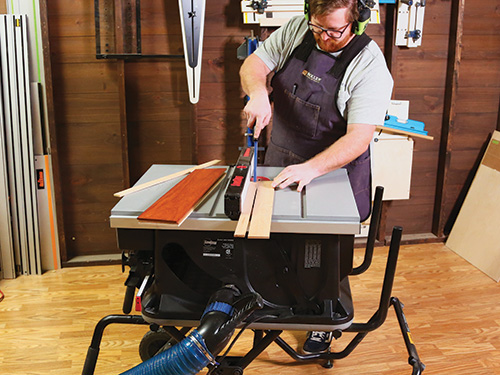
This project really gave my table saw a workout. I got started by crosscutting my pieces of walnut into roughly 16″ lengths and then ripped them to 1-1/8″ wide. My goal for this board was to end up just a bit proud of 1″ in thickness, so giving myself that extra 1/8″ for flattening and sanding turned out to be helpful.
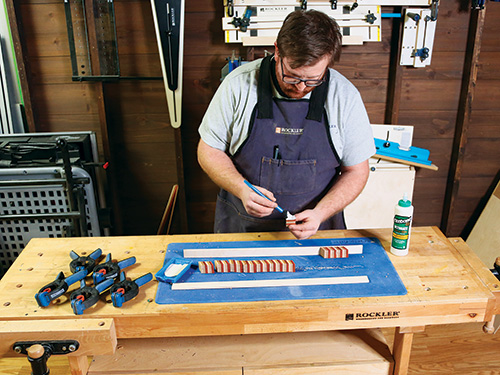
To glue up the accent strip, I put a thin coating of glue on the faces that would be touching. I grabbed a couple of 2x4s to use as clamping cauls to provide even pressure.
I reached for my bottle of Titebond III for this lamination. The “green” label is the right choice here, because it’s a waterproof formulation and is FDA-approved for indirect food contact.

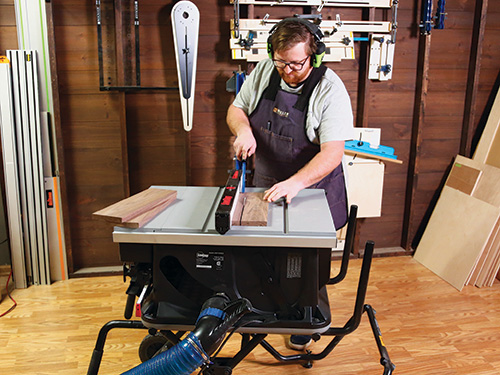
Once it had time to fully cure, I scraped away the extra glue squeeze-out and headed to the miter saw to cut it into some angled pieces. I swiveled my saw table to 22.5 degrees and, using a piece of tape and a marker, scribed a registration line on the saw’s fence 1-1/8″ away from the blade.
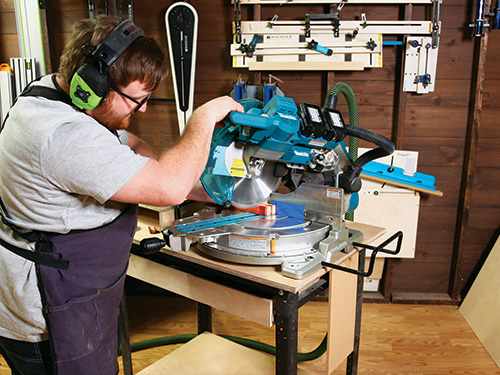
I cut 10 pieces to this length with the lamination laying on the saw table so its glue lines were facing up. Now back to that sandwich!
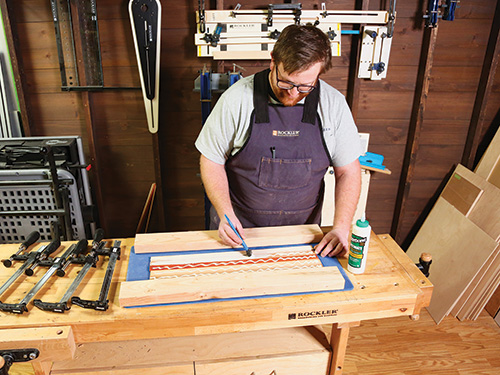
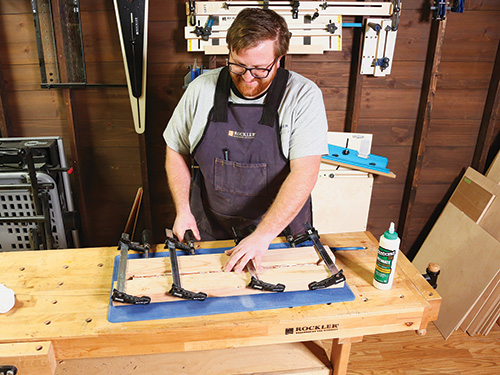
As you can see in the Drawings, I captured the angled pieces between the two maple strips. To glue the maple and the angled accent pieces together, I applied glue to one face of each maple strip and to the angled ends of the multicolored pieces, then sandwiched them all together. I was concerned that too much clamping force would cause this multi-piece glue-up to shift around before the glue had time to tack up. So, spring clamps to the rescue! I used enough clamps to apply adequate pressure but not to ruin their alignment.
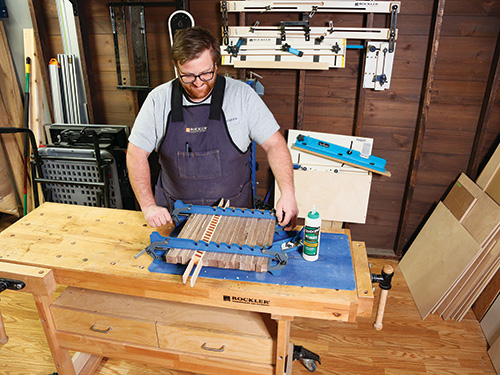
While the glue was drying, I started to prepare for gluing up the whole board. I did a dry-fit of all the pieces and was satisfied with the results — it was going to work fine. Then I got busy applying glue to the pieces. After I had assembled about two thirds of the walnut into a blank, I glued in the accent strip and then finished up with the remaining walnut on the opposite side of the accent.
I used a pair of Rockler’s Mini Deluxe Panel Clamps to provide the clamping pressure. They’re designed to both squeeze a panel together and also keep its laminations flush — perfect for this application!
Cutting and Shaping Comes Next
It’s always a good idea to give the glue on complicated laminations plenty of time to cure, so I let mine dry overnight. Removing the board from the clamps, I was pleased to find that it required minimal flattening. And that was good because I had more work to do.
I got started back at the table saw squaring up its ends. While this board would have worked well as a square, I want something different, so I settled on a circle!
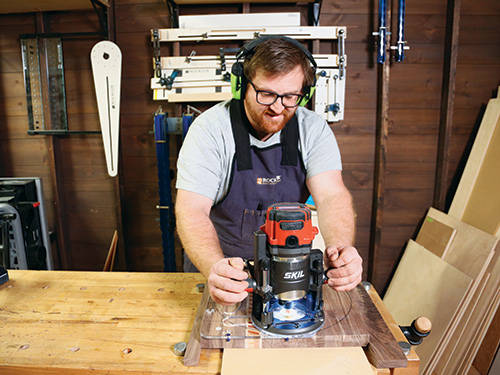
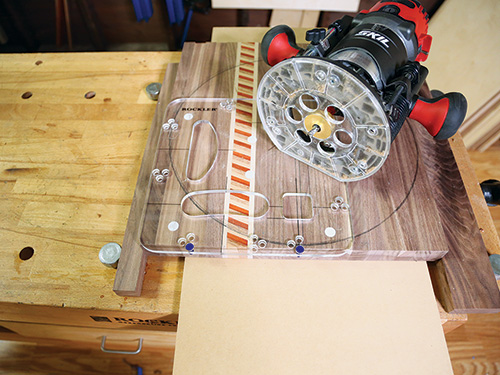
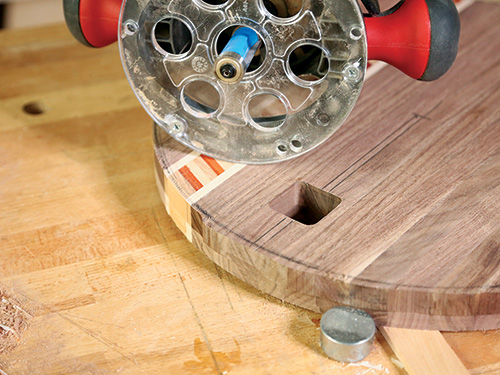
Before I got too excited and cut it round, I wanted to use a new 4-in-1 Cutting Board Handle Routing Template from Rockler. The template has four different handle shapes and takes the effort out of forming cutouts.

Simply register the template and remove the material with a router, making use of a guide bushing and 3/8″ spiral bit. I decided on the square cutout to pay homage to all the other square cutting boards in the world, and I think the square hole in a round object makes the choice a bit comical, too.
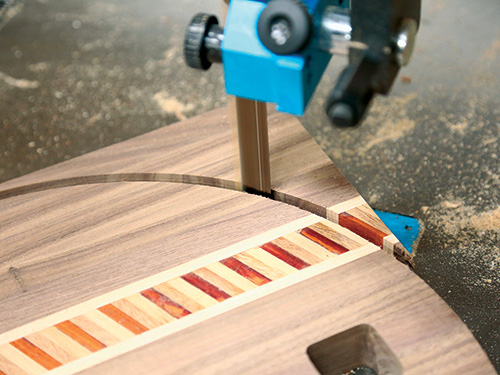
Then it was time to cut the board round. There are many ways to do this, but let me show you my preferred method. I started with my router attached to a circle-cutting jig and made a very shallow cut along the bottom of the board so I could see where the circle was going to be.
I set the jig for a 14″ diameter. I made a few more passes, routing to about 3/8″ deep. Then I took the board over to the band saw and completed the circular cut I had started. My last step was to skim off the remaining band saw waste with a flush-trim router bit.
Wrapping Up Some Final Details
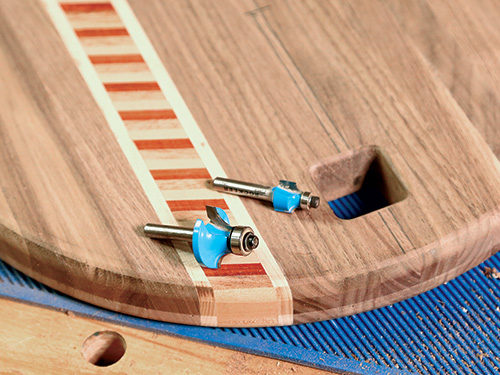
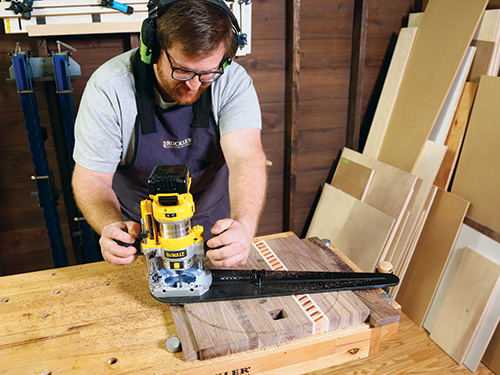
A round cutting board with sharp edges just seems incomplete to me. So, I eased the outer edges of the circle with a 3/8″-radius roundover bit in the router and switched to a 1/4″ roundover for softening the edges of the handle cutout. I think the combination of profiles adds a nice detail.
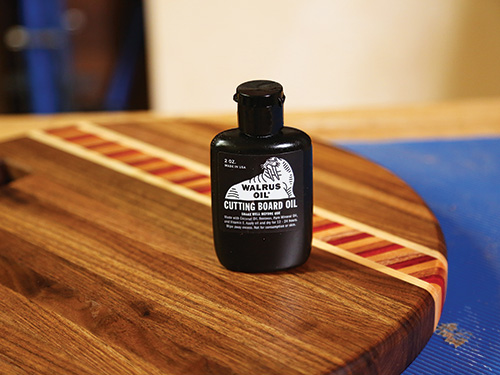
Even though my board was sufficiently flat, it still needed more final sanding So, I worked up through the grits to 320 to give all of its surfaces a silky smooth feel. A couple coats of food-safe Walrus Oil Cutting Board Oil made it even smoother, and the oil really highlights this project’s many wood colors.
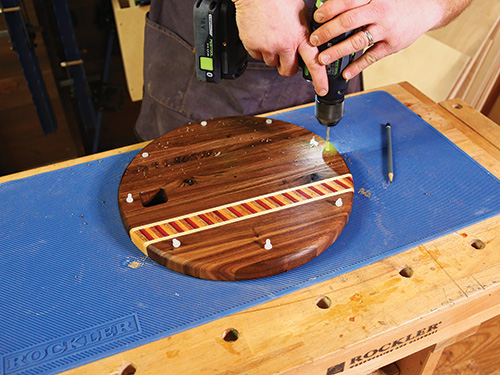
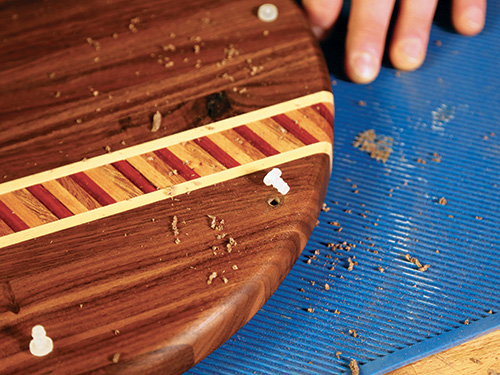
My favorite little feet are some 3/8″ soft bumpers that install in drilled holes in the bottom face. I mounted eight of them to prevent any tipping when I’m slicing tomatoes for my next BLT. And with that, my new cutting board was ready for use.
If you make one of these boards too, be sure to only wash it by hand and not in the dishwasher. When the board eventually looks dull and dry, clean it thoroughly and then apply a fresh coat of oil. Simple as that! I’m off to make a sandwich.


