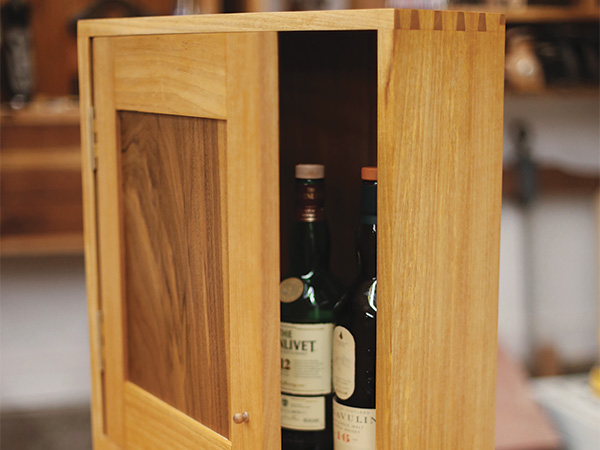
I find it very ironic that I, as a non-whiskey drinker, have such a fascination with whiskey cabinets. My husband loves highbrow whiskey, so I decided he needed a fancy way to display it. I had an ulterior motive in choosing this particular project for this article, because I have been trying to work out a more approachable way to build beautiful, one-off hanging cabinets regardless of their intended purpose — be it whiskey, heirloom tool display or toilet paper. Spoiler alert: this project didn’t get me anywhere near the “simplified, two-day build” design I was going for. All told, I have about 50 hours in this project. Granted, a lot of that time was spent head scratching and problem solving. So, in theory at least, the next few cabinets should go a tad quicker. Hopefully, this article and the accompanying project drawings will also help save you a whole lot of head scratching as well.
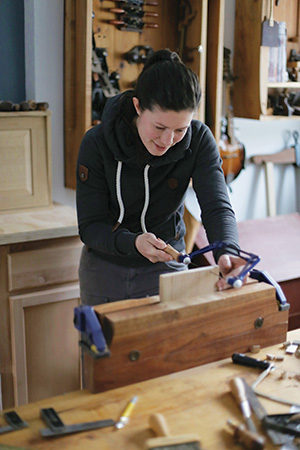
I consider myself a hand tool woodworker, but now that my workbench is out of my laundry room and I finally have a proper shop, I am learning to rely on my electric “apprentices” more and more. I’m glad I learned to do so many of these operations by hand first, because I have a much better understanding about the hows and whys of things — but I can also thank my lucky stars I don’t have to hand-thickness lumber anymore, because I’ve done it many, many times. Knowing the time and tedium I’m saving with each pass through my thickness planer brings a big grin to my face these days. Using machines in conjunction with hand tools, at least for me, makes every project infinitely more enjoyable. Because this is a hand tool-heavy project after the machines are off, I figured it was also a great opportunity to put Rockler’s new line of Bench Dog® Tools hand planes to the test.
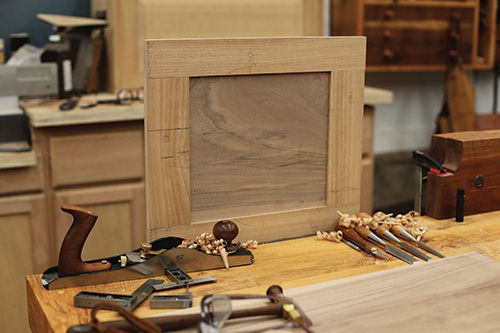
Choosing, Preparing Stock

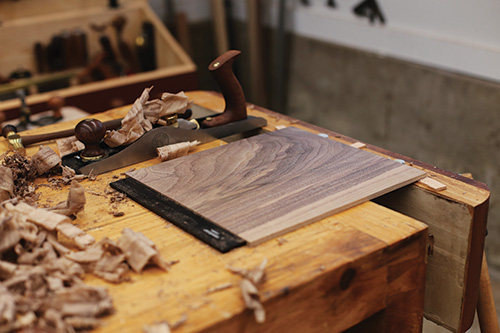
Part of the reason this cabinet took me so long to build was because I care DEEPLY about details. Grain selection is very important to me. I’m known to create a lot of firewood cutting the section I like right out of the middle of the board, which may be viewed as wasteful. But I think about the cost of a few extra sticks of wood (which seems expensive when I’m at the checkout counter of the hardwood store) in correlation with the number of hours I plan to invest in the project and the number of years I plan to have it hanging in my home, my children’s home and their children’s, too. A few extra dollars to get the perfect piece for every single part of the project suddenly becomes a lot easier to swallow.
This project was no exception. I designed the exterior of the cabinet to use one long piece of lumber for the three “show” sides of the case. I cut them so the wood grain from the original piece would run continuously around the exterior of the cabinet.
The alder I used for the main cabinet “bones” was S4S, but I never trust that S4S is square or flat, so I took this 3/4″ stock down to roughly 5/8″ when surfacing it at the jointer and planer. I left everything as thick as possible and sized it all to match. I always leave a little extra length on things, and I never prep an entire project based on a cut list before beginning work, because when cutting joinery by hand, some on-the-fly design adjustments may need to be made.
Sharpening Tools
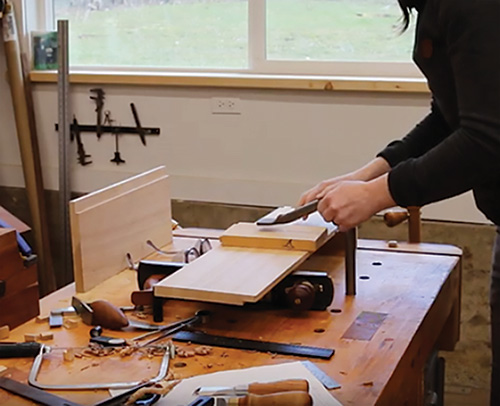
Once my stock is prepped, no matter how excited I am to make that first cut, I sharpen all the hand tools I’ll use on the project. A sharp tool is a safe tool, and I tend to make way fewer mistakes when my tools work the way they should. Speaking of sharpening, it was at this point in the project that I also unboxed a few of the Bench Dog planes to get them ready. The fit and finish was about what I expected for the price point. I was, however, quite pleasantly surprised about a few details: the quality of the steel in the plane irons, the fact that the soles and the mating bits were machined very flat, and that their machined edges had been eased prior to shipping, making for much more ergonomic tools right out of the box.
Here’s the way I like to look at tool pricing: you can either pay a higher cost up front to get a better fit and finish from the start (you are paying someone else for their time to degrease, polish, refine, set up and focus on all the little details that need to be attended to after the tool is manufactured). Or, you are saving money buying less expensive tools and spending your own time attending to those details. If you have time and the understanding of what it takes to set up and make tools work the way they should, you can “afford” to buy more budget-friendly new tools and antique tools and, after a little elbow grease, you end up with quality, well-functioning tools that do the jobs they were made to do.
Regarding the Bench Dog plane I used here, I invested about 35 minutes from the time I opened the box until I was taking good shavings.
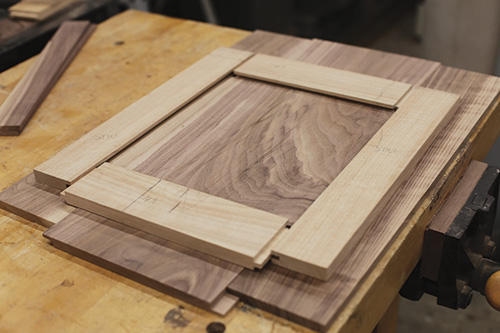
Building the Door
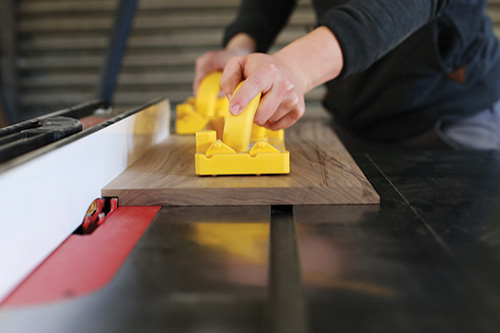
Frame-and-panel doors are traditionally created with a groove in the center for the panel, and the rails and stiles are joined with haunched mortises and tenons. Due to the small size of this cabinet door and the fact that it bears virtually no weight, I was able to save a significant amount of time and degrees of complication by using simple tongue-and-groove assembly for the entire door. I cut grooves in the rails and stiles, then short tenons to fit them using a dado stack and a crosscut sled on the table saw. I sized the walnut door panel to a hair under the depth of the groove so it can float freely within the door frame. I left the rails and stiles overly wide so I could sneak up on a perfect fit inside the cabinet opening after the case had been assembled.
Moving On to the Case
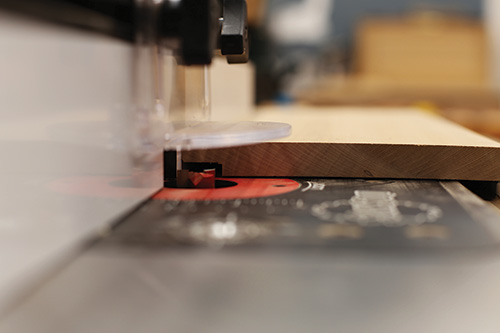
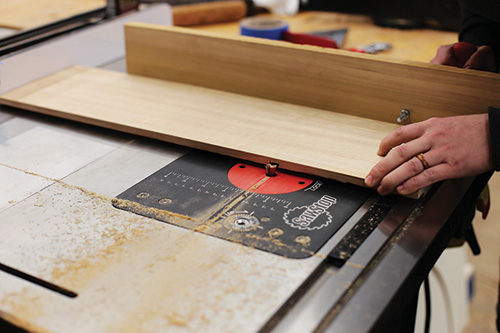
The case pieces need a rabbet along their inside back edges to fit the back slats and a sliding dovetail (or a dado … dealer’s choice) for the shelf. I did both of these operations at the router table. Do yourself a favor and take the time to make a “practice” corner piece of the case to get all the kinks worked out on your machines and get some practice cutting the joints; then you’ll have a reference for which joint goes where and how as you build the actual case. The ends of each piece of stock on the practice piece are also great for practicing a few saw cuts before plunging down the dovetail “tunnel” for the corner joints.
I always second-guess myself when using the router, because it’s one tool that can ruin both your project and your hands in a real hurry. For one-off cuts, I generally gravitate towards a hand tool-cut joint — that’s faster for me than the tool setup required for joinery operations on the router. But if multiple cuts need to be made, the router table is a great choice. If you don’t have a router table, you can cut the rabbets with a dado stack and, instead of using a sliding dovetail to attach the shelf, a stopped dado will suffice just fine. Regardless of the tool you use, having extra stock on hand that is the exact same dimension as your workpieces will be helpful in both tool setup and in peace of mind by providing the opportunity to practice a few times first.
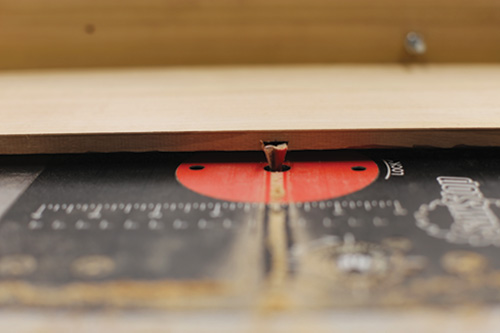
I cut all the rabbets in the case parts at the same time for efficiency. Then I fit one side of the shelf into the sliding dovetail “mortise” in the side case pieces, but I left the other shelf end long to get an exact length once the cabinet was assembled. I left the router table set up until the case was together, then measured, cut and routed the other end of the shelf accordingly.

Cut these joints precisely, but be ready to make a few refinements with hand tools if needed. For instance, I like to oversize my tenons ever so slightly on the table saw so I can use a shoulder plane to creep up on their final fit.
In Hindsight…
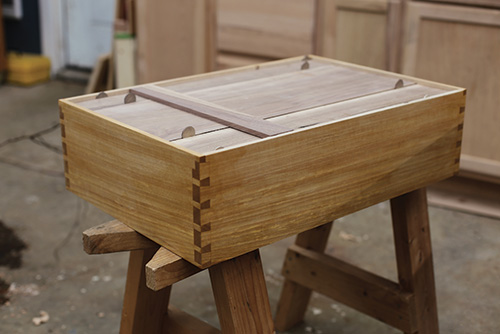
I realized about halfway through this project that I could have avoided several degrees of complication if I had used a dado around the back of the case instead of a rabbet to capture the back slats and to make room for the French cleat. I could have then modified the dovetail joinery with one straight pin at the back, which would hide the groove, instead of the crazy step-down dovetail mind-game I used on this project that you can see in the Drawings. That said, though, I actually think the aesthetic of that weird dovetail on the back really makes this project special. Live and learn, right?
Getting Ready for Dovetails!
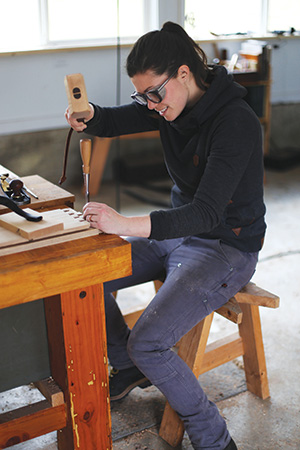
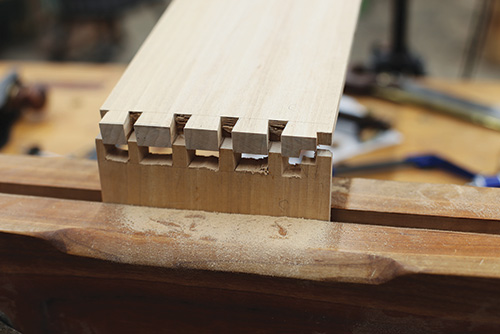
I could write an entire article on cutting dovetails, but that is for another time and place. Still, here’s my basic procedure. I like to cut tails-first dovetails, using the tail boards as a pattern for the pin boards. Because of the mechanics of the dovetail joint, your two long case pieces — the sides — need to be your tail boards, and your top and bottom case pieces will be the pin boards. I set my marking gauge a hair past the thickness of the case piece stock, then mark the faces and edges of each end with the board secured to the bench using bench hooks. I make a light pass first to establish my gauge line, then deepen it with a few more strokes. A heavy hand will cause the marking gauge to follow the grain of the wood, and you’ll end up with an inconsistent layout.
I then use two sets of dividers: one is set to my pin thickness and the other is set to the width of one tail plus one pin. They step out the dovetail layout so my dovetail spacing is consistent throughout the project. (If you like a more handmade, randomized look to your dovetails, mark them out by eye.)
Next, I use a dovetail marker and marking knife to carry those divider pin pricks across the board’s thickness and down the slope of the dovetails. This can also be done with a bevel gauge and square if you don’t have a dedicated dovetail marker. I prefer a dovetail with a 1:7 slope. I mark out the waste clearly with a pencil, then make my first cuts with a joinery saw. I always “split the line,” and that works great for me. I saw all the way down to the line, cutting all the left-facing sloped cuts across the board, followed by the right-facing slopes.
If you are new to dovetails, you can cut on the waste side of your line, but that will involve far more time with a chisel, which adds hours to the project and increases the probability of over-refining, chiseling the joint out of square and ending up with gappy dovetails.
On both the backsaw and coping saw, a little lubrication will go a long way to help keep binding and skipping at bay. I use mutton tallow, which smells like baking lamb when the saw heats up. Other folks like beeswax. Both options work great.
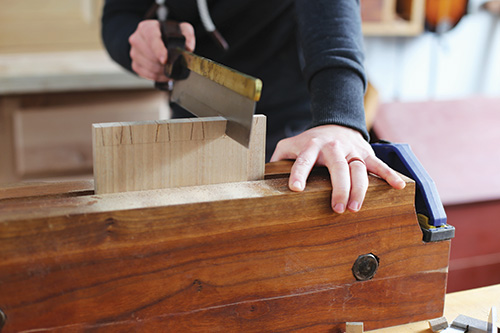
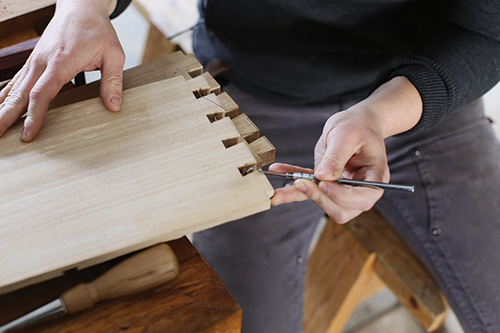
Once I’ve cut the majority of the waste out with a coping saw, I chisel the rest by hand. I cut out all my tails, then stack them in succession on my workbench, clamped directly over the leg of my bench to chop out the waste. A lot of folks like to use a sacrificial board between each board and also to protect the bench, but I like to pride myself on my chisel control. Saving that extra step in setup also saves me a lot of time. I chop my waste inward and at a slight angle from either shoulder, meeting in the middle of the joint. I like leaving a little extra wiggle room when it comes to final assembly, because if any little morsels are dislodged and caught in that little valley between the tails, they’ve got a place to go and won’t stay put and keep the joint from seating fully.
The short pin in the back is really tricky, but if you think of it in these terms — it’s a short little extra dovetail stepped down from the others — it makes a lot more sense. And, if you’ve cut your practice corner like I suggested, you already know how it works!
To mark the pins, I clamp the pin board in my vise so it’s level with a hand plane turned on its side. When the vise is tight, I slide the plane back lay the tail board over pin board and the plane, and secure it with a holdfast and a sacrificial block in the middle. I use the flashlight on my phone to look for a tiny, even light reveal between the tail and pin boards, indicating that the boards are aligned perfectly square to one another. Check your setup with a carpenter’s square at this point, because accurate execution of transferring the dovetail pattern squarely from one board to the other is absolutely crucial to the squareness of your cabinet.
Next, I use my marking knife to scribe the pattern of the tails onto the end of the pin board. I mark out my waste RIGHT THEN AND THERE to save a few headaches later on. I use a square and marking knife to continue the pin lines onto the front and the back faces of the pin board. Saw down to your gauge lines, remove the waste with the coping saw, and chisel the shoulders down to the gauge lines with a slight bevel inwards, creating a “waste valley” in the middle of the joint. I use a dovetail square (a regular small double square works fine if you don’t have one) to check the sides, shoulders and baseline of each and every tail and pin for square and to make sure there’s no waste crumbs that will keep the joint apart, come assembly time.

The whole half-pin half-tail thing to hide the rabbet for the back slats is a bit tricky to cut, but a steady saw hand and a little fancy chisel work made quick work of it for me.

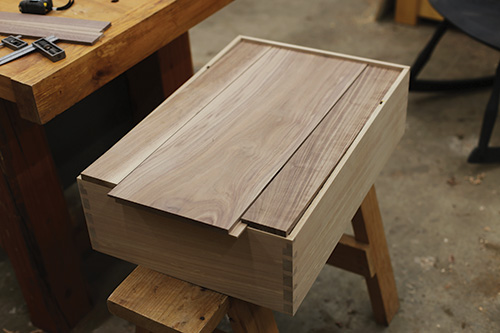
Because I planned to use shellac to finish the whiskey cabinet, I pre-finished all of the interior pieces at this point to avoid any glue spots that might otherwise show up later. The blonde amber shellac turned the spalted alder and figured walnut a beautiful rich tone. I did a single coat, being careful not to contaminate any glue surfaces with finish, then moved on to the glue-up.
Gluing Up the Case
I find it very helpful to label all my parts and their mating edges clearly, prior to glue-up. It is no fun realizing too
late that you’re trying to drive the wrong pins into the wrong tails or vice versa. Think before you act. Lay out your clamps before opening the glue, and work carefully and efficiently, keeping the open time of the glue in mind. A well-placed caul just below the protrusion point for the pins and tails will help apply even pressure to seat the dovetails around the exterior of the case. Sometimes a little persuasion is needed with a leather-padded-mallet, but if excessive force is required, your joints need further refinement.
Assembling, Fitting the Door
During this portion of the glue-up, remember that the door’s center panel must continue to float inside the frame to accommodate seasonal wood movement. Be careful not to accidentally glue it into its grooves. Also, be wary of too much clamping pressure, as you could cause your door to rack or warp.
With the door assembled, I could move on to hanging it in the case. To do that, I laid my cabinet flat and set the oversized door on top of it. I centered it perfectly over the cabinet, then traced the case’s opening onto the door’s back face from inside with a pencil. I then painstakingly removed the exact same amount of material from opposite sides of the door, shaving by shaving, until the door fit the opening. This way, if your case is racked at all, you can create a custom door to match it, and you won’t end up with visually uneven rails and styles. This definitely is a slow process, but that perfectly even door reveal is worth it.
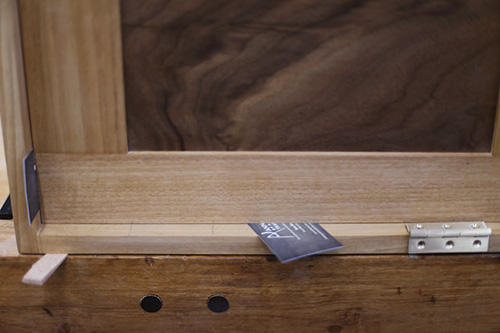
Adding the Back Slats
I like to space my back slats perfectly using coins or playing cards between them; that also allows for a bit of slip space for cross-grain expansion and contraction. For this cabinet, I pinned them into place with cut nails and captured them against the back rabbet of the case with the French cleat.
You can attach the cleat to the case with tenons, dowels or Dominos (if you remember them during glue-up) or with a long-grain glue joint and a couple of well-placed pin nails or brass screws if you forget. (By the way, I would NEVER forget…)
Once the glue dried, I got rid of any extra glue squeeze-out, sanded the shellacked surfaces with 400-grit sandpaper and applied another coat of shellac. Generally, three to four coats of shellac is plenty to make wood grain really pop, but I decided to wait until after the door was installed to apply the last coat.
Hanging the Door
With the door planed to final shape, I could finally hang it. I used business cards to wedge the door into place, then a marking knife, marking gauge and double square to mark the hinge placement.
Following tradition, I positioned the hinges just in from where the rails meet the panel. Then, I used a straight bit in my router, setting the bit’s depth of cut off of the thickness of the hinge leaf itself. The router removed the majority of the waste from the hinge mortise on both the door and the cabinet.
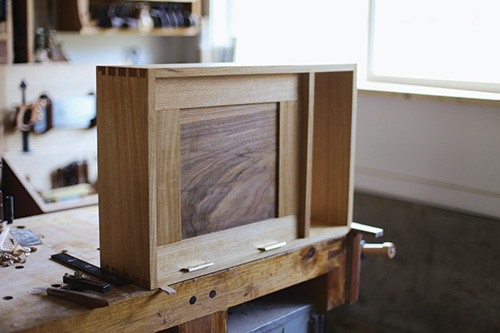
I chiseled out the rest. I predrilled my screw holes and installed the slotted brass screws, clocking each one. It’s little details like this that have the potential to set one’s work apart.
A Tiny Pull Wraps It Up
The last step in completing this cabinet was to turn a little door pull. Because the walnut door panel has a strip of sapwood adjacent to where I would install the pull, I carefully selected a piece of walnut that had sapwood running diagonally through it. I turned it on my lathe using carbide tools because it was just so dang small, then I mounted it in my drill chuck to sand and finish it. A tiny screw fastened it to the door.
This has been one of my favorite projects to date. I ended up getting so caught up in all the fun little details and woodworking nerdery that my “simplified” project still ended up taking an enormous amount of time to complete. I’m planning to build another one, but I won’t mind that challenge one bit.


