It was so long ago that I can’t recall which of us came up with the idea. I think it was my buddy and woodworking coworker at the time, Rolf Peterson. We were both employed at my father’s and uncle’s professional woodshop — Rolf between college classes, me between life stages, figuring out what to do next.
Rolf didn’t have children, but he did have a strong interest in boats. He and his dad were sailors. Rolf decided that we should make some boats, and I said “Why not.” I should preface this by saying that we were doing production work at the time — so it was not too surprising that after an evening’s work, we had about 50 wooden boats: a fleet that included both the precursor to this little tugboat, plus a flotilla of small sailboats.
When it came time to select a simple-tomake toy for our pages in this issue, that little boat drifted forth from the dark reaches of my memory. It is a sweet little craft, and as I have indicated already, you can make a pile of them in no time.
Making the Hull
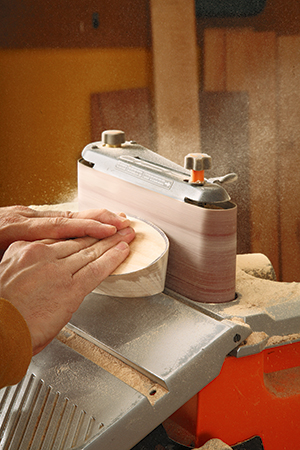
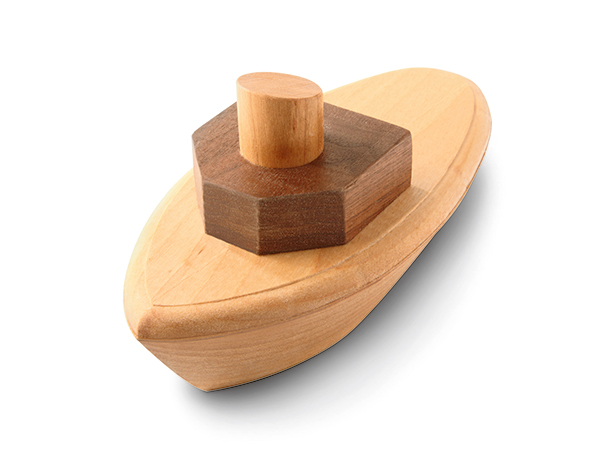
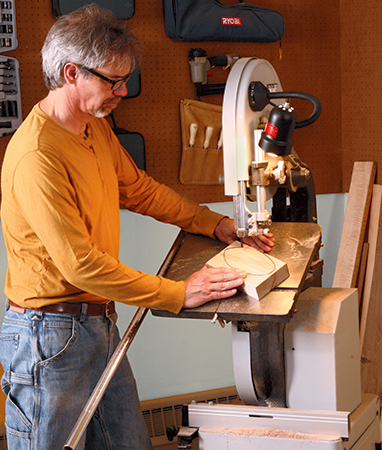
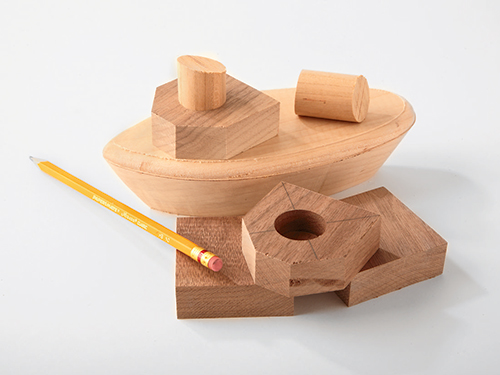
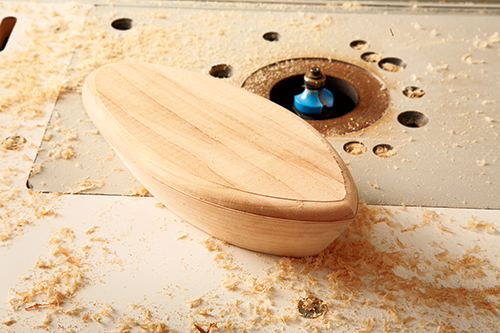
To look their best, the hull, cabin and smokestack (pieces 1, 2 and 3) should be made from different species of wood. We chose Douglas fir for the hulls that we made so many years ago, because we had it on hand. This time, I used birch lumber. Use the full-size pattern make templates for the hull and the cabin. Start making the hull by tracing its shape on a properly sized piece of 1-3⁄4″-thick stock. Step over to your band saw and set the table to a 30° angle. I recommend a 1/4″-wide or narrower band saw blade for this cut. Any wider and the shape at the stern (back of the boat for you landlubbers) would be harder to cut. With a slow, controlled pace, cut out the hull. If you are going to make a few of these toys, line them up and cut them out one after the other. Your next stop is at a power sander of some sort. I have a 4 x 24 oscillating belt sander that worked great for this task. A vertical disk sander would likely work just as well. Get busy and remove all the saw marks from the cut you just made. If your saw blade cuts similar to mine, the stern of your boat will need a little extra attention to clean things up.
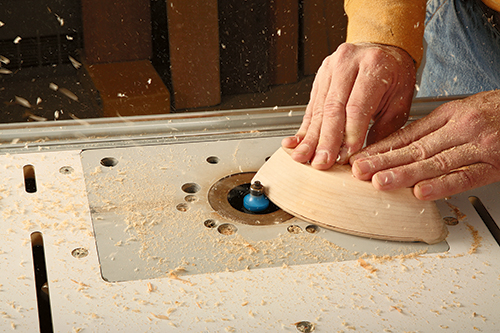
After the hull is sanded smooth, you need to shape the top edge of the boat. A 3/8″ bearing guided roundover bit chucked into a router table will do this job nicely. Set the bit high enough to cut into the “deck” of your boat. Be careful here, because the angled shape of the hull will exaggerate this cut. Work up to it in steps. The result of this operation is that you will clean up the edge and form a shape that looks a bit like a boat’s rub rail.
As just makes sense, when you complete each component of the boat, take a few minutes and sand it smooth, removing any machine marks or defects. I used a palm sander for this task.
Building Above Decks
Now you can move on to the cabin. I made mine from 3/4″ walnut, to visually separate it from the hull. It is quick and easy to make on the band saw, but you could use a table saw to form it if you so choose. (Again, if you are making a whole fleet, go ahead and chop them out by the dozen.) Sand the edges and then move over to the drill press. Bore a 1″-diameter hole 1/2″ deep with a Forstner bit in the location shown in the Drawing, although the exact location is not critical as long as it looks good.
Secure the cabin to the hull with a water-resistant glue like Titebond® II or III. You can glue and clamp the cabin in place if you’d like — or you can cheat like I did and use a 1″ brad nail as a “clamp,” driven down through the hole you just bored in the cabin.
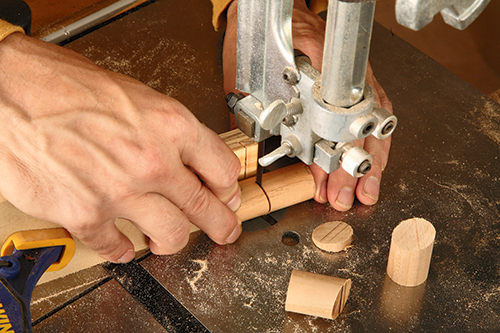
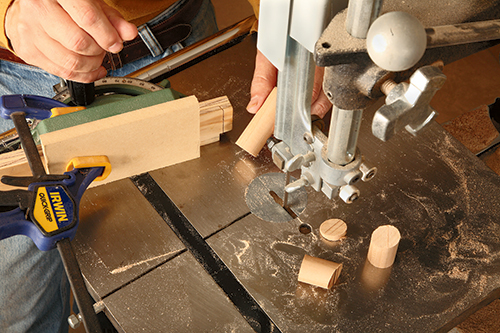
The last part to make is the smokestack. In this model, I used a 1″-diameter cherry dowel. I once again used my band saw. This time, I set my miter gauge to a 15° angle and used an auxiliary fence and stop combination to control the length of the cut. After the smokestack was cut to length, I sanded the top smooth, removing the saw marks. To secure the smokestack in the hole I had prepared for it, I simply squirted an appropriate amount of glue into the hole, then stuck the piece into the hole…I rotated it a bit back and forth, and then just left it to dry with the angle of the stack adjusted properly. Then, to prevent any possible future choking hazard, I drove a small brad into the stack.
After the glue cured, all that was left to do was to complete the last bit of sanding on the boat. Well, there is one more thing — the finish. I suppose there are several good types of product you could apply to this toy that would do the job well. There might even be an argument for not applying any finish at all. My personal preference for this sort of toy is to use mineral oil (sold as Butcher Block Oil). It is completely nontoxic, and you can reapply it any time you like. I just slather mineral oil all over the toy and let it soak in and dry for a day or so.


