This year, both of my daughters were off to college in two different cities, so moving furniture was much on my mind. I wanted them to have a nice desk to work at, but I certainly did not want to burden them (or myself) with having to lug a large unwieldy piece up and down stairs. I collect antique woodworking books and found the answer in G. A. Raeth’s book, Home Furniture Making. In it, he provided instructions and drawings for two different writing desks. Published in 1910 at the height of the Craftsman movement, one design features wedged through tenon construction, making it ideal as a “knockdown” piece that can be easily disassembled with no tools, and shipped flat (way ahead of IKEA). I knew that this design would have great appeal for young adults who want quality furniture but tend to move a lot, so I set to work updating the design.
In order to make the desk more stable and accommodate a typical laptop, I increased the depth to 16″. I added a second tenon to the bottom shelf to stiffen the desk, and included a cutout for more leg room under the desk, along with some other minor changes.
Not every woodworker has a shop equipped to easily handle sizing and flattening large glued-up panels, so I decided to order two sets of panels from online sources to see how much they would cost and to test the quality of panels bought this way. You certainly can lay up your own, but if large, flat solid-wood panels are hard for you to deal with, ordering your panels pre-made may be an option.
Large Solid-wood Panels
If you decide to glue up your own panels, make them just over the actual part sizes shown in the Material List. Not knowing exactly what I would receive in terms of quality, I ordered the pre-made panels well oversized. The panels for the middle and upper shelf were sized to include enough stock for the door frame, so I did not need to buy and size rough oak lumber. This also helps ensure that the door will match the color and grain of the desk. You will also need a half sheet of 1/2″-thick oak plywood for the door panels and the back of the desk.
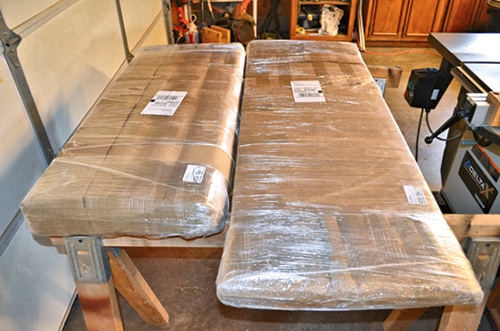
The panels were delivered from both vendors in multiple packages. They were very well wrapped and protected, and none of them suffered any damage in shipping. One vendor provided me with quartersawn white oak, and the other with plainsawn. I unpacked the panels and laid them flat with stickers in between for a couple of days to allow them to acclimate. Both sets were uniform in thickness and sanded to what looked like about 80-grit. There was some minor bowing in the plainsawn panels not seen in the quartersawn stock, but that is as expected, and none of the bowing was enough to worry about. I was very pleased with the quality of what I received. The quartersawn set was $409 with shipping and the plainsawn ended up at $337.
The Side Template
In order for the desk to come out square and straight, the two sides must be exactly the same, so taking the time to make a full-scale template pays off. I laid out the dimensions on a quarter sheet of 1/2″ plywood. I cut and sanded the profile and mortise locations. Make sure that everything is true: any flaws in the template will be repeated on the parts. Also be sure that the mortises are sized properly for the thickness of the panels you are using. You want the tenons to be a bit loose in the mortises. And do not forget to drill the hinge location hole as well.
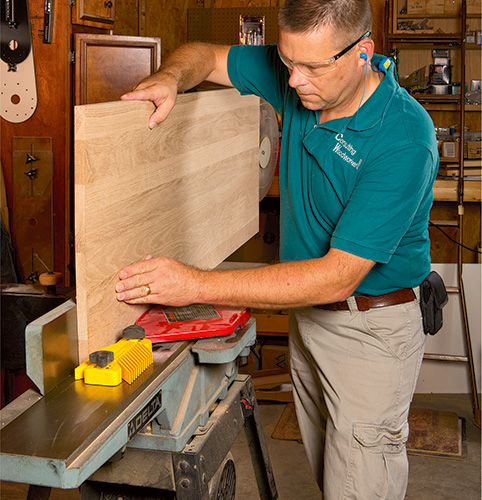
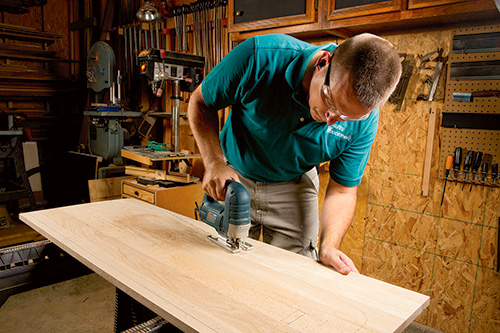
When the template is ready, clamp it in place and mark the outline of the sides on both larger (18″ x 50″) panels. Removing the template for now, use a jigsaw or band saw to cut out the side shape, being careful to leave about 1/16″ extra around the outside edges in case of some splintering here or there.

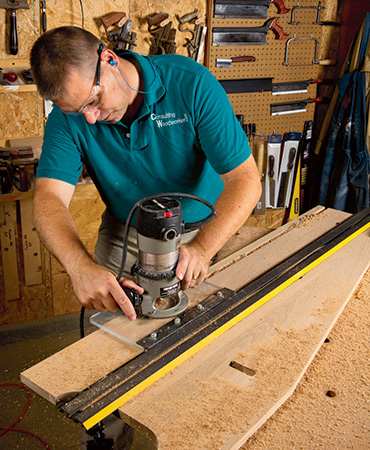
Once again, clamp the template to the side, making sure it is within the rough cut just made. Chuck a 1/2″-diameter flush-trim bit into a handheld router, then trim the side to the template, being careful that the template does not shift as you are working. Before removing the template, you can also rout out the mortises. Use a 1/16″ pilot bit to drill through the center of each mortise location on the template, then drill a 5/8″ hole with a Forstner bit, using the pilot hole as your guide. Drill halfway through with the Forstner, then flip the part and drill through from the other side. This prevents tearout as the bit cuts through the other side.
With the router turned off, set the flush-trim bit through the hole, ensuring that the bit is not touching the wood. Hold the router steady as you turn it on and remove the waste inside the mortise. Now the template can be removed and the mortises squared up with a chisel. If you try to chop through from one side, the grain can break away as you reach the bottom of the mortise. Work through from both faces toward the middle for the best results.
Next, mill a groove to accept the back. This is the point where the sides become left and right, so lay them out carefully. The important thing is that the sides are mirrored to each other. Use a straightedge and rout a 1/2″ groove from the top of the part to the mid-point of the bottom mortises. The groove should be 1/2″ in from the back and 3/8″ deep.
The last step is to drill the pivot hole for the hinge. Lay the template on each inside face and drill the 9mm pivot hole 1/2″ deep into each side part. Be careful not to drill all the way through the sides.
The Shelves
Take your panels to the jointer to straighten one edge, and rip them to final width at the table saw. The bottom shelf is ripped to 16″, the middle to 12-1/4″ and the top shelf to 9″ wide. Save the offcuts, especially from the middle and top shelves, and set them aside for now. (This will be the stock for the door’s frame.) Now crosscut the shelves to 14-1/2″ long.
The middle and top shelf get a single tenon on each end, exactly centered. (See the Drawings for details.) Each tenon gets a through mortise for the wedge. These will need to be chiseled out from both faces, just as you did with the mortises in the sides, so be sure to mark both shelf faces before you cut the tenon shoulders to shape.
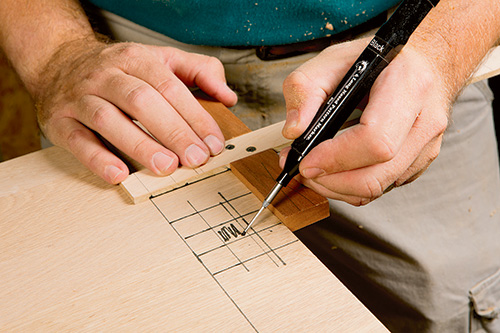
Since all the tenons are the same size, I made a story stick to speed the layout. Mark the shoulder line and three lines for the through mortise, as shown in the dimensioned Drawings. Cut the shoulders away, being careful to keep them square to the face of the shelf. Once the shoulders are removed, you can cut the outside corners of the tenon at 45 degrees using the layout lines.
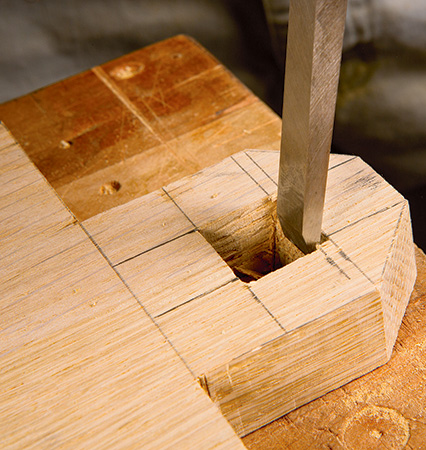
The mortises can now be chopped through. You want to cut the mortises 3/4″ across the grain, but only 5/8″ along the grain. The outside face of the mortise is cut at an angle to match the wedges, but for now just cut them 5/8″ wide. Again working from both faces to the center, drill a 1/2″ hole through the waste, and square up with a chisel.
To create the angle for the wedge, choose the best face to be the top of the shelf. With this face up, use a chisel to chop from the outer line of the mortise down to the existing opening at the bottom of the mortise.
The bottom shelf gets two tenons on each end. They are made the same as those on the other shelves, but they are NOT centered. The back panel of the desk sits on top of the lower shelf, so be sure to lay out the tenons so that the back shoulder of the shelf is 1″ longer than the front.
The top shelf gets a 9-degree bevel cut along the front edge for the door to rest against when it is closed. Be sure to orient this cut so that the bottom face of the shelf is wider than the top face.
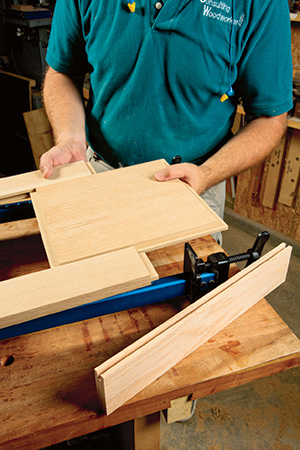
The bottom shelf gets a section cut out of the front edge for some extra leg clearance. Use a jigsaw to cut this out, and sand the edge smooth. This is a good time to dry-fit the desk and confirm that all the tenons line up properly and fit in their mortises.
The Back
Rip the 1/2″ oak ply to 30-3/4″, then crosscut one end square. Edge-band this end with a thin piece of solid oak, left over from ripping the panels, to hide the panel’s edge plys. After the glue dries, trim the banding flush if needed and crosscut the panel to 36-1/4″ long. The back slides into the grooves in the sides and rests on the bottom shelf. If the fit is snug and the back is square, it will keep the desk square during use.
The Door
The door is a standard frame-and-panel style. The only critical detail is that the back of the door becomes the work surface of the desk when opened. This means that the panels must be flush with the frame in back, and have no real gap between the panel edges and the frame.
Start by cutting two panels, 11-3/8″ x 11″, from the leftover 1/2″ plywood. Next, rip the leftovers from your shelf panels to 3″ wide, and crosscut them into two stiles, two rails and one center stile according to the Material List. Next, set up a stacked dado and cut a 1/4″-wide by 1/2″-deep groove into one edge of the stiles and rails, and both edges of the mid-stile.
If the ply panel were exactly 1/2″ thick, this groove would be centered on the stiles and rails. But you will have to adjust for the actual panel thickness. With the grooves cut, widen the dado stack and cut 1/2″-long tenons on both ends of the rails and mid-stile. Remember, your groove is probably off-center, so you have to cut the tenons in two setups to match any offset.
Once the frame parts fit properly, cut a 1/2″-wide rabbet all the way around your panels. The depth of the rabbet must be the same as the inside shoulder of the frame. This should leave a 1/4″-thick tenon on the panel edge that fits perfectly in the frame groove. Assemble the door and set it aside to dry.
Wedges
You can cut the eight wedges out of the scrap left over from the sides or the bottom shelf. They are 3″ long, 3/4″ thick and taper from 7/8″ at the top to 1/2″ at the bottom. They are small, so cutting them out on the band saw and sanding them smooth is the safest way to go.
Finishing
Since the desk is designed to assemble without fasteners, finishing is easy. All the parts were sanded to 120-grit prior to staining. I used Minwax® Toffee water-based stain to simulate a traditional fumed oak finish. There are large areas to cover, so apply the stain to small areas, wipe it off right away, and keep a wet edge working to maintain as even a tone as possible.
The water base will raise the grain, so sand again using 220 once the stain is dry, then apply your top coat. I sprayed on several coats of Minwax Polycrylic, sanding with 400-grit between coats. I also applied a generous coat of paste wax to all the parts. This greatly helps with assembly and disassembly when the desk needs to move.
Assembly
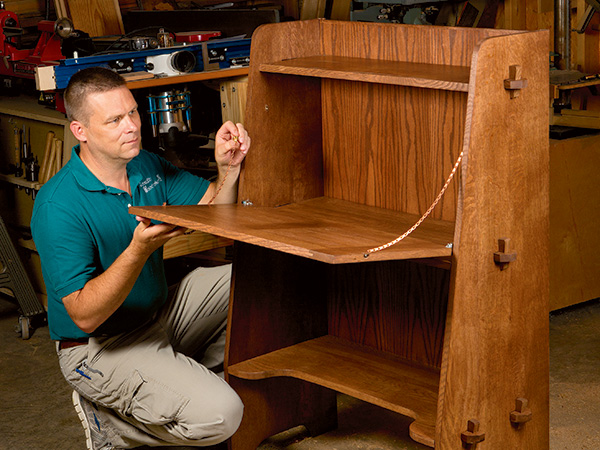
With the finishing done, the door needs hinges added and chains attached to hold it flat when being used. The hinges mount on each end of the door with the pivot pin 1/2″ up from the door bottom. They are surface-mounted with two supplied screws, and can be adjusted to square up the door when closed.
The easiest way to assemble the desk is to stand one side on its back edge and slip the bottom shelf through the side, securing it with two wedges. Then the middle and top shelves can be locked in as well. The second side is slid over the shelf tenons and the door pivots inserted into the sides just before the second side is seated. Insert the rest of the wedges and stand the desk up. Lastly, slip the back into place.
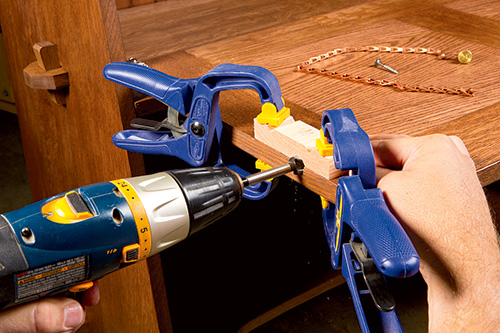
The final bit of assembly is to attach support chains for the door. Flat-link brass sash chain is a good choice here. Cut two lengths of chain at 18″ long. The chains attach to the door in a small mortise on each side. A 5/8″ Forstner bit cuts the mortise. (I used a roller stand to support the door and hold it parallel to the floor as I attached the chains.) Since the mortise is offset to one side, a block clamped to the door keeps the bit from “skating” as you drill about 1/2″ deep. Attach the chains with a panhead screw driven into each mortise. Center the screws.
Hard to Find Hardware
Pivot Hinges (2) #30007
Threaded Brass Inserts (2) #33183
Brass Thumbscrews (2) #70003


