River tables and live-edged furniture are immensely popular, but I’ve been thinking about other interesting ways to use a slab in a more non-traditional way. Slabs can offer spectacular grain patterns and more character than you’ll often find on typical dimension lumber, because they’re frequently sourced from trees that aren’t part of forests that are periodically logged.
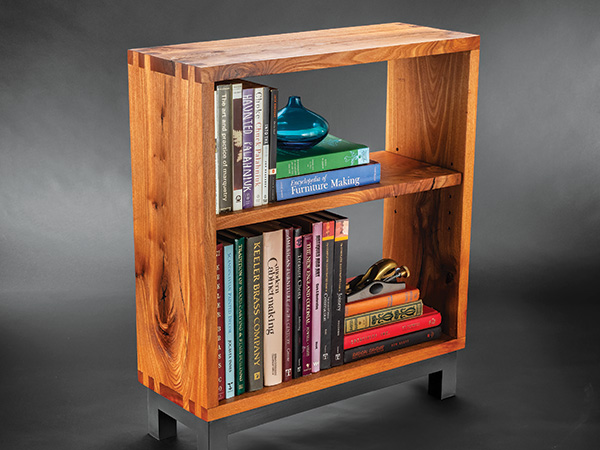
Since this sturdy bookcase has fairly simply styling, I thought resawing a unique slab might provide a chance to spice up the design with thicker components, showier grain and distressed figure. So I went to a local sawmill and selected a slab of red elm — it’s a species you won’t find at many lumberyards. I think its strong grain pattern, natural defects and warm color look great. The large box joints on the corners of the carcass complement the bookcase’s black, stocky base to give the project a contemporary look. Here’s a design that should work well with many home decors.
Selecting the Slab
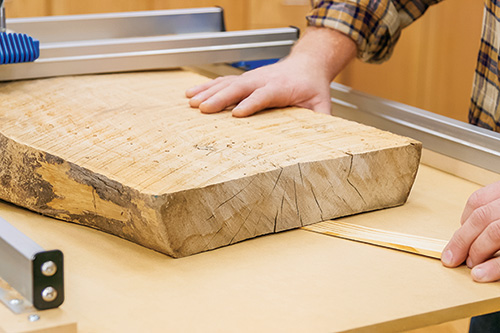
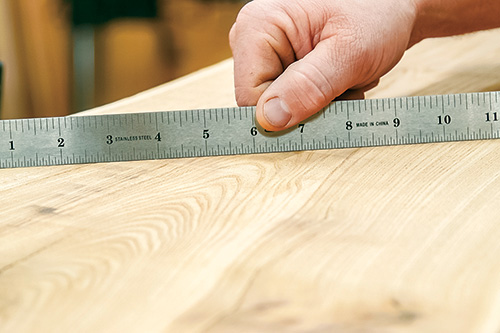
When I had my piece of red elm picked out, I made sure to take note of its moisture content. Material around 12 percent or less moisture content is ideal for furniture building, and mine was dry enough for immediate use. The slab I bought was 7 ft long and about 14″ wide. I checked for any embedded metal objects with a metal detector and then rough-cut the plank into three sections that were about 26″ long.
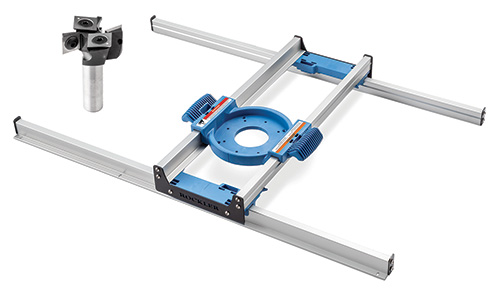
I sized my pieces, in part, to fit into Rockler’s soon-to-be-released Benchtop Slab Flattening Jig. It fits workpieces up to 18″ wide, 28″ long and 1-3/4″ thick. My slab was about 2-3/8″ thick and had a slight crown to it, but that was no problem for this slab-flattening system. One of the unique features of this aluminum-railed jig is that it can be shimmed up to any height to match the thickness of the slab for surfacing. I raised the jig by inserting strips of 3/4″ MDF under its rails on top of the jig’s MDF substrate.
Flattening Both Sides
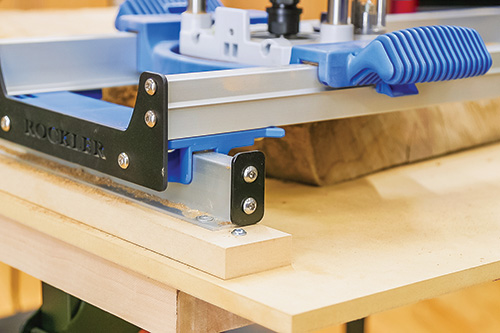
When preparing a slab for flattening, it’s important to stabilize and secure it to the jig’s MDF or plywood substrate so it can’t shift. I used a combination of shims and blocking, hot-glued to the substrate and the slab sections, to lock things down.
With a 1-1/2″-diameter carbide-insert spoil bit installed in my mid-size router, and the router mounted to the jig’s reinforced plastic router sled, I was able to easily remove the rough surface of the wood and eliminate the cupping/crowning. The process to flatten a slab in this jig is simple: Slide the router carriage back and forth on the jig’s aluminum rails, taking off about 1/8″ of material or less of thickness at a time.

After one side is flat, you could flip the slab over and repeat the flattening process to create a second smooth face. That might be really helpful if you don’t own a planer. But since I do, I ran the slab sections through my planer at this point with the flattened faces down to reduce their thickness to 2-3/16″. This way, I could resaw them to achieve the 1″ stock thickness I needed plus account for the material lost to the blade kerf and a bit of cleanup.
Once the faces of my slabs were flat, smooth and parallel to each other, it was time to work on their live edges. At the table saw, I used Rockler’s Straight-Line Rip Hold-Down Clamps attached to a plywood sled to rip one irregular edge off of each slab. I cut the opposite edges off using the rip fence, leaving each piece about 1/2″ wider than the Material List dimensions. I squared up their ends at the miter saw and kept them a tad overly long.
On to Resawing, Gap-filling
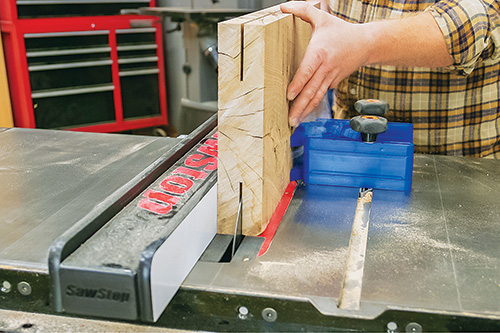
It’s sometimes easier with modestly powered band saws to first begin a resaw cut at the table saw, making a deep cut into both edges. That’s what I did here, which reduced what would be left for the band saw to finish up.
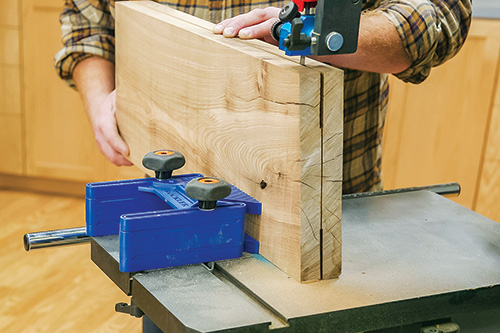
After making the table saw cuts along the slab’s centerlines, I took them over to the band saw and split them the rest of the way, turning three thicker pieces into six thinner ones.
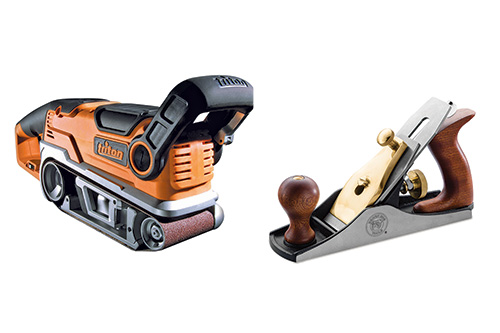
I cleaned up the six sawn faces with one more pass through my planer, which brought them all to 1″ thickness. But you could use the flattening jig instead, or even a belt sander or a bench plane. It’s up to you. The important thing is, make sure the stock thickness for the bookcase’s top, bottom and sides match.
One of the reasons I selected this slab was because of the unique cracks and voids in it. I filled those defects with a black tinted epoxy designed for this application.
After a few hours of curing, the epoxy was ready to sand flat, which I did with my random orbit sander. Then I trimmed the bookcase’s top, bottom and sides to final size.
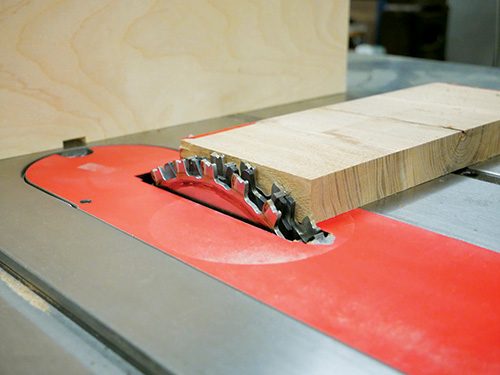
Cutting Box Joints
This bookcase features an irregular box joint pattern on the corners to add some visual interest as well as strength, since the project has no back panel. I cut my box joints using the old tried-and-true shop made “miter gauge” jig. It consists of a piece of 3/4″ plywood attached to my miter gauge’s fence with a 3/4″ x 1″ wooden key installed in a notch in its bottom edge. I chose a piece of plywood measuring roughly 12″ x 16″ for the jig fence — it was large enough to provide plenty of vertical and horizontal support for these large bookcase components, particularly when two of them need to be standing side by side on the jig for cutting the box joints. With a 3/4″-wide dado stack installed in the table saw, I set the height a hair above 1″, so the pins of the joints would extend just a bit past the workpiece faces when assembled. (I think it’s easier to level those flush than have the pins come up short and need to plane the whole faces of the parts instead.)
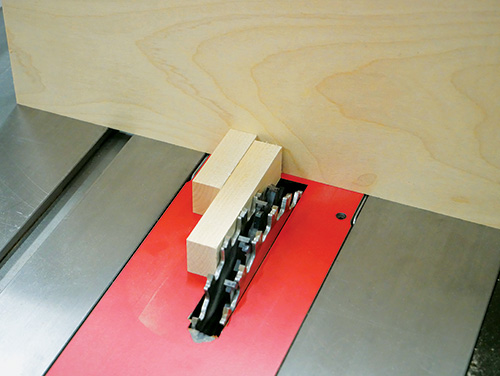
I cut a 3/4″ slot through the edge of the jig’s fence, about halfway along its length, for the wooden key. Then I made up a piece of 3/4″ x 1″ key stock about 4″ long. I cut it in half and installed one piece in the jig’s notch so it was flush to the back face of the fence and projected outward.
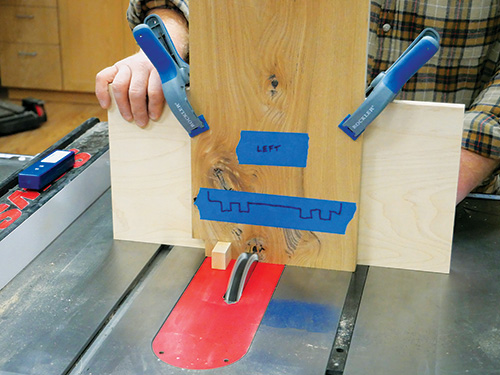
To prepare the box joint jig, set the second key against the first key on its left side (looking down from above) to act as a spacer, and place the jig fence against the miter gauge fence with the miter gauge in your saw’s left miter slot. Slide the fence assembly over so the spacer key touches the right side of the dado blade. Holding it carefully in this position, fasten the miter gauge to the box joint jig with several screws driven through both fences. Then remove the spacer key and cut a second notch through the jig fence. The distance between the jig’s key and the blade must match the width of the blade precisely, or the joints will be difficult to assemble. Accurate setup is really crucial here!
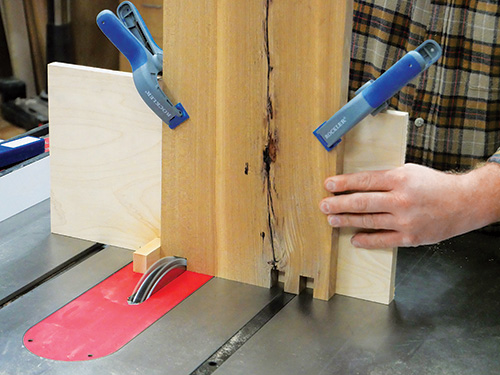
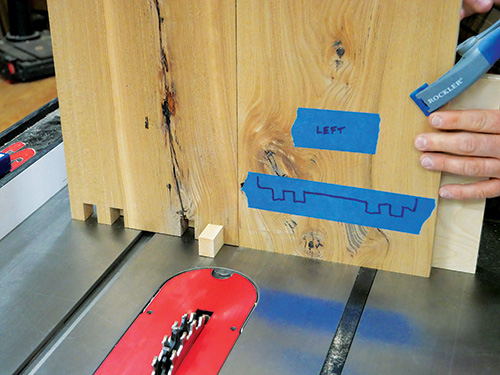
I used masking tape to lay out my box joint pattern on each of the bookcase’s top, bottom and side workpieces to help avoid confusion — no room for mistakes here on one-of-a-kind lumber! The tape layouts are merely visual guides, not exact templates for cutting.
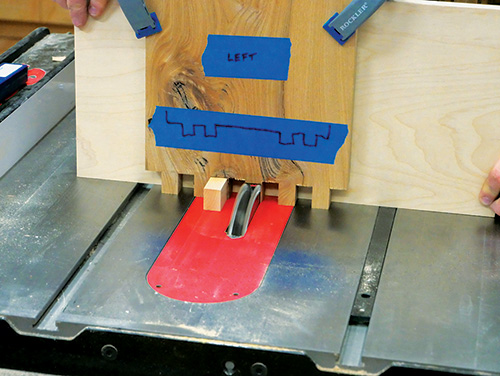
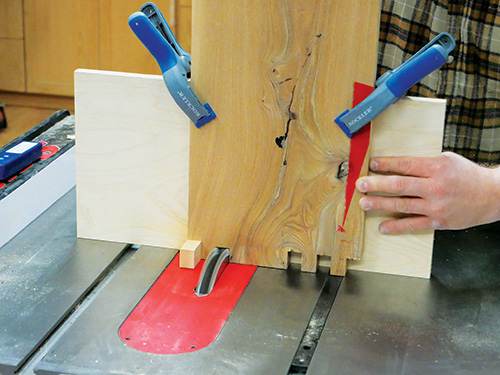
As you can see in the Box Joint Layout Drawing, the 3/4″-wide pins are spaced between 3/4″-wide slots, and there’s a 3″-wide “pin” in the middle of the pattern on the bookcase top and bottom panels. I cut the joints on the ends of the top and bottom panels first, indexing each slot cut by fitting it over the jig’s key. Notice that you cut two slots in from each edge of these parts to form two thin pins. What’s left in the middle is the wider pin. Once the top and bottom panels are cut, use them to index the first slot cuts on the edges of the bookcase sides. It’s typical box-joint cutting procedure. Finish cutting the wider center slots by removing the waste in several passes.
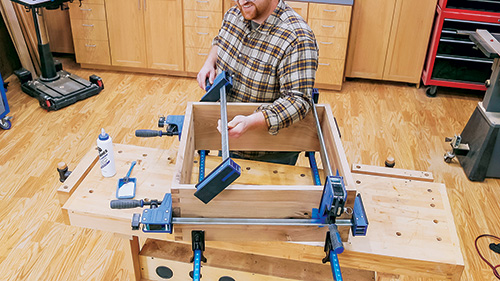
Assembly Time!
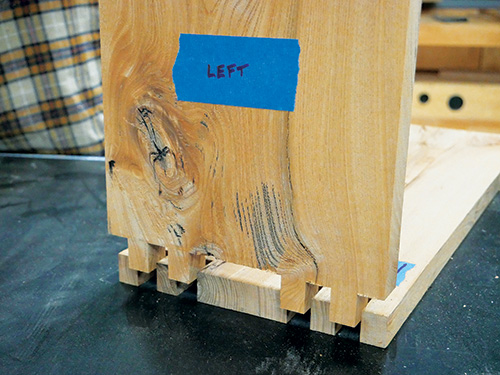
With the tricky step now behind you, dry-fit the corner joints to make sure they slip together — if you made the jig correctly and worked carefully, they will!
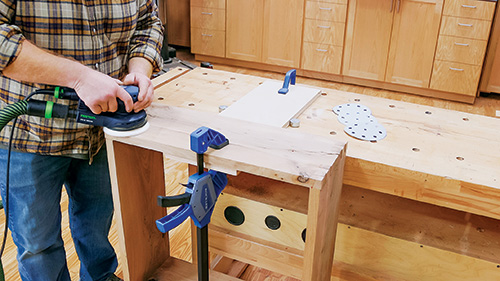
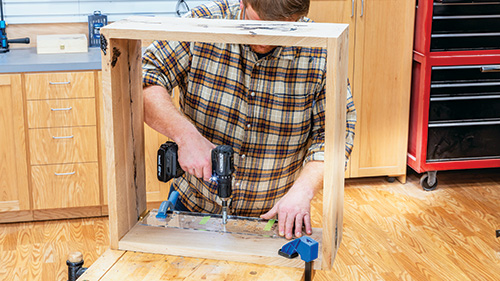
Then I disassembled the carcass, gave all four parts a finish-sanding up to 220-grit and brought them together one last time with glue and clamps. When the glue dried, I flattened the protruding pins with 60-grit abrasive in my random orbit sander, then finish-sanded those areas again.
I wanted the bookcase shelf to be adjustable, so it was time to pull out my Rockler shelf pin jig and drill/driver to bore the 1/4″ shelf pin holes. Make sure all the rows of holes you drill align with one another so the shelf will sit evenly.
The base’s legs and short and long stretchers are simply 1-1/2″ x 1-1/2″ stock joined with pocket screws and glue. Since I would be painting the base, I just milled down economical 8/4 poplar for these parts. Once you’ve got the components cut to size and shape, fasten pairs of legs to each short stretcher with glue and pocket screws, orienting the pocket holes so they’re inside the base where they won’t be seen.
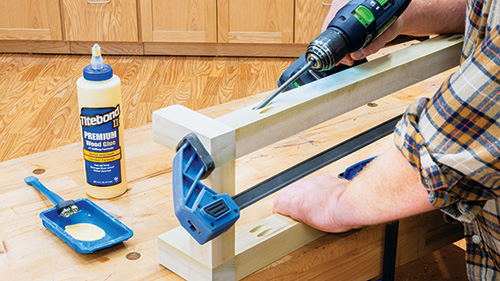
Then join these base end subassemblies to the long stretchers, again hiding the pocket holes on the back sides of the parts. When the glue dried, I sanded the base and brushed on two coats of General Finishes Lamp Black Milk Paint to wrap up its construction.
Finishing Up
This bookcase will receive lots of use in my busy home, so I opted to finish the carcass and shelf with a hard wax oil. It’s easy to apply by hand, and it buffs beautifully to a soft luster. It’s also easy to repair down the road by simply wiping more finish on again.
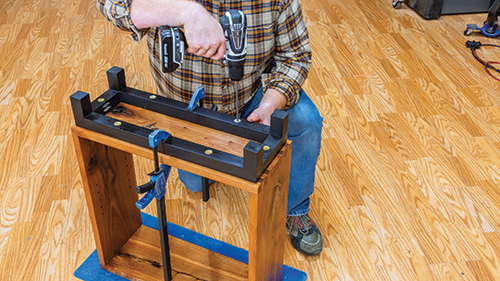
Once the paint and finish thoroughly dried, I bored 1/4″-deep countersunk holes into the bottom of the base stretchers, centered the base on the bookcase’s bottom panel and fastened the components together with 2″ wood screws.
Now grab some metal shelf pins and install the shelf at a height that works for you. I hope you’ll enjoy this rugged and attractive bookcase as much as I do!


