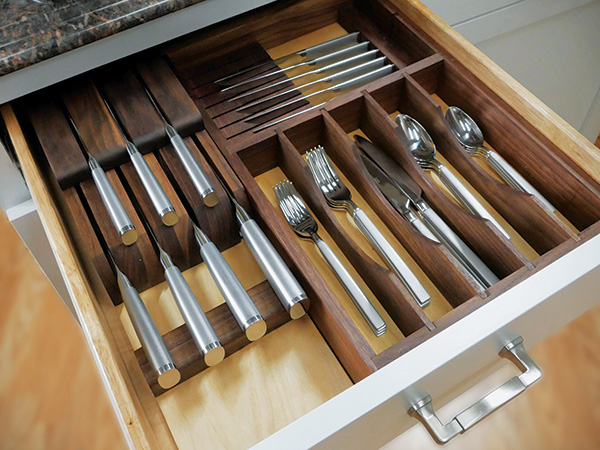
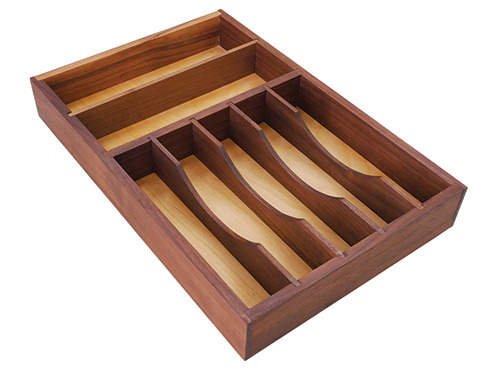
This silverware and utensil tray has enough spaces in its main compartment to keep your forks, knives and spoons in order. There’s also a rear compartment that can be used to store steak knives or as more divided space for other larger items.
I decided to use my router table to form all the grooves, rabbets and dadoes in this project, but you could also do all the machining with a table saw and dado blade. Feel free to modify the positions of the dadoes shown in the Drawings to create spacing that suits your needs best.
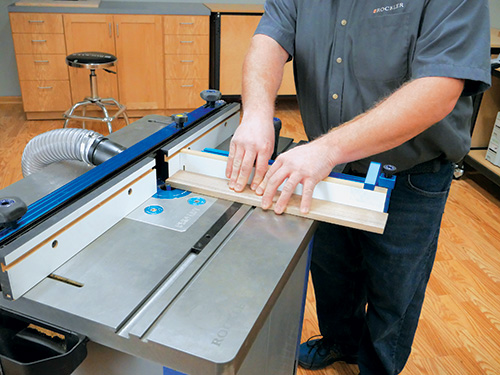
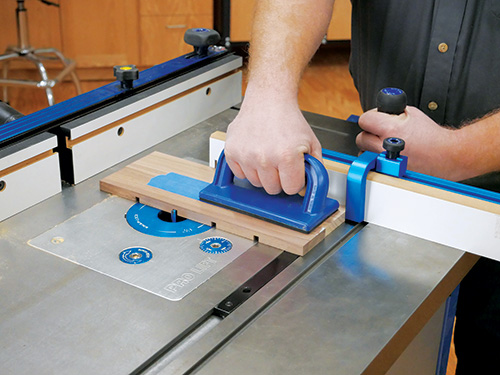
Start construction by cutting all the parts to size as specified in the Material List. Then install a 1/2″-diameter straight bit in the router table. Raise the bit to 1/4″ and set the fence so the back of the bit is flush with the fence facings. Rout a 1/2″-wide x 1/4″-deep rabbet in each end of the tray sides to capture the front and back pieces. Next, cut the 1/2″-wide x 1/4″-deep dadoes in the tray sides for the cross and rear dividers. Be sure to remember that the tray sides are mirror opposites of each other.
Milling More Grooves, Dadoes
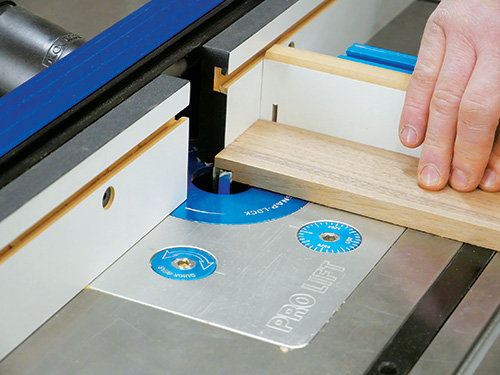
Switch to a 1/4″ straight bit, set its height to 1/4″ and position the fence 1/4″ away from the back of the bit. Go ahead and mill a groove for the tray’s bottom panel along the inside faces of the tray sides, front and back, along the full length of these parts.
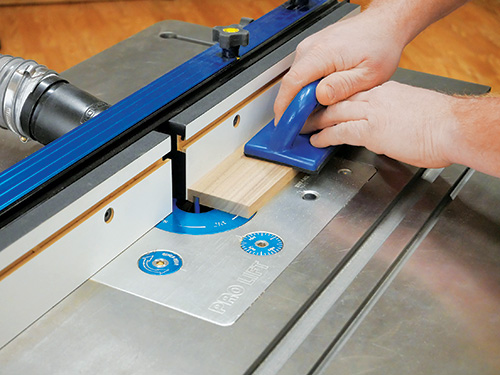
You can use the same bit at the same height to rout the four dadoes in the tray front and cross divider that will hold the silverware dividers. I found it helpful to tape these two pieces together with their ends aligned so I could rout both parts at the same time. It ensures that the dadoes will line up with one another correctly when the tray is assembled.
Now, gather the four silverware dividers so you can draw a large radius on the top edge of each to mark their recessed cutouts. To lay these out, first draw a centerline across the width of each divider, and mark the center point of these lines (it establishes the apex of the curve).
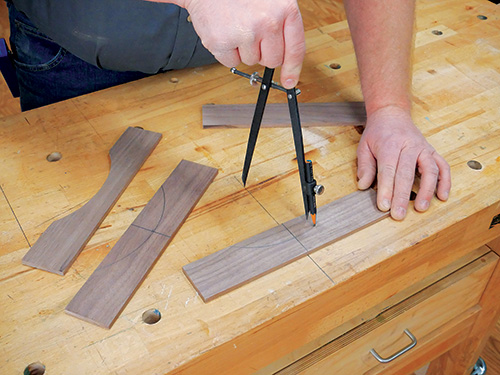
Open a compass to 4-1/2″ then set up for drawing each curve. I just drew a line on my workbench, aligned it with the centerline on each silverware divider, and used the bench layout line to locate the point of my compass for drawing the radius. Cut the recesses out at your band saw, and sand the curves smooth.
Assembling the Tray, Adding Optional Parts
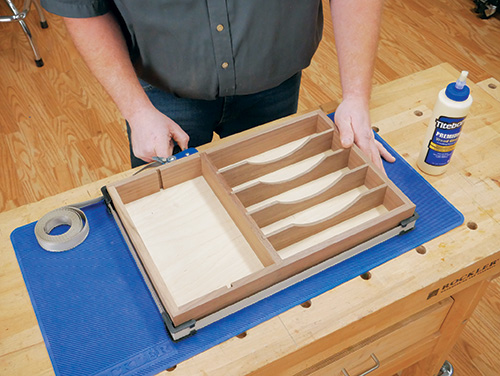
Sand all the parts you’ve made so far up to 180-grit. Then assemble the tray, applying glue to the corner rabbets, bottom grooves and dadoes for the cross divider. I used a band clamp to hold the parts securely. When you tighten it, be careful that the tray remains square; its diagonal measurements should match. I didn’t glue the silverware dividers or rear divider in place so those can be removed if my storage needs change. After the glue dried, I simply top-coated the tray with wipe-on poly to match the knife block.
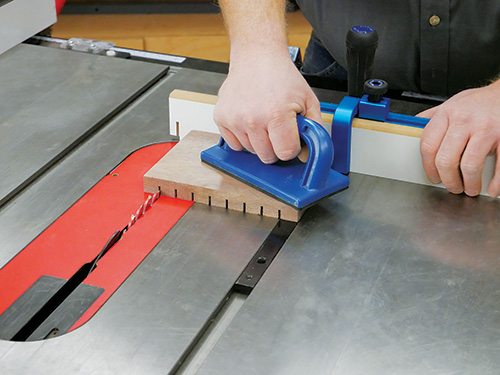
One option for filling the tray’s rear compartment is with a steak knife holder. Making it is simple: I just cut 1/2″-deep kerfs for the knife blades across the face of a 3/4″ x 5″ x 6-3/4″ piece of scrap walnut. I spaced the knife-blade slots 3/4″ apart, with this spacing centered on the slots. The steak knife holder fits the tray if the rear divider is removed.
Not all steak knives will be long enough to fill the area that’s left for their handles beside the knife block. So, I cut a 3/4″ x 1″ x 5″ filler block and placed that behind the ends of the handles to prevent the knives from sliding out of their blade slots.


