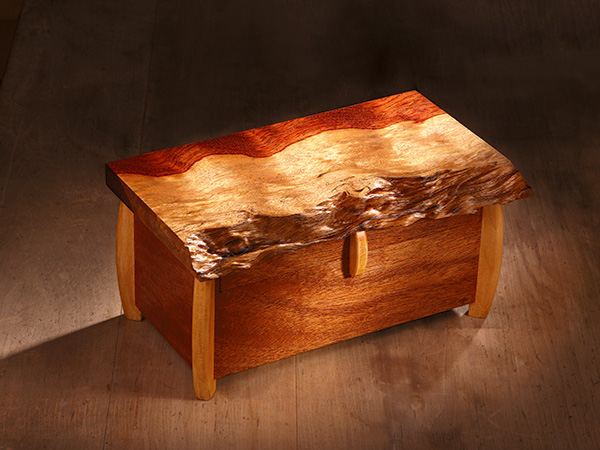
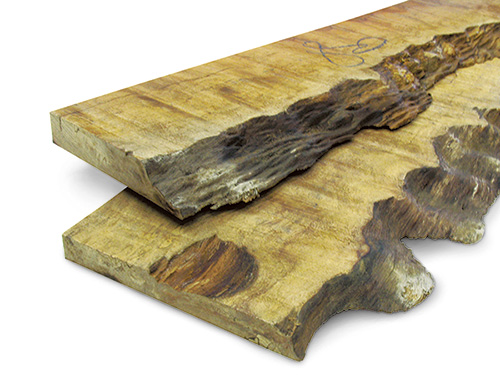
I found a couple of pieces of bubinga in the burn pile at work, and I saved them from a sad and fiery fate. These pieces still had that still had one natural edge. Boards with a natural edge are often referred to as live-edge or waney-edge boards.
In most cases, a woodworker selects specific wood to suit what he or she is building. In this case, I decided to build myself a small box to show off the piece of wood. Its uneven natural edge appealed to me — as did the coloration of its heartand sapwood. While a waney edge might not be everyone’s cup of tea, to me, the contrast between the clean lines of the box and legs and the uneven edge of the bubinga was very nice to look at.
Building the Box
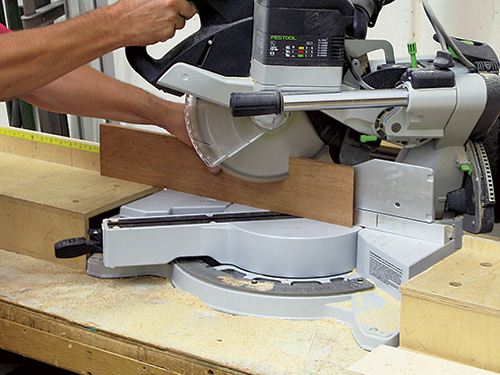
The sides and ends of the box (pieces 1 and 2) were simply ripped to their proper width and then miter cut to length on my miter saw. My saw has the depth of cut necessary to make these cuts; you may need to set this up on your table saw. Speaking of the table saw, I moved over to mine to plow the grooves that would capture the bottom (piece 3). Check out the Drawings for all the construction details required for this project. Go ahead and cut the bottom from 1/4″ plywood and you are ready to glue up the box pieces.
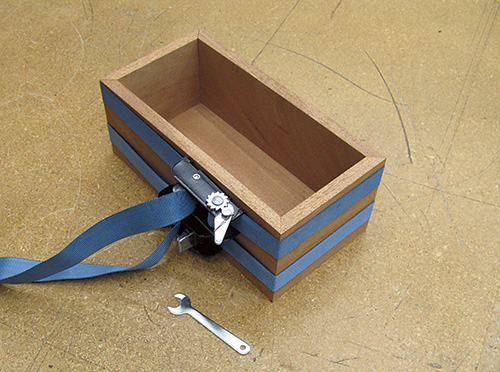
Test-fit the pieces to be sure that your miters are tight and the bottom is properly sized. When you have done that, apply a thin coat of glue to the corner joints (no glue for the bottom!) and clamp it up until the glue cures. I prefer band clamps for this task.
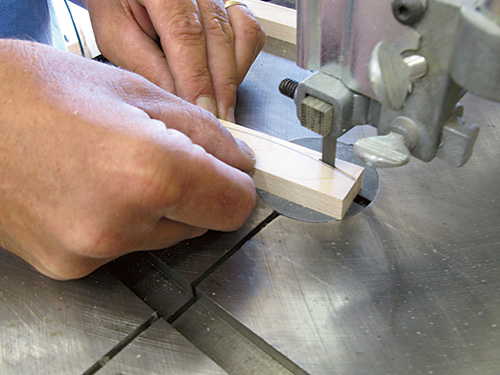
While the glue is curing, set up a 1/2″ dado head in your table saw and make a shallow test cut in some scrap lumber. Surface some maple down so that its thickness fits perfectly into your test dado cut. Now you are ready to mill the legs (pieces 4) to the dimensions listed in the Material List. Strike a curved line on one of the pieces, as shown in the Drawings. Cut the curve on your band saw and sand it smooth to the line. Now use that completed leg to trace the curve onto the remaining leg blanks and repeat the process for each of them.
As shown, I rounded over the curved edges of the legs using a roundover bit in my router table. Note that I used a screw clamp to hold the leg during this operation. It would be too dangerous to try to hold the pieces with your hands.
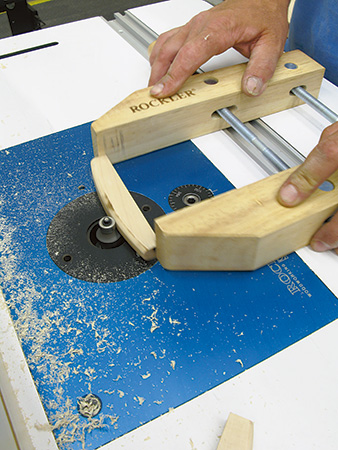
Once the legs were completely machined, I was ready to move on to forming the corner dadoes. The legs are housed in dadoes on the four corners of the box. I cut them using a sled that held the box at 45° to the dado head. I secured the sled to my table saw’s miter gauge with a couple of screws, and it worked like a charm.
I built the sled by gluing together four layers of 1/2″ plywood and trimming it into a 5″ x 16″ rectangle. Then I set my table saw blade to exactly 45° and bisected it across the 5″ dimension. I flipped one piece over, and the exposed bevels created two 45° faces. I clamped the bases between two long “fences,” gluing them in place. After adding a tall fence in back to clamp to the box, my sled was done.
Go ahead and cut the dadoes for the legs and glue them in place. Once again, the band clamp is a good choice here.
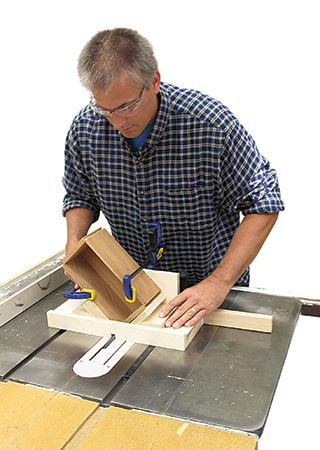
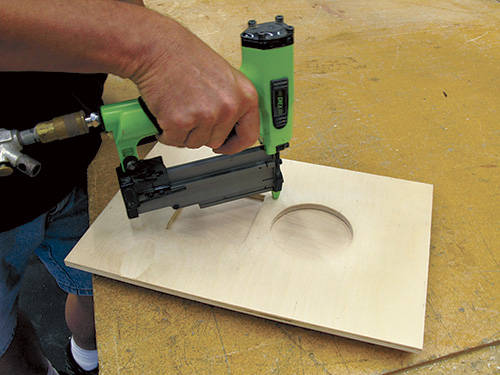
When the glue cured, I cut out an opening for the drawer. With a hand saw, I carefully cut down 1″ as shown in the Drawings. (The cuts align with the inside face of the box ends.) Then I set up my router table with a straight bit and a couple of stops on the fence, and routed the drawer opening. It took a few passes, raising the router bit about 1/4″ for each pass.
Building the Drawer and Top
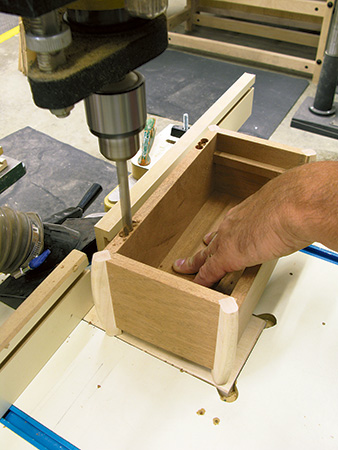
I mounted drawer supports (pieces 5) inside the box, level to the drawer opening. The drawer consists of a solid piece of wood that forms the drawer body and a drawer face made from the same material as the box (pieces 6 and 7).
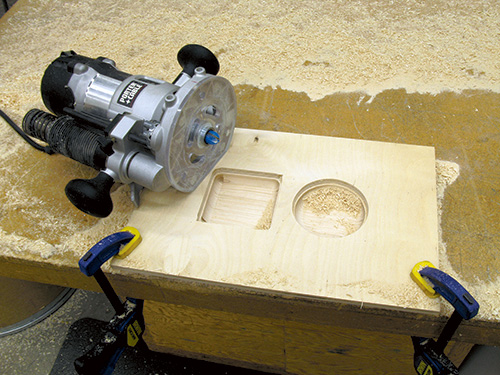
As you can see in the photo, I used a core box bit guided by a rub collar and a template to form the recesses in the drawer body. Use the Drawings to determine the dimensions that I used. (You can also create your own shapes if you’d like.) I attached my template with short brads driven into the drawer body, but double-sided tape would work, too. When you’ve completed the routing, place the drawer body in the box and locate the drawer front on the body.
Mark the location with a pencil and then glue the face to the body. Now you can make the drawer handle (piece 8) in the same manner as you made the legs. Locate it in the center of the drawer face, and glue it flush to the top edge. With that done, make the drawer blocks (pieces 9) and glue them to the bottom of the drawer body (keep them just far enough from the edge to clear the drawer supports). These blocks and the pull form three legs upon which the drawer sits when it is removed.
Here’s a fine opportunity to give the whole box and the drawer a good sanding, taking it up through the grits.
Adding the Top
Now you are ready to make the top (piece 10). As I stated at the beginning of this article, my top was made from a really interesting piece of bubinga. I cleaned up the waney edge of the top with a brass brush, to remove any loose pieces. In truth, this box would look good with a pretty piece of wood of any species — that will be up to you to decide. But there are a couple of important details that you should know about the top.
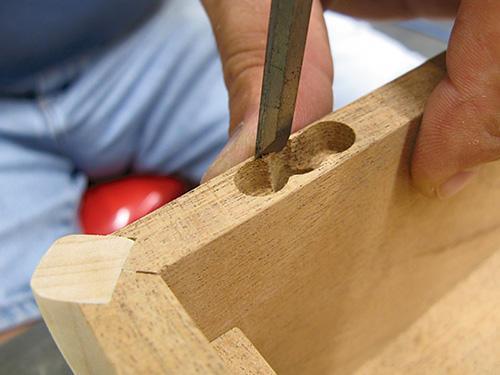
I used Soss hinges (pieces 11) in the top because they are strong and attractive. Sadly, they are also a bit of a pain to install. Drill out mortises for the hinges in the box first. I used a drill press to remove most of the waste and then followed up with a sharp bench chisel for the final fitting. When you’ve got that done, carefully transfer the hinge locations to your top workpiece. Repeat the procedure and then temporarily mount the top. Now mark where the legs meet the underside of the top when it is opened. I used a Dremel tool to carve out two little mortises that allow the top to open to a full 90°. Sand the top and you are ready to apply the finish.
In this case, I applied a wash coat of amber shellac thinned 25% out of the can with denatured alcohol, just to add a bit of amber coloring to the wood and to seal the pores. Then I sprayed a couple of coats of lacquer, de-nibbing between the applications. When the finish cured, I remounted the top and the box was completed.
It is funny how things work out. This little piece of wood from Africa went from the burn pile to becoming the focus of a classy little box. Now I’ll always take a second look at waney-edged scraps!
Click Here to Download the Drawings and Materials List.
Brad Becker is a professional woodworker and a regular contributor to the Journal.


