
There’s something about candle light that evokes the holidays. Their flickering glow creates a warm setting that can bring a relaxing calm to a long winter evening.
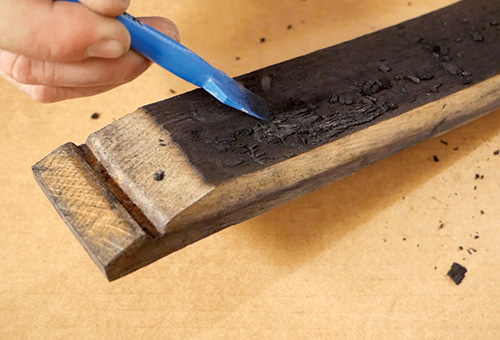
paddle end of a Rockler Silicone Glue Brush works well as a scraper.
This barrel stave candle holder is a simple-to-build and fun-to-use project that also makes a wonderful gift. The staves are available from Rockler. There are just a few things to consider first before getting this project underway, so keep the following suggestions in mind.
Spacing the Candles
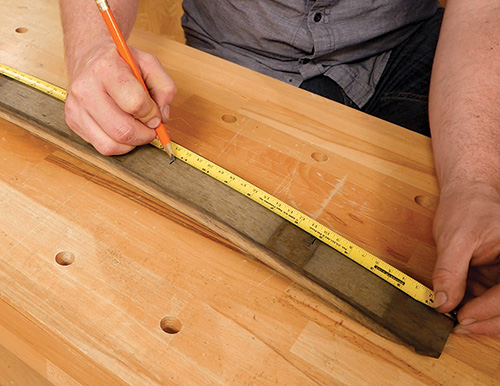
While the arc of the barrel stave is locked in, what you can choose is where you locate the candles. Our version spaces multiple candles evenly along the arc of the stave. Another option would be to start with a candle at the center of the stave, then expand the distance between subsequent candles. Or you could position pairs of candles across the stave — those options can be the key to customizing this project however it looks best to you.
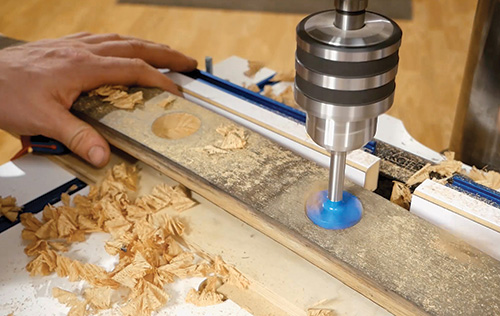
Details for Boring
One important thing to keep in mind is that the bore for the candles must be oriented to the horizon, not the curve of the stave. Otherwise, the candles will tilt. As you can see in the photo sequence, securing the stave to a board and then using a drill press to drill the candle holes is a super way to get this done.
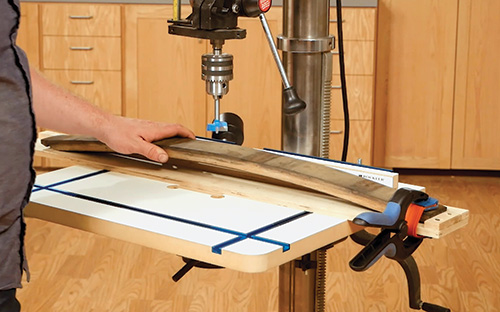
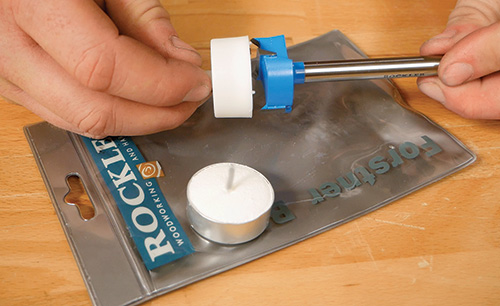
If you don’t have a drill press, don’t despair. You can still make the project, but you will need to account for that arc as you drill. Again, put the stave on a board, but then set a combo square behind the stave with the ruler pointing up. You can visually align your handheld drill to that orientation and get a pretty good result. Also, make certain that your drill bit is of the correct diameter to accept the candles. A Forstner bit is the best option here because it cuts clean, flat-bottomed holes. A slightly oversized diameter will make the candles easier to insert and remove.
Speaking of which, we used battery-powered votives in the above photo, and that is our strong recommendation. You can buy a bag of 24 at Amazon or craft stores for under $10. But, if you are going to use actual candles rather than artificial ones, make sure that they have a glass or metal casing around them. Better safe than sorry when it comes to open flame.
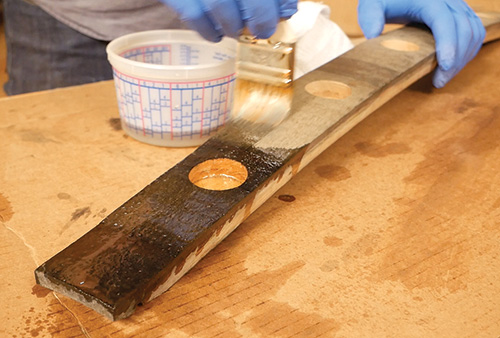
Any clear finish will work on these staves, but shellac might be the best choice. It is quick to dry, adheres to just about anything and it does not have an offensive odor.
This lovely gift will be used year after year. Give it a try for the holidays.
WARNING: Use appropriate candle holders or battery-operated candles to keep flame and heat away from flammable wood and decorations. Do not leave lit candles unattended.


