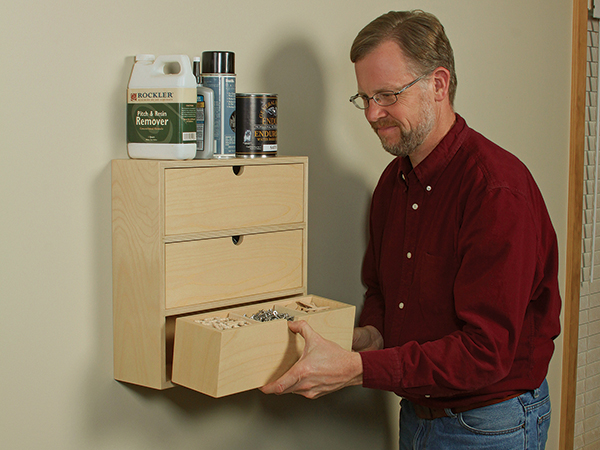
One of the byproducts of woodworking is, well, “byproducts.” We end up with an extra hinge here, a couple of coat hooks, T-bolts or jig knobs there. Maybe it’s the remainder of a 100-pack of pocket screws when you only used a dozen. Those bits and pieces have to go somewhere retrievable until needed, and this little storage cabinet can help. It has three sturdy tote drawers for keeping small quantities of “this or that” accessible. We used 1/2″ Baltic birch plywood and Rockler’s new Miter Fold Dado Set to build it. It’s a stacked dado with a “specialty” blade that cuts a unique hinged miter joint in solid wood or plywood that won’t slip out of position when you glue and clamp it together. But, by modifying the part sizes in the Material List you could use lock miters, box joints, rabbets or even butt joints for the corner joints instead — whatever works best for you.
Preparing the Cabinet Blank
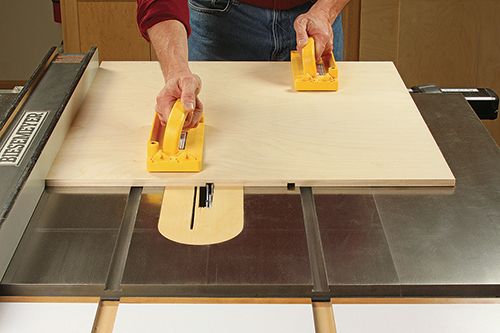
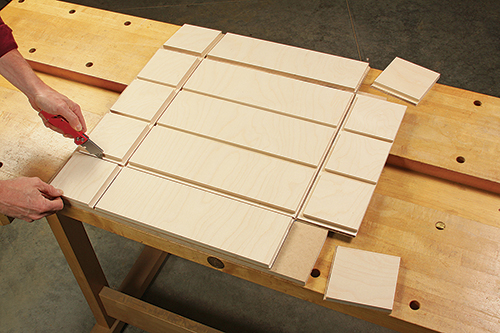
To get started, cut a 26″ x 26″ blank for the cabinet carcass from 1/2″-thick cabinet-grade plywood or solid wood. Make sure the corners are square and the diagonal measurements match. Sand one face of the panel to 180-grit; this will become the cabinet’s inside face. Next, cut a pair of dadoes that will house the two dividers between the drawers. Stack a dado blade to match the actual thickness of your project stock, and raise it 1/4″ above the saw table. Set your table saw’s rip fence 10-3/16″ away from the closest face of the dado blade. Now cut one dado across the panel’s inside (sanded) face, then turn it 180˚ and cut a second dado parallel to the first along the panel’s opposite edge. Make sure the depth of these two dadoes is uniform along the cuts.
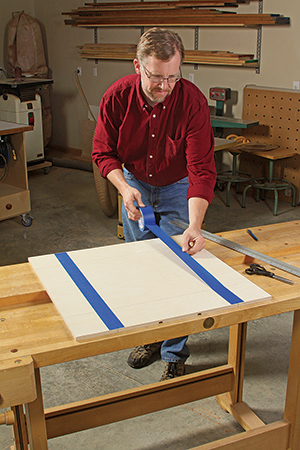
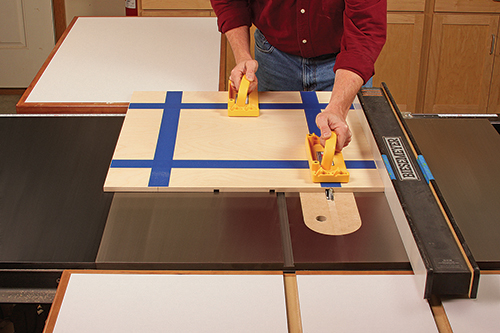
Since we’re using the Miter Fold Dado Set, flip the panel to its back face, and draw four layout lines across it, 5″ in from each edge. These mark the “fold” lines of the cabinet. Extend the layout lines around to the edges of the panel, too. Apply a strip of wide painter’s tape, centered over each fold line, to cover them up. The tape will reinforce the Miter Fold joints where the veneer “hinge” is thinnest, to help keep the cabinet carcass from folding up prematurely while the joints are being cut.
Making a Zero-clearance Throat Plate
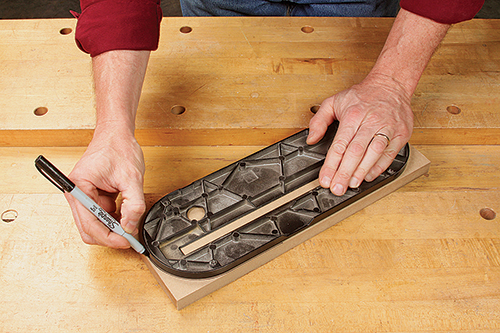
Cut out the throat plate shape slightly larger than your traced outline. Then, mount the blank to your metal or plastic throat plate with double-sided tape, and template-rout the blank to match the “master” using a flush-trim bit with an end-mounted bearing.
Separate the two, and see if the new throat plate fits the saw table’s opening. If it doesn’t, sand its edges as needed, and drill a finger hole through the new throat plate to make it easier to remove.
If you’ve made your throat plate from thicker material than the master, you’ll need to recess the bottom edges so the throat plate will sit on its tabs in the opening and be flush with the tabletop surface. The size and location of those tabs will determine how much material you’ll need to remove.
Cutting the Carcass Joints
Make a fresh throat plate for your table saw to use with the Miter Fold Blade. Then cut a test piece about 3″ wide and 14″ to 18″ long from the same material you’re using for the carcass panel, and set it aside.
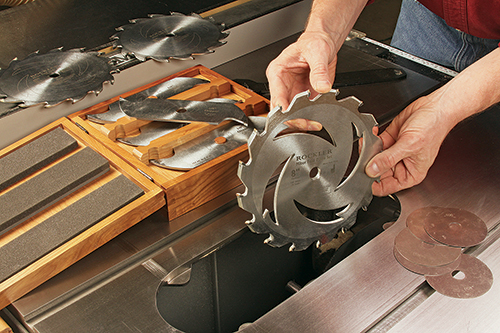
Grab your Miter Fold Blade manual and follow the included chart to stack the blade for the correct width of cut. Once it’s installed, and with the rip fence clamped partially over your new throat plate, raise the Miter Fold Blade slowly through it until the tips of the specialty blade are slightly higher than the thickness of the carcass panel stock.
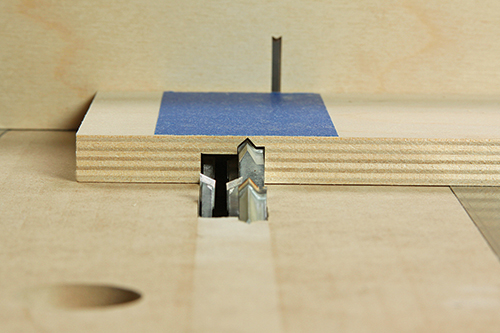
Lower the blade a few cranks, then carefully raise it again until the tips of the specialty blade are just 1/32″ below the top of the test piece you set aside earlier. Make sure that you’re measuring from the top of the blade’s arc so that there’s no chance it will cut all the way through the carcass panel when you are machining the folding joints to come.
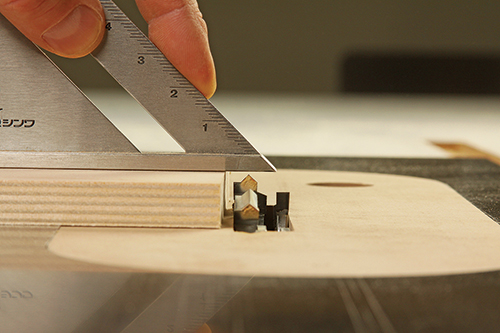
It’s time to check the blade height before making the actual cuts. Apply a strip of painter’s tape across the width of the test piece, a few inches in from one end. Using your miter gauge with a long scrap fence installed, and a push pad to keep your hand out of harm’s way, cut across the test piece with the taped face up.
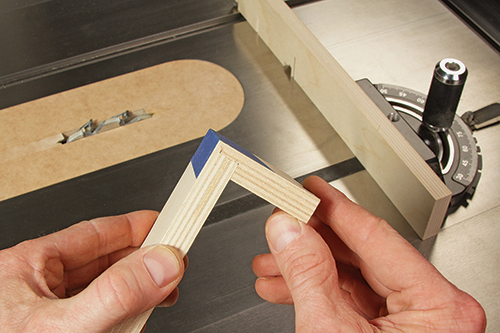
Make this cut directly under the tape, midway across its width. Fold up the test joint, to see if the intersecting faces of the Miter Fold profile meet correctly. If they don’t, add or subtract shims, according to the manual, to improve the fit.
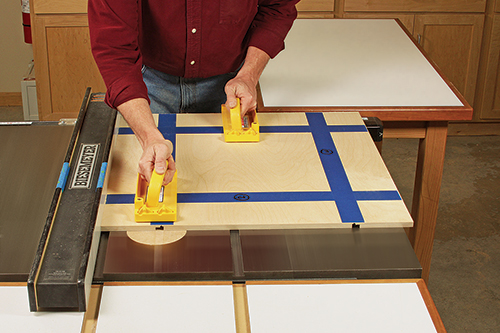
With the blade dialed in, set the rip fence to the left and then right of the blade to make the four Miter Fold joint cuts that will form the cabinet’s top, bottom and sides. These cuts should be lined up so the tips of the specialty blade are intersecting your 5″ layout marks on the edges of the panel. Make a cut along two opposite edges of the panel with the rip fence to the left side of the blade. Then, repeat with the rip fence on the right side of the blade and the panel turned 90° from the first set of cuts.
Once the four fold cuts are made, carefully trim off the four corner waste pieces of the carcass with a sharp utility knife so the short ends of the top, bottom and sides can engage correctly.
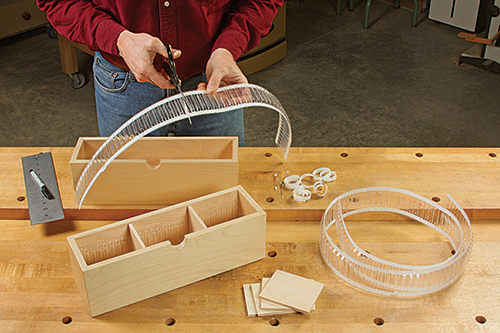
Divider Options
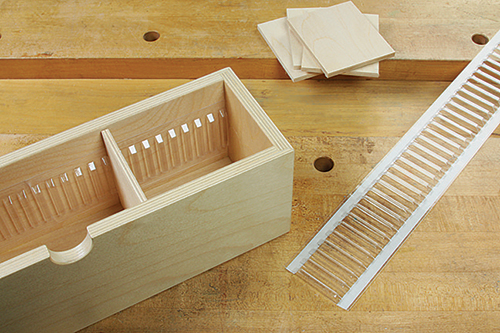
Just cut the holders to length from a 60″ piece with scissors, and affix them inside the drawers with their pre-applied adhesive strips.Then, make drawer dividers from scraps of 1/4″ plywood, hardboard or solid wood.
Or, if you don’t plan to change the divider configuration, another option would be to install fixed dividers instead, without holders.
Make them from thicker material, and drive a couple of 18-gauge brad nails through the drawer sides and bottom to attach them.
Adding Dividers
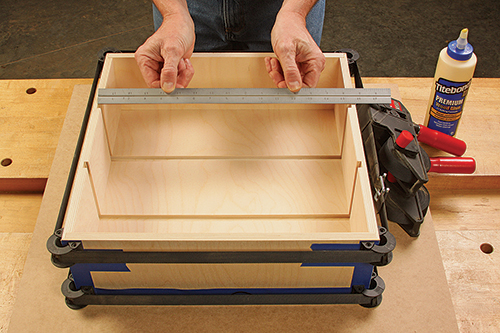
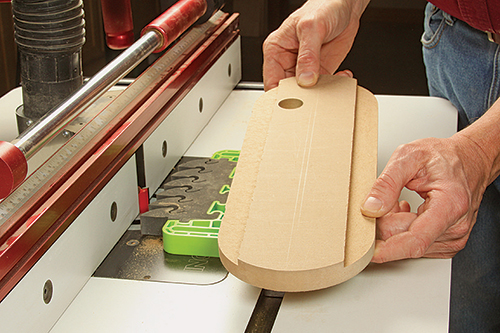
Go ahead and fold up the four joints to relax the “hinge” veneer along the seams. If everything meets up evenly at the corners, spread glue on the joints and clamp up the cabinet carcass. While the glue dries, measure the front-to-back and side-to-side dimensions within the carcass for the drawer dividers. Remove the Miter Fold Blade, switching back to your standard saw blade, and cut two dividers to size. Sand them to 180-grit, and glue the dividers into their dadoes. Peel the painter’s tape off of the cabinet.
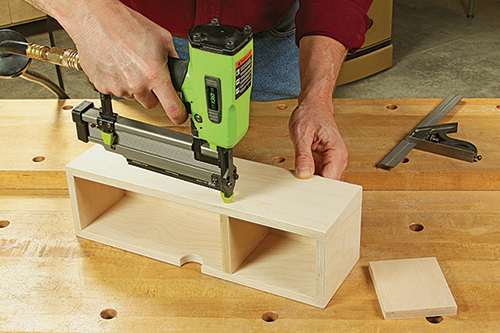
Building the Drawers
The process for machining the three drawers with the Miter Fold Blade is the same as for making the cabinet carcass — only this time, there are no internal divider dadoes to cut. Start by cutting three 1/2″-thick plywood or solid wood panels to 13-3/8″ x 23-7/8″, and sand one face smooth for the “inside” face.
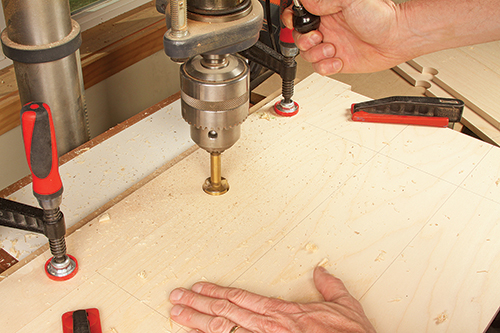
Along one long edge of each drawer panel, mark a centerline for drilling a 1-1/4″-dia. semicircle with a Forstner bit to serve as a finger pull. Bore these three finger pulls, one for each drawer, at a drill press and against a clamped fence.
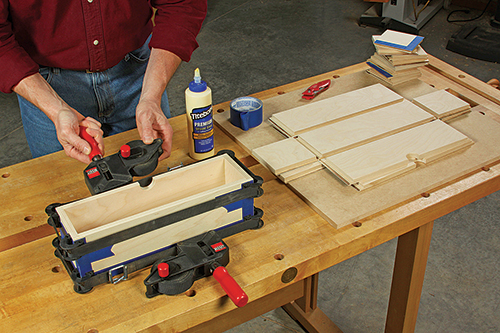
Next, mark the back faces of the drawer panels with four long layout lines, this time at 4-1/2″ in from the edges and ends. Cover them with tape. Reinstall the Miter Fold Blade, adjust it to the correct height again and cut the hinged drawer joints on all three panel workpieces. Glue and clamp the drawer boxes.
Finishing Up
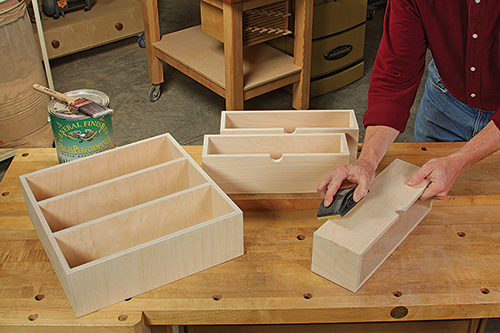
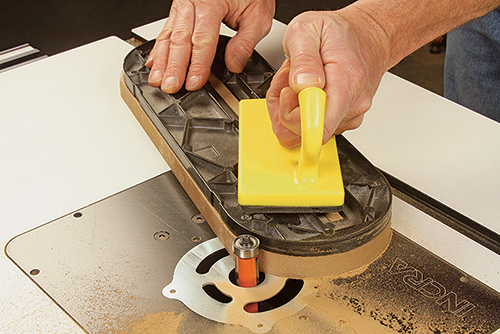
The Miter Fold Blade leaves sharp outer corners on the folded joints and, depending on the grain direction of the outer veneer “hinge,” even tiny splits in the veneer. So, ease these folded edgeson the cabinet and drawer boxes with a sanding block. Smooth the remaining unsanded surfaces to 180-grit, then apply a couple of coats of your favorite durable finish.
Add the drawer dividers inside the drawers if you wish. Then hang the project by driving a pair of 2″ flathead deck or wood screws through countersunk pilot holes in the cabinet back, centered on its width. Locate these mounting screws on a wall stud to hang the cabinet. Now, round up those “must keep” odds and ends, and fill up those drawers!


