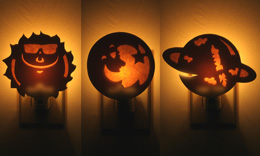
Make these acrylic nightlights in about an hour.
Note: To make these nightlights, we suggest using 1/4-in.-thick acrylic with a release-paper facing. You can purchase it from online plastic supply houses or some craft stores. You’ll also need a nightlight with a mounting clip to fasten to the back of the acrylic pattern. Find it at Klockit (item #3564; www.klockit.com or 800-556-2548).
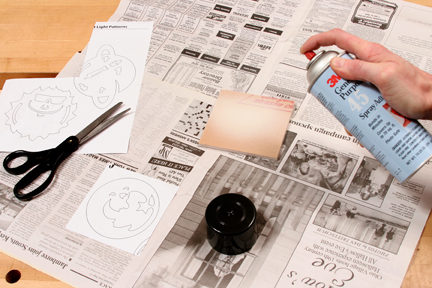
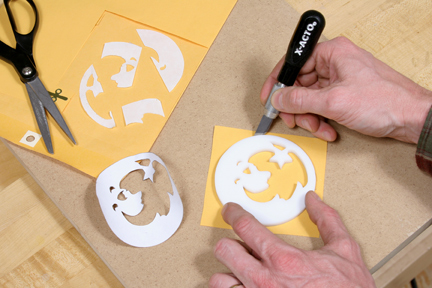
Step 1: Download and print out the PDF nightlight patterns. Draw an oversized square around the pattern you’d like to make, and cut out the square.
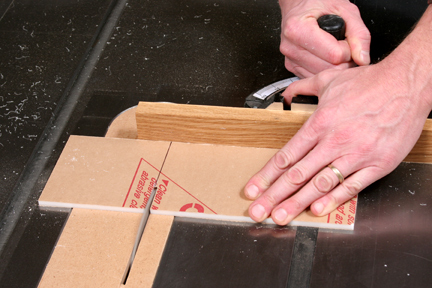
Step 2: Cut a piece of acrylic that matches the size of your paper pattern square, using a table saw and a sharp carbide-tipped blade. Do not remove the protective release paper from the plastic (see Photo 1).
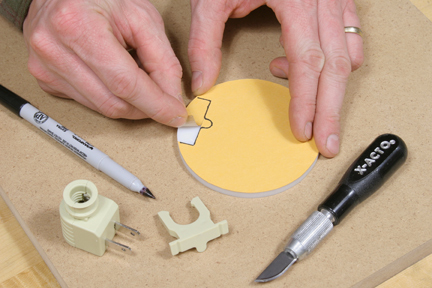
Step 3: Mount the nightlight pattern to the release paper on the plastic with spray adhesive (see Photo 2). Allow the adhesive to completely dry before continuing.
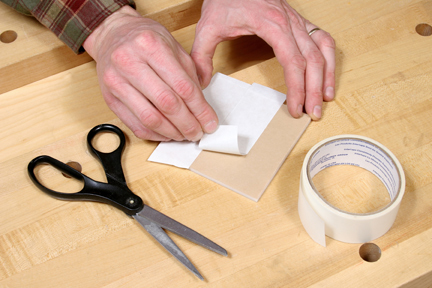
Step 4: Apply strips of carpet tape to cover the back of the plastic (see Photo 3). Butt the edges of the tape together, but don’t overlap them. Leave the backing paper on the outer face of the tape.
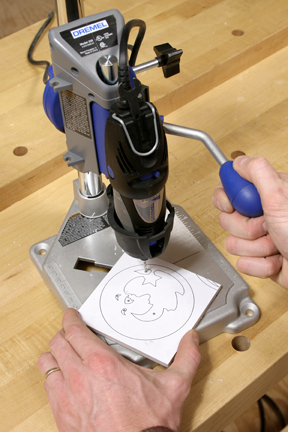
Step 5: Drill a starter hole through each of the cutout areas of the pattern with a small-diameter drill bit (see Photo 4). Make sure the holes are large enough to fit a scroll saw blade.
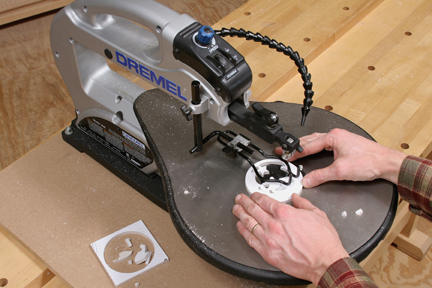
Step 6: Use your scroll saw and a fine-tooth blade to cut out the pattern (see Photo 5). Clean up any ragged bits of backing paper from inside the cutouts with a craft knife and a sharp blade. Peel off the paper pattern and release paper from the front of the plastic.
Step 7: The cutout areas of your nightlight will cast a warm glow and hide the nightlight bulb if you cover the back of the pattern with translucent, heavy paper. You can find papers of various colors and weights at a craft store, but a manila mailing envelope works well, too. Peel off the backing from the carpet tape, stick the decorative paper to it, and trim away the excess with a craft knife (see Photo 6).
Step 8: Now that your pattern is complete, find a spot on the back for installing the nightlight mounting clip. Locate the clip near the edge of the plastic and clear of any cutout spots. Trace the mounting clip onto the pattern, then trim away the paper, carpet tape and release paper in the mounting clip area to expose the plastic (see Photo 7).
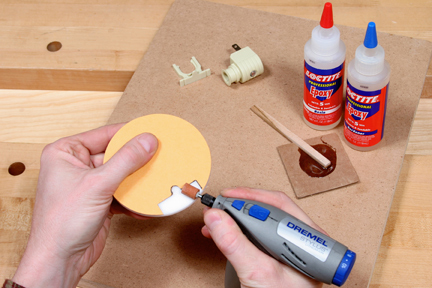
Step 9: Use fine-grit sandpaper, an emery board or a rotary tool and small sanding drum to “etch” the plastic where the mounting clip will be fastened. By lightly sanding off the glossy surface, you’ll give the plastic better “bite” for the epoxy that will bond it to the pattern. Etch the mating surface of the mounting clip now, too (see Photo 8).
Step 10: Mix a small amount of two-part epoxy, and glue the mounting clip in place. Give the epoxy several hours of time to cure before you snap it onto the nightlight. Then, plug it in, and your little astronaut will be all set for launch time when the lights go out!


