Learn how to build this folding adirondack chair project that is featured in the March/April 2019 issue of Woodworker’s Journal magazine. Chris Marshall walks you through every step of the construction process. The plans for this project are available in the printed issue and will be available online for print subscribers. Plans for this Folding Adirondack Chair project are also available at Rockler Woodworking and Hardware.
In this video, I’m going to show you how to build one of these chairs. You can also find the measured drawings and a complete build article in the April 2019 issue of Woodworker’s Journal. This spring, Rockler will also be selling the published plans, a set of templates for the curved parts and a hardware kit at Rockler.com.
We’ll start the process by building the seat assembly, so cut a couple of blanks for these back legs from 1-1/2″-thick stock.
Here I’m plotting points on a grid of 1″ squares on one of the leg blanks, then connecting the points with straight lines and a French curve to draw the first leg. When that’s done, cut out the leg and sand the cut edges flat and smooth.
Now go ahead and trace the first leg onto the second leg blank and cut it to rough shape, just outside of your layout lines. Then, attach the two legs together, face to face, with double-sided tape. Trim the second leg to match the first leg using a long bearing-guided flush-trim bit in your handheld router or on a router table.
Mark both back legs for these bolts here that will attach the front legs and allow these parts to pivot. Drill these 5/16″-dia. through bolt holes at a drill press, if possible, so these holes will be square to the leg faces.
Next up, we’re going to head to the table saw to cut dadoes into the back legs for these three parts: a rear seat stretcher, these backrest pivots and these backrest stops.
I’ve got one of the legs dadoed already so we can take a closer look. The whole dadoed area is 6” wide, and I start by cutting all of it 1/4” deep. Then I raise the blade to 3/4” to cut this 3”-wide center dado.
I make all of these cuts with my leg workpieces held against a long, stiff fence on my saw’s miter gauge for stability. And, this bottom “seat portion” of the leg goes against the miter gauge fence for every cut so these dadoes remain square to this front bottom edge. I’ve got it identified with a piece of tape here so I don’t forget which of these two bottom edges needs to stay against the fence.
When the dadoing is finished, file or sand the sharp back corners of the legs round, ease the long sharp edges and finish-sand the legs to 180 grit.
And now we can connect the legs with a couple of seat stretchers — a wider one in back that fits into the front-most dado we just cut, and this one, right here. So, go ahead and make up these parts. Then fasten the legs to the two stretchers with pairs of 3″ counterbored exterior screws to form the seat framework. Install the rear seat stretcher in the narrow, front-most leg dadoes.
We’ll fill the other wide and narrow dadoes in the legs with these two parts: a backrest pivot and a backrest stop. These backrest pivots have a 4-1/2″-wide lapped area here, milled 3/4″ deep into their outside faces. When these lap fits into the leg dadoes, it enables the pivots to install flush with the faces of the legs, like this
Cut these laps on a band saw, with a wide dado blade or a straight bit in the router table. Now cut the top ends of the pivots into 1-1/2″ radii and smooth the curves. Then bore a 7/8″-dia. counterbore, 3/8″ deep, into the outside face of each pivot at the centerpoint of the curves you just cut, followed by a 5/16″ bolt hole centered in the counterbore.
Sand the two pivots, ease their sharp edges and attach them to the legs like I’m doing here with waterproof wood glue and four counterbored screws. Then make up these backrest stops and install them in their dadoes so their top rounded end is are flush with the top edges of the legs.
We can wrap up work on our seat base by installing these seat slats. I want to point out a couple of things about them, so let’s take a closer look. As you can see here, I first rounded the corners of my seat slats and knocked off the sharp top edges with a 1/4” roundover bit in my router. And that will help prevent splinters.
I also drilled these pairs of screw pilot holes at my drill press, before installing the slats, to keep the screw patterns evenly spaced and straight. Counterbore these holes so you can cover the screw heads with wood plugs.
To install them, butt the rearmost slat against the backrest pivots, and space the slats about 5/16″ apart — some dowels or wood scraps can make this easy to do. Then extend the screw pilot holes from the slats into the legs, and fasten the slats with 2″ exterior screws.
That takes care of the seat portion of this project, so now we can move on to the fold-down backrest. We’ll start with these two long backrest supports here, so make up those blanks. Each one requires a long slot near the bottom so the backrest can slide up, like this, to set the chair up or fold it down. We’ll cut these slots at the router table with a 5/16”-dia. straight or spiral bit.
Now I’ve got my router table set up to make these slot cuts, with the bit’s cutting limits marked with tape on the table. I’ve already got one slot cut on these backrest supports to show you what we’re doing. Clearly, it’s a centered slot, and it goes all the way through the thick workpiece. Now, these supports are pretty thick at 1-1/2 in., but you don’t need an overly long bit to make these cuts. Here’s the trick!
For each bit height setting, make two passes instead of just one, flipping the workpiece end for end and keeping the same edge against the fence. This way, you can cut the slot in from both faces to speed the process along. But remember, make sure to keep the same edge against the fence. As long as your bit can cut to at least half the thickness of the workpiece, you can cut these centered slots without buying an overly long bit.
This is also a good time to drill a bolt hole in each support for attaching the back ends of the arms, later. Complete the supports by rounding their bottom corners with 5/8″ radii to provide clearance for pivoting.
The backrest of the chair also requires these two horizontal crosspieces. And they’re curved along this front edge to make the chair back more comfortable to lean against. So, make up one, then template-rout the second one to match it, just like you did for the back legs.
Here at the bench, I’ve got the backrest framework clamped together so I can check its fit on the seat assembly. You want this framework to slide in between the leg pivots without binding. If the fit is too tight, trim the crosspieces a little bit shorter, clamp it up and try the fit again. When the framework fits correctly, finish-sand the parts and fasten the crosspieces between the supports with 3″-long counterbored exterior screws.
With the seatback framework assembled, we can move on to making the back slats. Now, you can see that there are two narrow ones on the outside and five wider ones in between. So make up blanks for them all, and cut the top ends of these narrower slats round. These five wide slats share a 10″-radius, and here’s how to lay that out.
Here, I’ve got all seven slats clamped together and up against this clamped, flat scrap to keep the bottom ends lined up. I’ve also got 1/4″ spacers in between each slat. I’ve drawn a center line down the middle slat, and marked a pivot point 10″ in from the top end. That way, I can use a large compass or these trammel points set for 10 inches to draw that curve.
Cut the slat curves at the band saw, then ease their sharp corners. Round over the front edges to prevent splinters, and sand them smooth.
Here I’ve got my back slats ready to install on the backrest framework. You can see that I’ve got the spacers in place between them again, and a couple of layout lines here and here so the screws will be centered on the crosspieces. And I’ve pre-drilled counterbores for the installation screws. I’ve also got a couple of scraps clamped together down here so that all of the slats will line up along the bottom evenly. And you’ve got a pin or brad nailer, I’ve found it helpful to tack all of the slats to keep them from moving around as you’re driving the attachment screws.
Fasten the slats with 2” exterior screws. Notice that the hole positions are offset on the narrow slats in order to avoid the screw locations where the backrest supports and crosspieces connect.
Well, we’re making great progress on this chair, and there’s only a few more parts to make before this chair will be ready for finish! So, next up: the front legs. Notice on the bottom ends that they have a centered slot so the seat can move up or down for setup. Go ahead and rout these slots, just like you did for the backrest supports.
Here I’ve got one of the legs already completed so I can point out a few important details, and the first one is this 3/4”-dia. counterbore right here. This counterbore is a safety feature: it locks these knobs from Rockler into the top of the slot so the seat can’t fall down if the knobs loosen up a little bit. If this were just a slot, all that would hold the seat up is the knob and bolt tension, but this recess provides an important mechanical stop. Bore these knob recesses 1/4″ deep at the drill press, centering the counterbore on the radius of the slot’s top curve.
Another point of note on the front legs are these 1-1/2” radii curves at the top back corners. They enable the legs to pivot backwards for folding up or setting up the chair. But this square corner prevents them from rotating forwards. Lay these curves — one for the left leg, like this, and one for the right leg, like this — and band saw them to shape.
Now switch to 7/8” bit and drill a 5/8”-deep counterbore and a through bolt hole near the top of each leg where the legs will connect to the chair’s arms. Then, round over the bottom corners of the legs with 5/8” radii. Sand all the leg curves smooth, and ease their sharp edges.
If you buy Rockler’s templates for this project, you’ll get one to draw these shapes. Or, you can lay it out on your own, using our gridded drawings in our published plans in Woodworker’s Journal magazine. Whichever route you take, saw one arm to shape, and template-rout the second one to match the first.
The arms of the chair require two of these pivot blocks apiece to attach them to the chair and allow for rotation. I’ve got this pair shaped, counterbored, drilled and ready to cut to final length. I find that it’s often easer and safer to make small parts like these from a longer workpiece, to start with.
Both pivot blocks for each arm are located along this inside flat edge, but their counterbores face in opposite directions. The rear pivot block’s counterbore faces the outside, curved edge of the arm, and the front pivot block’s counterbore faces inward. Install the pivot blocks on the arms with pairs of 2″ counterbored exterior screws. Then ease the top sharp edges of both arms with a 1/4” roundover bit.
All that’s left to do now is bolt the chair together, plug the screw holes and apply some finish! Start by installing carriage bolts, big fender washers and knobs to attach the backrest to the seat assembly. Then attach an arm to each leg with a carriage bolt, a washer and nylon lock nut in the top leg counterbores. Don’t overtighten these nuts. Just snug them up lightly. You want the parts to rotate freely. Now slip these front leg assemblies onto long carriage bolts in the back legs here, and thread a knob into that recess at the top of the front leg slots. Finally, attach the rear ends of the arms to the backrest with more carriage bolts, washers and nylon lock nuts.
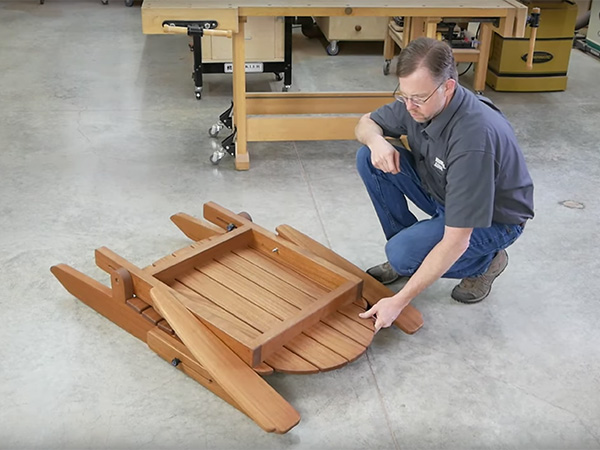
Go ahead and check the folding action of the chair. If it functions properly, it’s time to fill all of these counterbores with wood plugs, so you can move on to finishing.
I’m keeping the finish on this chair as simple and easy to refinish as possible! I’m just applying a coat of semi-transparent, oil-based deck and siding stain with UV inhibitors added. And when the stain dries, I’ll bolt the chair back together, and it will be ready for use.
I hope this video will encourage you to build a couple of these chairs for your yard! It’s a fun project to build, and at the end of the season, they’ll be a whole lot easier to store! Remember, you can find this project in our April 2019 issue of Woodworker’s Journal Magazine. Or, buy the project plans, templates and hardware from rockler.com. I’m Chris Marshall with Woodworker’s Journal, and thanks for watching!


