My life is all about woodcarving, mostly relief woodcarving. I started when I was 18 years old and knew right off: woodcarving was for me. Carving became the true passion of my life, and I am very fortunate to make my living, for some 65-plus years now, at what I truly love.
When I want to carve a small relief of something, say a shell, I start with my drawing (or pattern), transfer it to a piece of wood and band saw the outline out. Now I have an odd-shaped piece of wood, 1″ thick (or less) that I need to secure firmly so I can carve the piece well, but how? A vise does not hold odd shapes very well, and I don’t get full access to carve the sides. A screw through the back may not have an area deep enough to hold the piece well. Double-stick tape has always slipped on me. How do I secure an odd -shaped, small piece well enough to get full access to carve my shell well?
 I have a simple solution. Spread waterbased Elmer’s® glue (white glue), on the bottom of the project: my shell. Cover this surface with a layer of newspaper, then another layer of glue, and then a piece of scrap wood like a nice-sized piece of plywood. Clamp together and leave overnight.
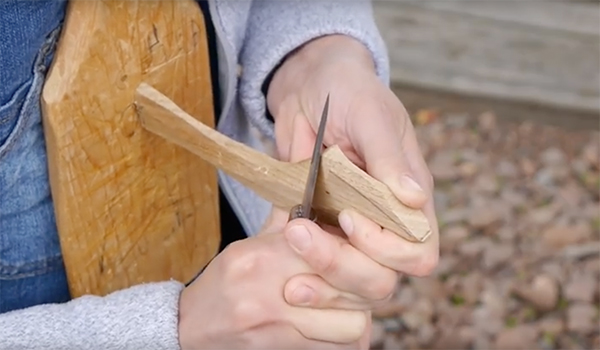
The next day you can clamp the sized piece of plywood any way you feel most comfortable with (in a vise, between bench dogs, etc.), and carve comfortably and safely. When you have finished the carving, you can remove it from the plywood by pushing a knife into the paper between project and backboard, and working the knife all the way around until the carving pops free.
Of course, the project doesn’t have to be a shell. I have carved many decorative pieces this way. No screws, no crushing vises, no handmade holders, just comfortable carving. Remember, have fun in the wonderful world of woodcarving.


