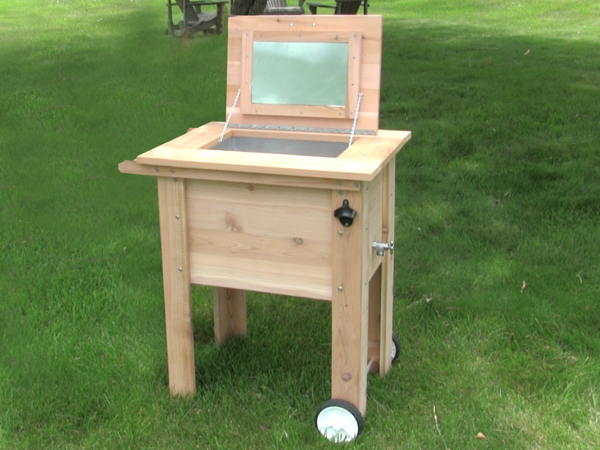
We partnered with Gorilla Glue to design and build this cooler cart project that uses many of their latest products. This cooler cart will keep your drinks icy cold and serves as a perfect serving station on your deck or patio. This deck cooler cart project is made with dimension lumber, so all you have to do is cut the boards to length and follow our simple assembly instructions. This is a woodworking project that even a beginner can build.
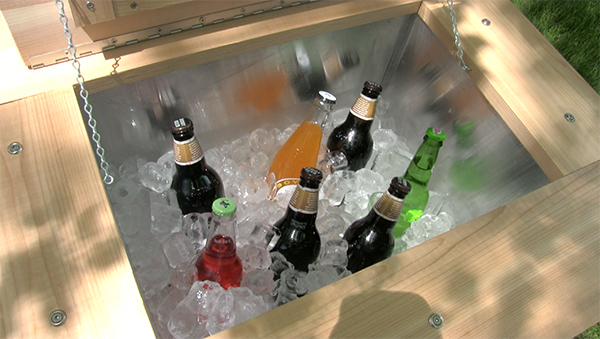
The cooler cart features an insulated cooler box that is lined with aluminum, so it can get wet and is easy to clean. The interior of the cooler is sealed, so that it will not leak. It also has a drain that makes it easy to empty when the ice has melted. Click here to download the complete project plans, including a material list and how to photos.
VIDEO: Check out new Gorilla Glue Products and see how this cooler cart was built.
CLICK HERE TO DOWNLOAD THE PLANS.
How to Build this Backyard Cooler Cart
Make the Legs and Side Panels
1. Cut the eight long and short leg pieces to length. See Material List on next page.
2. Apply a bead of glue to one long edge of each end leg, and then clamp each leg to a mating front or back leg. Drive 1-1/2″ finish nails through the front or back legs to secure the joint.
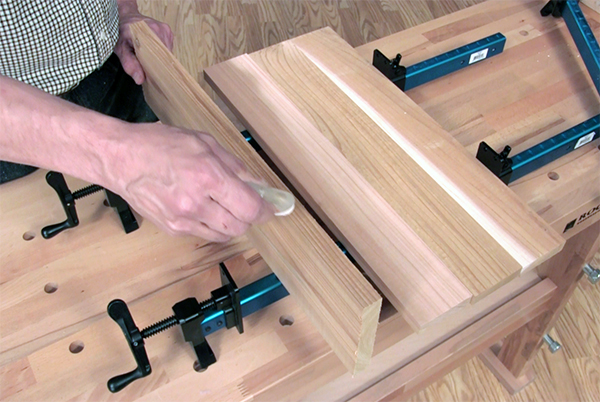
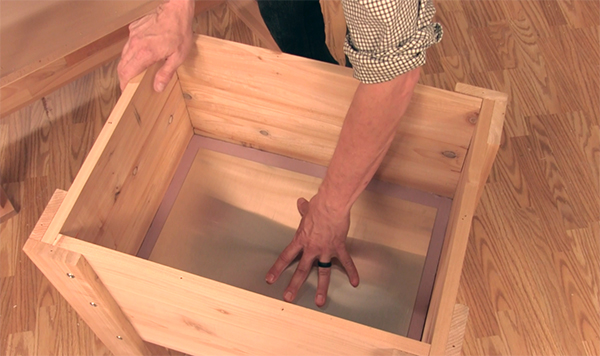
3. Cut the front, back and end panel boards to length. Apply a bead of glue to each edge and clamp the boards that make each panel (photo 1).
4. Position the tops of the panels flush with the top of the legs and attach the panels to the legs with 1-1/4″ exterior-rated screws. Predrill 1/8″ pilot holes to prevent splitting the boards near the edges or ends. We chose to use finish washers to add a decorative element, but you could also countersink each screw (photo 2).

5. Cut the bottom supports to length and attach them5. Cut the bottom supports to length and attach them to the bottom of the panels with 2″ screws.
6. Cut the axle support blocks to length and attach them to the inside face of the front and back short legs. These blocks are flush with the bottoms of the legs.
7. Bore a 5/8″-dia. hole through the front and back legs and axle support blocks. The center of these holes is located 1-1/2″ up from the bottom of the leg.
8. Cut the axle to length with a hack saw.
9. Insert the axle through the axle holes. Place one flat washer over each end of the axle. Place the one wheel on each end of the axle. Then secure each wheel with a 1/2″ push nut. Use a hammer to pat the push nut on the axle.
Insulate the Cooler Box
Note: The foam insulation and sheet aluminum measurements that are listed on the Material List are based on using 7/8″-thick cedar boards. If the thickness of the lumber you are using is different, then you must measure and cut the insulation and aluminum pieces to fit your cooler box dimensions.
1. Cut the rigid foam insulation pieces to size with a retractable blade knife and straightedge.
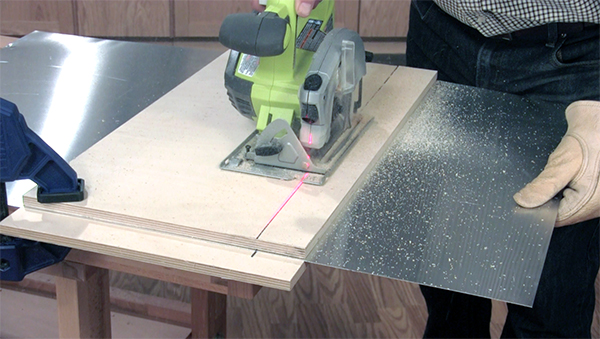
2. Cut the sheet aluminum using a circular saw. The safest and easiest way to make these cuts is to sandwich the aluminum sheets between two pieces of plywood. Use a standard universal-use circular saw blade to make the cuts (photo 3).
3. Evenly space the bottom slats on the bottom sup-ports. Secure each slat with a couple of 1-1/4″ screws.
4. Place the bottom piece of insulation on top of the slats. Then apply construction adhesive to the back of the bottom aluminum sheet. This piece of aluminum is not cut to cover the entire piece of insulation because the front, back and end insulation will cover its edges. Center the bottom aluminum sheet on top of the bottom insulation and press to ensure complete contact (photo 4).
5. Install the front and back insulation against the front and back panels. Similar to the bottom aluminum sheet, the front and back sheets of aluminum were not cut to cover the entire piece of insulation because the edges will be covered by the end insulation pieces. Apply construction adhesive to the back of the aluminum sheets; center them over the insulation and press into place.the edges will be covered by the end insulation pieces. Apply construction adhesive to the back of the aluminum sheets; center them over the insulation and press into place.
6. Install the end insulation pieces and attach the end aluminum sheets. These two pieces must be cut to fit exactly between the front and back of the cooler box.
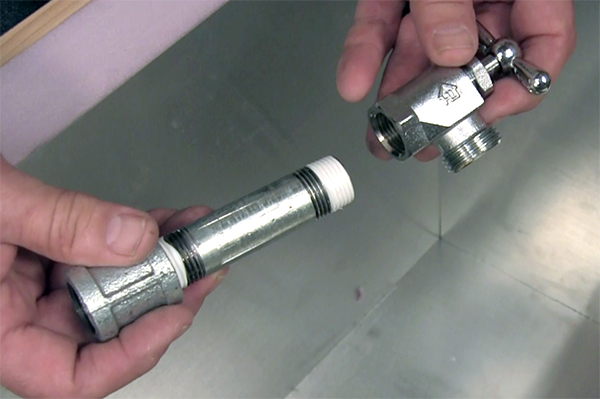
7. The drain spout is made from three common plumb-ing fittings; a 1/2″ galvanized coupling, a 1/2″-dia. x 3-1/2″-long galvanized threaded nipple, and a1/2″ sillcock valve. You must bore a 7/8″-dia. hole through the side of the cooler box to install this drain spout. Drill a small (1/8- to 1/4″ diameter) starter hole through the aluminum sheet on the wheel end of the cooler box. Locate this hole approximately 3/4″ up from the bottom of the cooler box. Next, drill a 7/8″ hole through the aluminum sheet, foam insulation and end panel. Drill carefully through the aluminum to minimize tearing the sheet. Wrap both ends of the threaded nipple with Teflon™ plumber’s tape. Thread the coupling on one end of the nipple. Then slide the nipple through the hole in the cooler box. On the outside of the box, thread the valve onto the other end of the nipple (photo 5).
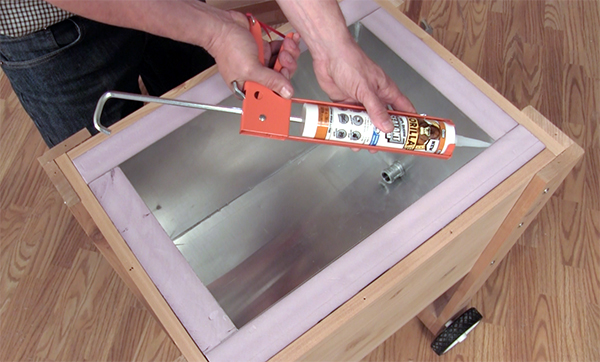
8. Seal the interior of the cooler by applying a heavy bead of clear silicone sealant over all interior corner seams and around the drain coupling (photo 6).
Make the Top Cap and Handle
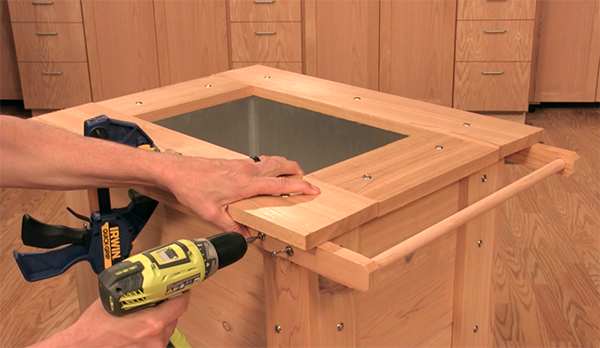
1. Cut the top cap parts to length. The top cap should overlap the inside edge of the cooler box by 1/4″ on all sides.
2. Attach the top caps to the front, back and end panels with 2″ screws. Be careful to center the screws on the edges of the front, back and end panels.
3. Cut the handles to length.
4. Bore 7/8″-dia. x 3/8″-deep holes in the handle sup-ports that will capture the handle. Use a 7/8″ Forstner bit to bore these holes.
5. Soften the sharp corners of the handle supports by mitering the corners of the handle end of the handle supports.
6. Fit the ends of the handle in the 7/8″ hole in each handle support to capture the handle. Then attach the handle supports to the front and back panels with 2″ screws.
Make the Lid
1. Cut the lid boards to length.
2. Apply a bead of glue to each edge and clamp the boards to make the lid panel.
3. Cut the lid bracing parts to length. These boards will reinforce the lid and frame the lid insulation.
4. Center the lid bracing on the underside of the lid panel and attach the lid bracing with 1-1/4″ screws.
5. Cut the piece of 3/4″-thick rigid insulation to size for the lid.
6. Cut the lid aluminum to size.
7. Secure the lid insulation and aluminum sheet to the underside of the lid with construction adhesive.
8. Cut the piano hinge to a length of 20-1/2″ long with a hacksaw. When marking the hinge, measure out from the center of the hinge to create symmetrical ends.
9. Center the lid over the cooler box opening and attach the hinge to the lid and back top cap with the screws that are provided with the hinge.
10. Attach the handle.
Finishing
You may apply any exterior-rated finish that you prefer. We chose to leave our project unfinished so that it will gray to a weathered patina over time.
CLICK HERE TO DOWNLOAD THE PLANS


