In 1996, my wife and I visited our son and his new bride in the Swiss town of Lachen, where he had his first job out of college. I had always coveted a set of Pfeil carving chisels, which are made in Langenthal, Switzerland. I bought my set from the local hardware: they got the set I wanted overnight from the factory, at about 40% less than the U.S. price. (The 40% clinched the deal.)
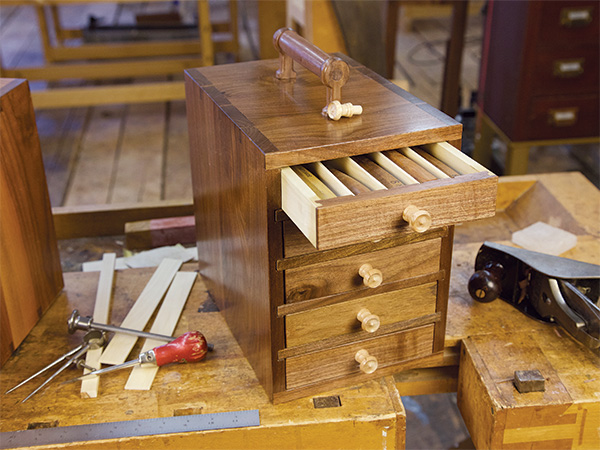
The chisels came in a nice tool roll, which was made from leather-looking plastic. Once home, however, I set about making their storage space a little nicer by constructing a fitting box for them: a “till” to fit into the 18th century style tool chest I had built some years before.
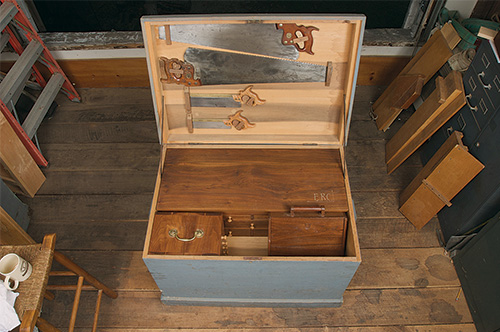
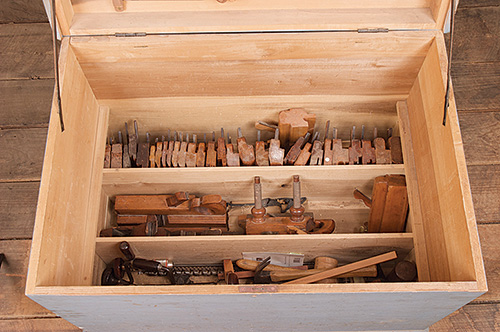
Eighteenth century tool chests were large, six-board boxes with three wells in the bottom to house planes, hammers, etc. A working craftsman of that era would have had about 40 planes. Above the wells were nested one or more smaller boxes, or tills, which housed smaller tools such as screwdrivers, marking tools, and so forth. A till was what we think of as a tool chest today. While the historic six-board chests were of decent workmanship, the exterior wasn’t too fancy: it was, at most, painted. However, the inside of the chest and the tills were a tour-de-force of the cabinetmaker’s art. The tills were fine casework!
Joinery Options
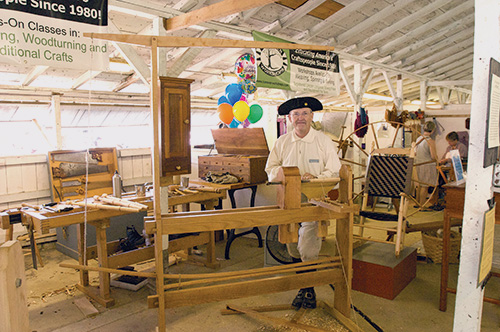
I built my chisel till over a period of five days, completely with hand tools, as part of an early American craft reenactment I presented for many years at our local county fair (the oldest in Ohio). I even resawed the wood to thickness and the boards to size with hand saws.
Take heart, though: I don’t expect everyone else to live up to my 18th century expectations! In fact, I didn’t — quite — make it to a complete hand tool build myself: In the early hours of Day Five, I stopped in at the shop and used a table saw to rip 20 pieces needed for the 1/8″-thick dividers, which separate the chisels in the drawers. Coming from my modern shop and walking into the fair in my 18th century costume, I felt like someone from the U.S.S. Enterprise having just been beamed down to a less technologically advanced civilization.
While I did manage to uphold the prime directive by making my original till entirely with hand dovetails, when it came to this article, both editor Joanna Werch Takes and I felt that readers should have as many construction options as possible. The carcass can be hand or machine dovetailed (the size is within the capacity of most jigs), or it could be finger (box) jointed. The drawers in this piece require very fine dovetails: not a good size for your first attempt at hand cutting. I’ll show you a different method.
Drawer and Case Dado Layout
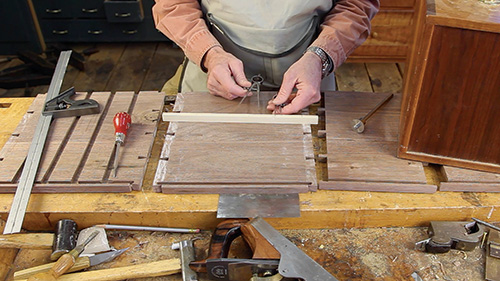
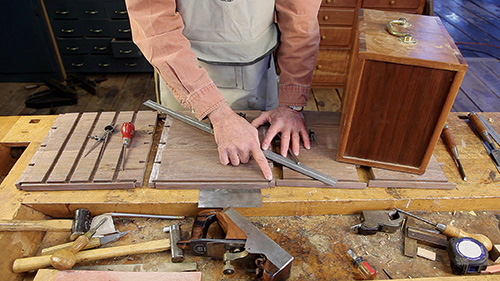
An early step in this project is laying out the dadoes in the carcass to hold the drawer partitions and the dadoes in the drawer fronts and backs to hold the interior dividers. It’s a challenge to lay out these dadoes so that they hold the pieces snugly and have absolutely equal space between them.
The easiest way to lay out the spacing is with dividers. Set a small set of dividers to 1/8″ or 1/4″, depending on if you’re measuring in the drawers or on the carcass. Calculate the remaining space, divide it by five, and set a larger pair to this figure. Now adjust this set of dividers until you can step everything off perfectly for the five drawers or five tool storage spaces. I generally do this layout on a strip of wood, which then becomes a story stick for the project.
Drawer Construction
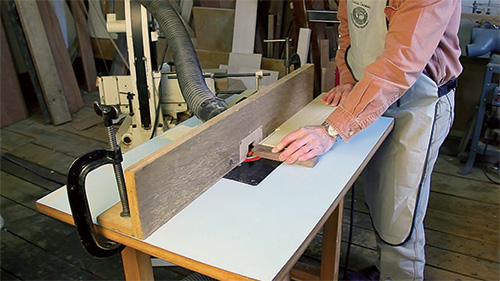
I chose to make the drawers for the example in this article with drawer joints, using a specialized bit in my router table that cuts both halves of the joint with the same setup. This joint is very fast and easy to cut and makes a strong drawer. It is especially suitable for small drawers. Setup takes some sample cuts to get everything perfect but, once achieved, milling is very fast.
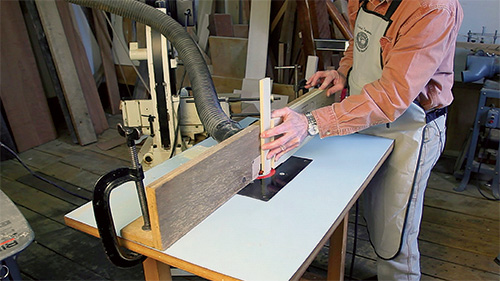
Fronts and backs of the drawers are run horizontally on the router table long a miter fence (a square block of wood works fine for this purpose), with the sides being run vertically. The inside face of the drawer is always against the table/fence.
Dovetailed drawers with solid wood bottoms have a back that is 1/2″ narrower than the front to allow a solid wood bottom to go under the back and allow for wood movement. If using plywood for the bottom, you can make the back the same size as the front and plow a groove in it as well. This is because plywood is dimensionally stable.
A starting point in setting up the Freud 99-240 cutter I used for this joint is to have it 25/64″ above the table and protruding from the fence 9/32″. Only raising or lowering the bit is necessary to get a perfect fit, but use fresh test pieces on both halves of the joint with every test! Once you have a good fit, keep the test pieces for speedy setup next time.
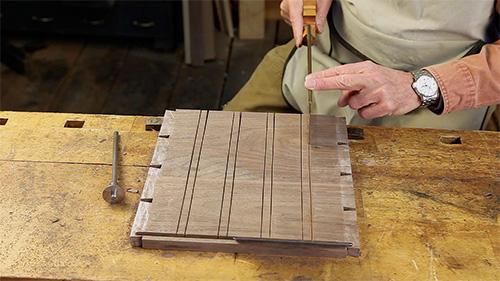
I cut the 1/8″ dadoes for the drawer dividers with a back saw but removed the waste with a 1/8″ chisel. Like the carcass, these dadoes have to be stopped at the groove for the bottom. This job can be done handily on a router table with a miter gauge, but a positive stop has to be clamped to the table to stop the dado shy of the groove. The last bit of waste may have to be cut out with a small chisel or a knife.
The drawer bottom fits into a groove plowed in the drawer front and sides.
Case Construction
This till has no face frame. You will need to cut dadoes and a groove into the carcass for the drawer compartments and the back panel.
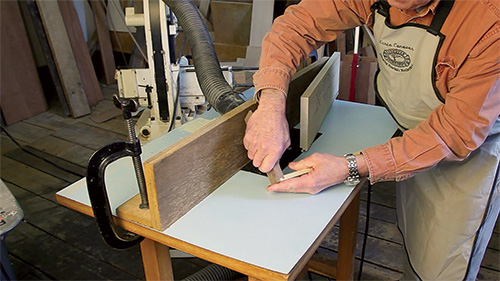
The back panel is housed in a 1/4″ groove located 1/4″ from the back edge of the till. This groove has to be stopped to hide it from showing through on the back edge of the sides of the carcass. Because of this, it’s a good idea to make the half pins at either edge of the pin board a bit less than 1/4″ to negate having to stop the groove in the top and bottom as well. These grooves are easiest to do in a router table (stopping a groove of this short length is tough sledding with plow and router planes!). Compartments for the drawers are created by wood support partitions that are housed in dadoes cut into the carcass.
The dadoes in the carcass for the partitions must be stopped at the back panel groove. You can achieve this on a router table, but you’ll need a positive stop, and you’ll need to cut the final portion where it meets the groove for the back panel by hand with a chisel. In my case, I chose to do my dadoes for the example project in this article the same way I did for the original till. I first cut the edges of the dadoes with a carcass (filed crosscut) saw, then removed the waste with a router plane.
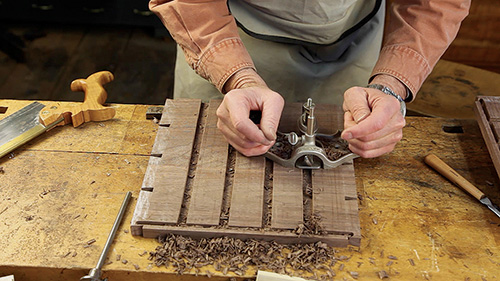
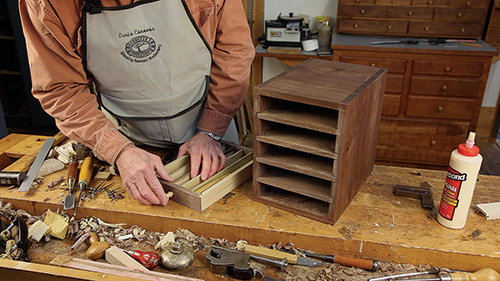
I glued up the carcass, making sure the joints fit tightly, then used hand planes to bring all the dovetails down flush. The drawer partitions do not touch the back panel: this is to allow space for expansion and contraction of the wood. They are slightly tapered so that they fit more tightly into the dadoes the farther back in the carcass they go. You will have to push hard to insert the partitions! Use a mallet to bring them flush with the front of the carcass. Only use a drop or two of glue at the front edges of the partitions; you want them to float within the dadoes.
Your drawers should slide too far into the carcass at this point. You need to install drawer stops by gluing 1/8″ x 1/2″ x 1″ rectangles to the top of each partition 5/8″ (the thickness of the drawer front) from the edge to stop the drawers flush with the face.
Handle Options
As you can see in the photos of my different versions of this till, you have several options for creating the handle on top of the box. You could purchase a brass hardware handle or sash pull, as I did for the original, or you could turn a wood handle as seen in the lead photo of this article.
Since I wanted my turned wooden handle to be able to support the weight of the tools contained in my till, I chose to construct it with square tenons on the bottom of the support ends, which fit into mortises I chopped into the top piece of the carcass.
Finishing Strategy
I applied four coats of finish to the completed chest. I used Waterlox, but any oil finish would be fine. I sanded to 180-grit before the first coat and sanded successive coats in wet with 220-grit paper. I did not finish the inside of the drawers, or the carcass beyond about 1″, as this is the way our forefathers would have done it.
Although this till/chest is designed for carving chisels, it could just as easily house jewelry or other items. In fact, I am going to add cross partitions to this one and give it to a dear friend of mine to keep his fishing flies in.
Click Here to Download the Drawings and Materials List.
Hard to Find Hardware
Freud® 99-240 Drawer Lock Router Bit 1/2″ Shank #31202
Solid Brass Sash Pull #70458


