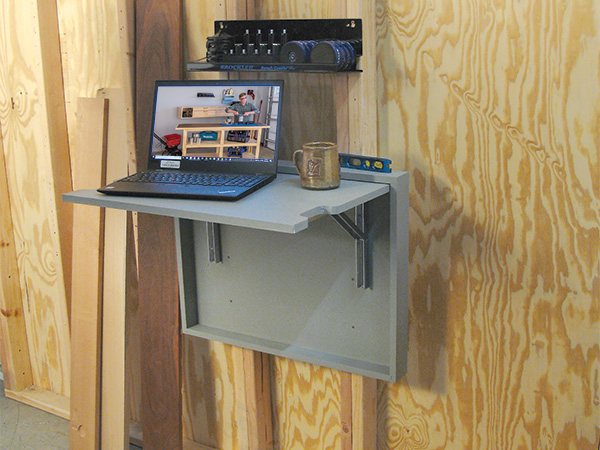
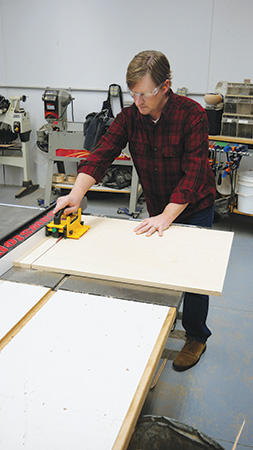
No matter how much I continue to dream about having a dedicated shop space, the fact of the matter is, I do my woodworking in a cramped garage that also stores two cars. So for me, every bit of usable, horizontal work space counts!
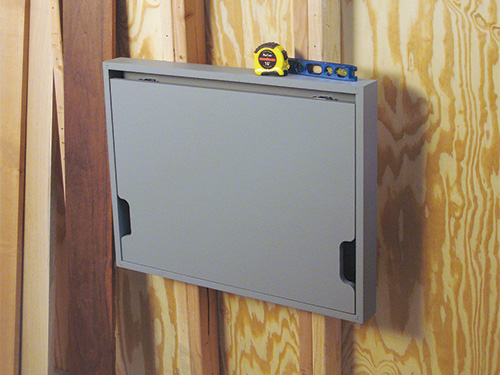
This shop desk project came about when I ran across Rockler’s Folding Shelf Brackets recently. They close by squeezing a release latch on the upper leg and lowering them. It didn’t take much daydreaming or time in SketchUp for me to create the plans that now give me the occasional desk space I need. I’m finding it to be a useful landing pad for my laptop when I’m watching a how-to video online. It’s also a handy place to spread out project plans or to stage small parts and tools as I work. And then, when I’m done using the desk, I can fold it down and out of the way until the next time I need it. But, while my desk is out in the garage, the range of alternative uses for it is truly wide open, so don’t limit your options to just woodworking.
Think Outside the Shop for Other Uses

There’s no reason why a practical, space-saving project like this needs to be pigeonholed to a shop setting! If you add one of these folding desks to your garden shed, you’ll have a work surface for amending potting soil in a planter, changing the chainsaw spark plug or whatever task can be made easier by working at standing height. Same goes for the laundry room: a prop-up counter could serve as a place to set the iron while it cools or to fold socks. If the hunting shack is short on counter space, here could be a place to refill the lantern, dismantle a hand gun for cleaning or sort your tackle box lures.
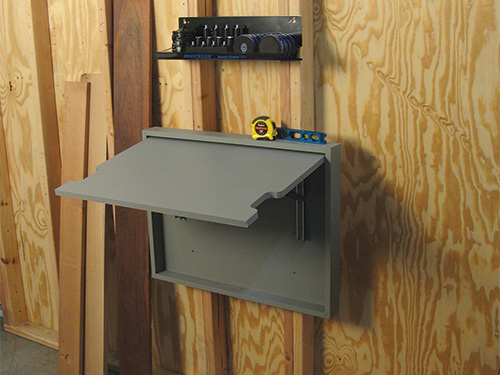
And don’t overlook the ways you could customize the design further: the shallow space behind the desk could store a clipboard and drawing pad, your measuring and marking tools or a rack of chisels. Add a groove or a simple pencil tray along the front edge of the desk, and you’ll never have pencils rolling off. For even more durability, cover the desktop with a scrap of plastic laminate so it won’t absorb stains or other chemicals while you’re mixing or pouring them. And an additional point of note: these brackets have three locking positions from partially to fully raised. Here’s a project with many possibilities!
Parting Out a Pair of Panels
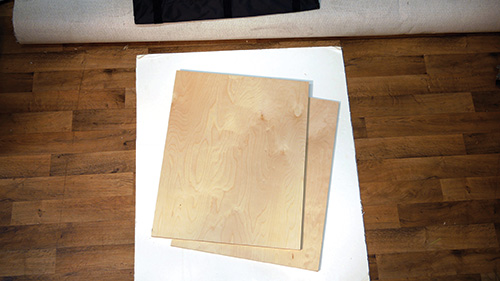
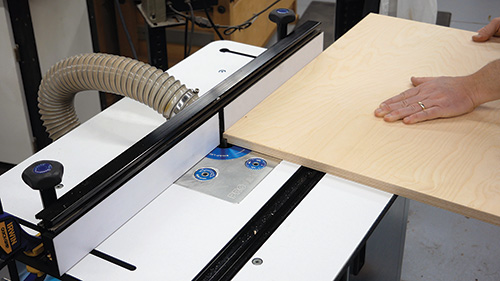
I ordered a couple of 24″ x 30″ Baltic birch panels from Rockler, which will provide just enough material for all the desk components if you cut them carefully. The Panel Cutting Diagram shows the sequence of steps to harvest the parts efficiently. Start by crosscutting a 2-3/4″-wide strip off of one end of each panel for the two side pieces of the desk’s case. Then turn the panels longways and rip a second strip to the same width for the case’s top and bottom.
Trim down what’s left of the panels to form the desk surface, and crosscut the top, bottom and side strips to their final lengths, according to the Material List. Leave the back panel slightly large for now. If you haven’t worked with Baltic birch before, be advised that the surface veneer can splinter if you use a dull or dirty blade. Use your best blade, just to play it safe.
Adding Corner Joinery
When you study the Exploded View drawing, you’ll see that the top, bottom and sides of the desk’s case interlock at the corners with rabbet-and-dado joints — they’re easy to machine and very strong. The case’s back panel has rabbets along its wide ends that fit into grooves in the top and bottom pieces to lock it in place.
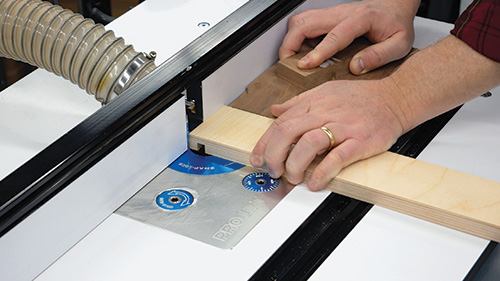
I opted to cut the corner joints at my router table using a 3/8″-dia. straight bit. If you decide to do the same (you could also cut the joinery with a dado blade at the table saw, if you prefer), raise the bit to 3/8″ and lock your router table fence 3/8″ away from it.
Plow a dado across the end of each side piece and into the same face of the parts. Because these side pieces are so narrow, be sure to back up the cuts with a scrap piece to prevent the workpieces from skewing away from the fence as you push them over the bit. A backup piece will also prevent the plywood from blowing out along the back edge as the router bit exits the cut.
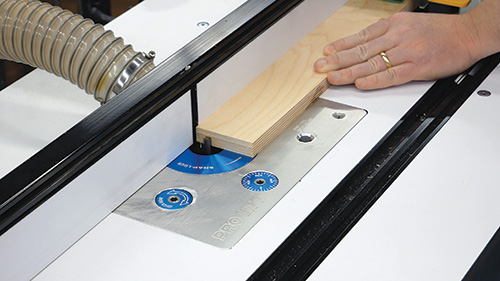
Once those dadoes are milled, it’s time to rout a 3/8″ x 3/8″ groove into the top and bottom pieces of the case. These grooves are inset 3/8″ from the part edges, so your router table is already set to go from the previous dado cuts. Plow a groove into each part, keeping the workpieces pressed tightly against the fence and pushed down firmly so the grooves will have a consistent depth all along their length.
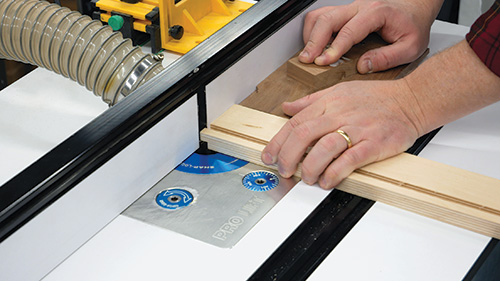
The top and bottom pieces require rabbets on their ends to fit the dadoes you first cut on the side pieces. Here’s where the router table fence needs to be adjusted and, quite possibly, your bit height, too. Shift the fence forward so the bit has a full 3/8″ exposure but no more. Make a test cut on some scrap of the same thickness as your plywood, and see if the test rabbet fits the case’s side dadoes. If the joint is too tight, raise the bit a tad. If it’s loose, lower the bit instead. Once that’s dialed in, mill the rabbets on the top and bottom pieces. Again, back up these cuts with a scrap that stabilizes them and prevents blowout.
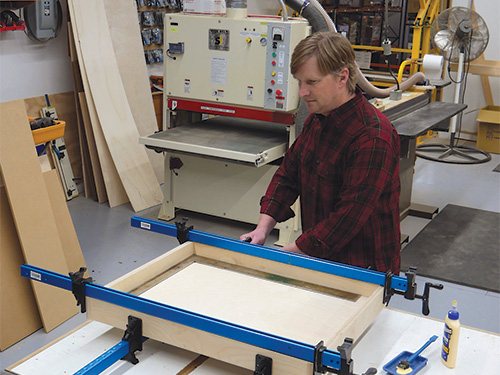
Dry-fit the corner joints, and take an inside measurement of the frame’s width and height to verify the final dimensions of the back panel. Cut the panel to size, then head back to the router table to mill a rabbet along its top and bottom ends using the same router table settings. When that’s done, carry out another dry assembly of all the parts. If the joints close well and the back fits its grooves properly, give the pieces a final sanding to 120-grit (for painting) or 180-grit (for a clear finish) and glue and clamp the case together.
Forming Handle Cutouts
Two cutouts along the edges of the desk surface enable you to simply reach in and lift up to lock the desk into place for use.
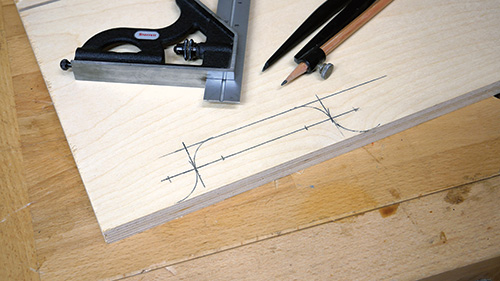
Lay out these handles 2-3/4″ in from the front edge of the desk surface, using the Drawing as your guide.
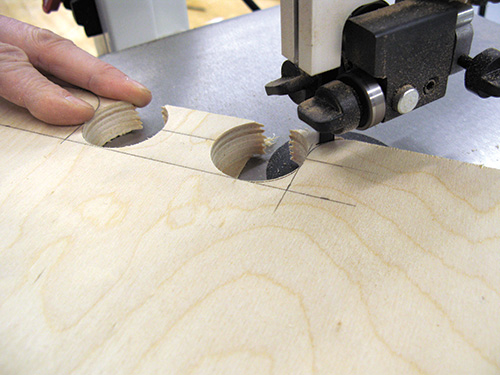
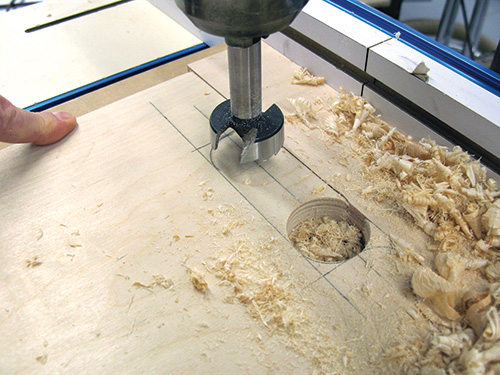
I cut the handles to shape, starting at my drill press with a 1-1/2″-dia. Forstner bit, to form the two inside curves.
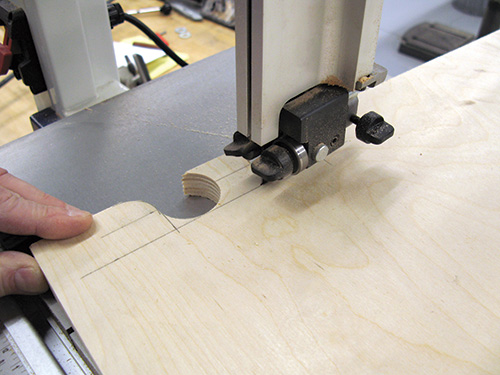
Once those were bored, I trimmed the outside curves and removed the inner waste piece at my band saw.
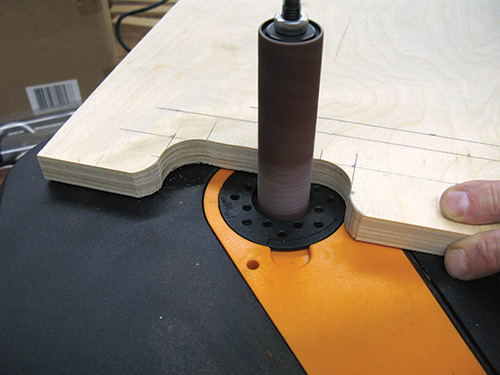
Then, I fired up my benchtop spindle sander and gave the cutouts a final sanding to blend and smooth the curves.
Mounting the Brackets

Attaching the shelf brackets to the back of the case isn’t hard, but what’s critical here is that these brackets are exactly parallel to one another and to the sides of the case. If they aren’t, they can bind when they are closed. I first positioned the wider (release latch) legs of the brackets 3″ in from the narrow ends of the desktop and attached them to it with short screws driven into pilot holes. Then, with the brackets opened, I set the desktop into the case, pushed it up against the case top and adjusted it side to side for even clearance. I drew layout lines to mark the brackets’ narrower leg locations and attached the legs to the back with more screws. Test the up-and-down action of the desk, and make any adjustments to the brackets until they articulate smoothly. With that done, remove them so you can prime and paint the wooden parts. Or topcoat them with your favorite clear finish.
When the paint or finish dries, reinstall the hardware. Now, call a buddy over to help you mount this project to a wall. Of course, the right approach is to anchor the back to two wall studs, so locate their spacing with a pair of parallel layout lines on the inside face of the case back. Have your helper hold the project in place on the wall so you can lift the desk surface up and decide on a working height that’s most comfortable for you. Mark six installation screw locations on your stud layout lines in the case. Drill pilot holes, and drive 3″ deck screws into the wall to mount the desk. Then, put this handy desk to work!
Hard-to-Find Hardware:
Folding Shelf Bracket, 16″ (2) #65806
3/4″ Baltic Birch Plywood, 24″ W X 30″ L (2) #63453


