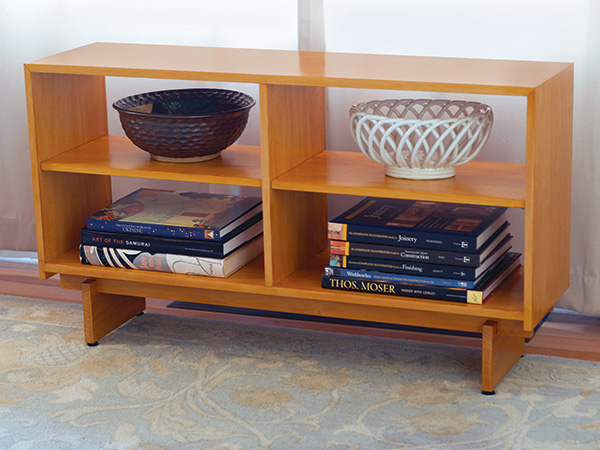
As our lives become ever more digital and on-demand, the need for storage becomes less important than the need for a high bandwidth connection, which was the scenario facing a customer new to a tiny home. With a design brief that called for a compact TV stand with room for a small media collection in a modern style, I immediately thought of a series of cases George Nakashima designed in the 1950s. Although he is more well known for his organic designs incorporating live edges, Nakashima’s earlier work is in the Mid-Century Modern style. While fitting in with the style of the period, these minimalist designs hint at the future direction Nakashima’s work would take. A composite design in this style would also serve my client’s desire for a minimalist stand to house a modest media setup.
Taking cues from several Nakashima pieces, my final design features a half-dovetailed case over a rectilinear base joined with half-laps. The flexible design can be scaled to fit larger TVs or serve as a low bookcase under a window. The case is joined with halfblind dovetails at the upper corners and dadoes at the bottom, with a vertical divider dadoed into place at the center. While the two shelves could be fixed in dadoes, I chose to use adjustable pins so the owner can add more shelves at a later date, if desired. I used wide, vertical-grain fir for the case, which prevented me from having to glue up panels. To carry the straight grain figure around to the front and back of the console, I applied shop made banding to the edges.
Starting with Dovetails
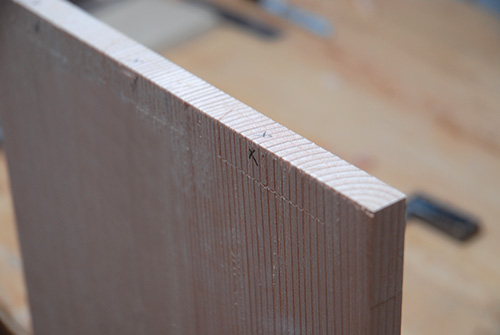
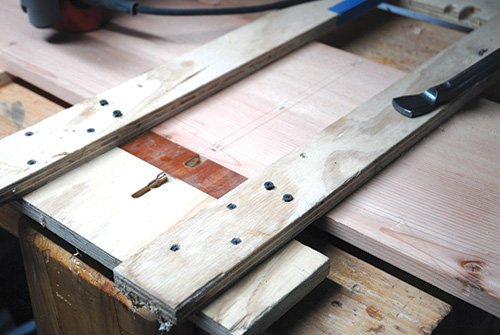
Begin by cutting the top and sides to final width, then plow a 3/8″-wide rabbet 1/4″ deep on each end of the bottom face of the top. The rabbets’ shoulders make it easier to mark the dovetail pins and also strengthen the case against racking. Once the rabbets are cut, mark tails on the ends of the top panel.
For the 12″-deep case here, I used three 2-1/2″-wide tails spaced 1-1/4″ apart and set back 1″ from the front and back edges, but this spacing can vary based on your personal preference and the depth of your case. Remove the waste between the tails using your preferred method.
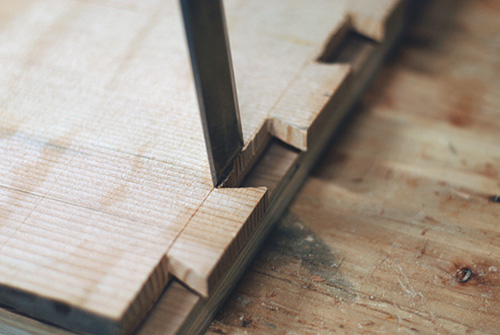
The wide spacing between my tails allowed me to remove most of the waste on the band saw before paring to my layout lines with a sharp chisel. To finish the dovetails, position each end of the top panel over its mating side panel, and mark the locations of the tails with a sharp knife before cutting the sockets.
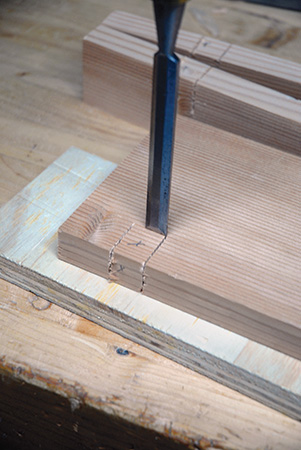
There are various ways to cut dovetail sockets, ranging from routing the bulk of the waste away before cleaning the joint with a chisel, or carefully paring the joint.
I cut a series of kerfs in the waste area, sawing close to my layout lines, then chop out the waste with a chisel. Once the bulk of the waste is clear, I pare to my layout lines with a chisel and test fit until I have a neat joint.
Adding Dadoes and Rabbets
To plow the stopped dadoes for the case bottom and vertical divider, I used a 1/2″ straight bit in a router guided by a simple jig composed of two rails joined by parallel fences.
A cut in the fence aligns the jig with layout lines on the workpiece, and the parallel rails guide the router precisely.

Position the jig, clamp it in place and plow each 3/8″-deep dado in a couple of passes. It’s easy to forget that these are stopped dadoes, but start each joint with a plunge cut, and stop routing before you reach the end of the board.
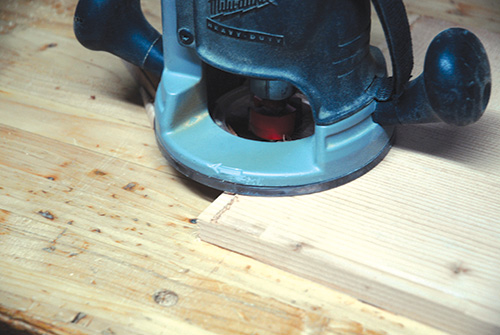
A 3/8″ rabbeting bit set 1/8″ deep makes quick work of forming the tongues on the ends of the case bottom and center divider — rabbet both faces of these panel ends.
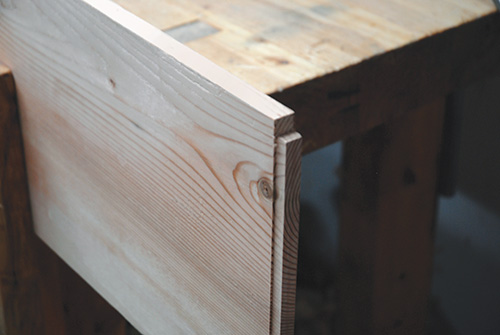
Then trim the shoulders of the tongues so their overall length matches the dado lengths.
Prefinishing Before Assembly
When possible, I like to pre-finish parts before assembling them. For this console, that meant finishing the case’s interior surfaces before putting it together and then finishing the outside of the case after it came out of the clamps. I started by sanding the case parts, working up through the grits to 220, then applied blue painter’s tape to the joinery to keep those surfaces bare. I wiped a few coats of garnet shellac on both sides of the divider and the inside faces of the case. After the shellac cured, I wet-sanded by hand using denatured alcohol and 320-grit wet-dry paper to smooth the finished surfaces further.
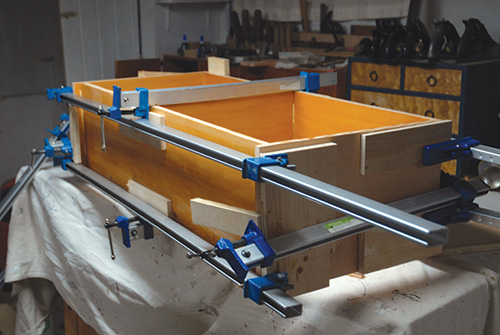
At this stage, you can remove the painter’s tape to prepare for assembly. The glue-up isn’t complicated, but its sequence matters. Begin by joining the sides to the bottom, then insert the divider into the bottom. Finally, place the top. Carry out a dry fit first before opening the glue bottle to practice the sequence and ensure that the joints fit together well.
Applying Edge Banding
Edge banding is usually reserved for covering the exposed edges of sheet goods to make the edges more attractive. Here, it actually serves the same purpose. Depending on your wood choice, you might decide to skip this step, but in this instance, adding edge banding enabled me to wrap the vertical grain pattern from the faces of the case around to its front and back edges. Applying banding to both edges also keeps the appearance of the console consistent if it should happen to be positioned away from the wall.
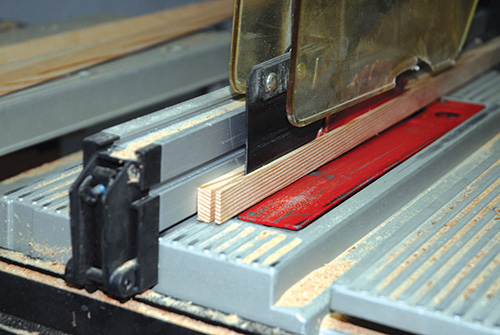
I ripped strips of edge banding on the table saw, cutting the stock 1/8″ thick from a board that was slightly thicker than the width of the edges I was facing. While it might be tempting to set the rip fence just 1/8″ away from the blade to make these repetitive cuts, I think it’s safer to set up these cuts so the strips fall away from the blade instead of being trapped between the blade and the fence. This requires me to reposition the fence for each cut, as the workpiece gets progressively narrower. But if you set each cut up carefully, you can still end up with strips that are all the same 1/8″ thickness.
I wanted to ensure a tight fit between the pieces of edge banding, so I applied it in stages, gluing only a piece or two at a time. If you’re impatient, a brad or pin nailer can speed up the process, but I prefer to take my time using glue and clamps alone to avoid the need to fill any nail holes.
I began by applying a piece to the top edges, cutting strips of banding to length and mitering both ends at 45°. After applying a thin layer of glue, I clamped the trim in place, taking care that its inner edge was flush with the inside edge of the case. The outer edge of the trim should stand slightly proud of the case and will be trimmed flush later.
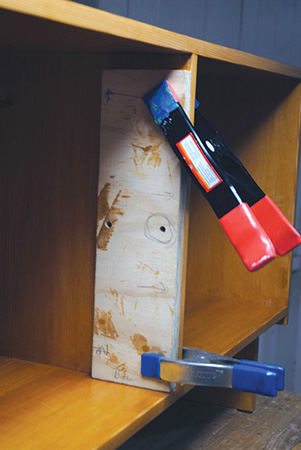
The side edge banding came next. I cut these pieces a little longer than their finished length and mitered the top ends. When gluing them on, again take care to make sure their inside edges are flush with the case’s inside edges. After the clamps come off, trim their bottom ends flush with the bottom face of the case with a utility knife or hand saw.
With the sides covered, move on to the bottom piece of edge banding. Cut it to fit tightly between the side banding, and glue it in place. Finish up by gluing the center pieces of edge banding onto the divider, leaving both edges proud of the divider.
I used a piloted flush-trim bit in my trim router to trim the edge banding flush with the case and cleaned up the inside corners with a chisel, but a block plane would work, too. Depending on your taste, you could also apply a small roundover or chamfer to the outer edges of the banding, but I simply eased those with a sanding block. Once that’s done, do any touch-up sanding and apply finish to the outside of the case.
Installing the Shelves
Next comes the two adjustable shelves. Cut panels for them that are 1/8″ shorter than the width of the console’s openings. Install edge banding on their front and back edges to continue the vertical grain pattern here. Once that’s glued in place and trimmed flush, sand the shelves and apply finish to complete them.
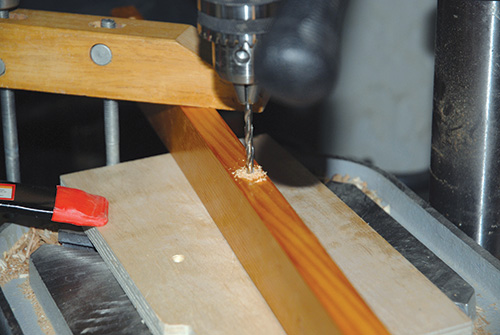
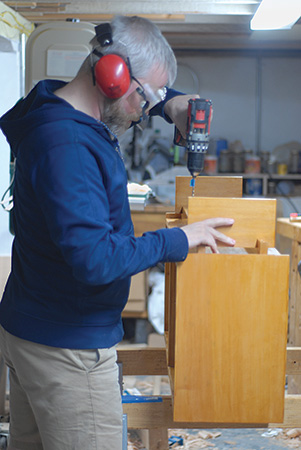
To hang the shelves, I created a basic drilling jig for positioning the shelf pin holes inside the case. It’s just a length of scrap cut slightly shorter than the case opening with a pair of holes drilled at the desired height and set back about 3/4″ from either edge. To use the jig, clamp it in place with one of its edges flush with the front or back of the case, and drill the shelf pin holes about 1/2″ deep. Though they aren’t necessary, I also added metal shelf pin sleeves to these holes to lend a more refined appearance to this aspect of the build.
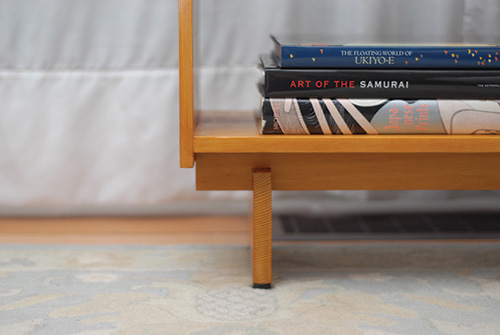
Building the Base
The key design elements of the case — its overhang and setback — carry through into the base, with the stretchers extending past the feet and the feet set back from the edges of the case. I joined the stretchers and feet with simple half-laps. Cut the parts to size, and drill pilot holes through the thickness of the stretchers at the drill press for eventually screwing them to the case bottom.
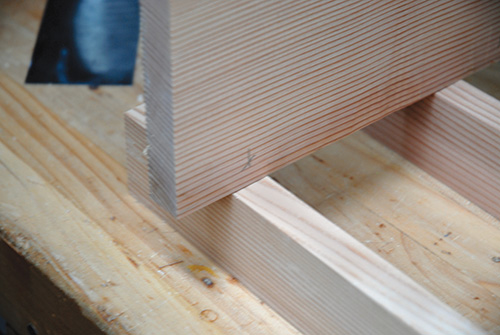
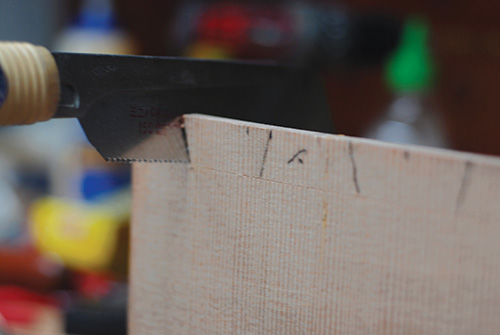
Next, arrange the stretchers and feet in their correct orientation, and mark the stretchers for the cross-lap pockets, using the feet to set the actual width of these cuts. I cut the pockets with a Japanese pull saw and chisel, first making parallel saw cuts, then chopping away the waste in between them.

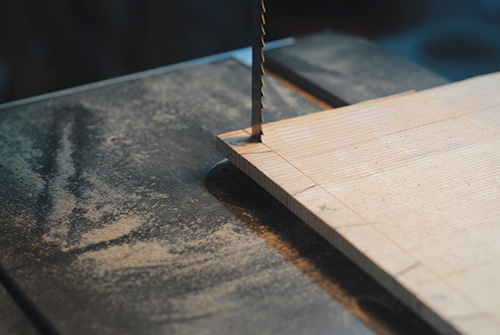
These joints can also be cut on the band saw or using a dado blade on the table saw. Fit the stretchers and feet together; if the joints are too snug, I find it’s easier to plane the long grain of the feet until they slip into the joint pockets. It’s much easier than paring or filing the end grain inside the pockets to fit the feet that way.
When the joints slip together as they should, drill countersunk pilot holes and drive a screw through each half-lap joint to lock the parts together. Then invert the case, position the base for an even overhang all around, and drive screws through the stretchers and into the bottom panel to attach these components.
With the console still inverted, drill the four installation holes for the adjustable chair glides. Install the glides, and turn the console right-side up. Slip the shelves into place on shelf pins and this project is ready for your living room or, in my case, delivery to a happy client.
Hard-to-Find Hardware:
Black 1/4″ Pin Supports (1) #22781
Black 1/4″ Sleeves (1) #22872
Polished Nickel Glides-Screw Chair Glides (1) #12295
1/4″ Hex Drive Threaded Inserts (1) #31872


