When I arrived at the seller’s home, a man in his late 50s directed me to a building 35 yards from his back door. He was rail-thin with patchy gray hair, watery eyes and a quavering, nicotine-stained handshake.
He pointed through the building’s overhead door at a stickered pile of wood tucked into a dark corner. He explained there was more out back. Then, with a rasping, expectorant-laden cough, he retreated to the house.
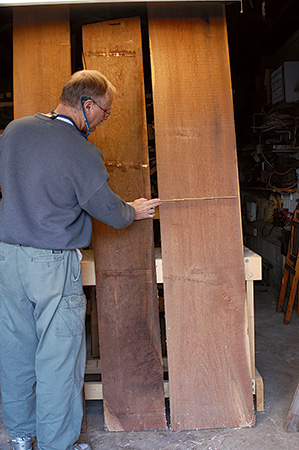
Moving aside battered hand tools, cases of motor oil, bits and pieces of machinery, I unearthed a stickered pile of rough-cut 5/4 cherry and walnut planks. The top layers were scattered with knots and splits and wane, but as I worked my way into the pile, the quality of the material improved. I dug deeper, and suddenly, I was face-to-face with some breathtaking material: boards 16″ wide, 10 to 12 feet long, composed entirely of clear, straight-grained walnut heartwood. In half an hour, I pulled out a dozen planks of the finest American hardwood I’ve ever seen.
I heard a door slam at the back of the house, and a woman approached the building in which I was working. She, too, was about my age. She was the sister, she explained. Her brother had cancer, and the material he’d cut some years ago with the intent of someday turning it into furniture for his home he now wished to turn into cash because he had no medical insurance. And that’s where the story of this highboy begins.
Arriving at a Design
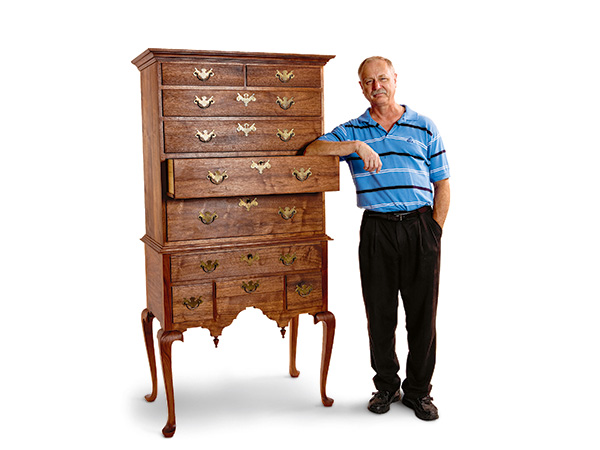
I scaled up the measured drawing for this piece from a photo on page 185 of Albert Sack’s The New Fine Points of Furniture, but like the craftsmen who made the original American Queen Anne pieces, I varied from my source in order to suit the tastes of my customer — in this case, myself.
First, although I liked the informal grace of the original I was using as my model — a 1747 highboy built by Moses Bayley and Joshua Morss of Newbury, Massachusetts — I wanted my version to have a more stately posture, so when I drew the leg profile, I reduced the sweep in the leg’s cyma curve. I also changed the moldings at both the cornice and the waist. The waist molding on mine extends almost an inch beyond the surface of the lower case, whereas the waist-molding on the original has no overhang at all. Finally, the cornice molding on mine is different than the cornice molding on the original in two respects: First, like Bayley and Morss, I composed mine of elements that could be made with the tools I had on hand. Second, I gave my cornice molding an overall contour that leads down into the upper case in a curving line unlike the essentially straight line that leads the eye down into the piece on the original. I did this hoping to echo the curve in the cabriole legs at the bottom of the piece.
Since I didn’t have access to the original highboy, I don’t know any details about its internal parts, but I suspect it lacks some of the features I added to my version. For example, I installed two layers of sliding trays to the top drawer of the lower case. I also added three secret compartments to my edition. One of those will appear in the final installment of this project next week, and the other two are — well, secret.
Starting from the Ground Up
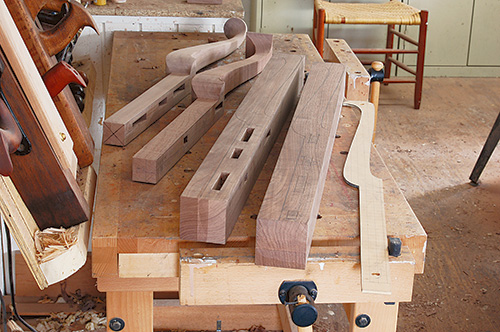
The fabrication of this highboy’s four cabriole legs demands a considerable investment of time. If you’re a first-timer, please don’t be disheartened if, after a week of hard work, you’re still working on them.
Begin by squaring up your leg stock. The blanks should finish out at a minimum of 2-7/8″ on a side with a length of 36-3/8″. This length includes the finished length of the leg (35-3/8″), plus one additional inch which is necessary if you decide to turn the foot on the lathe as I do. Once the leg has been squared up, trace your leg pattern on one face of your blank. Then place the pattern on a face adjacent to the one on which the pattern is marked, making sure the back corner of the post at the top of the leg meets the back corner of the post on the previously marked face.
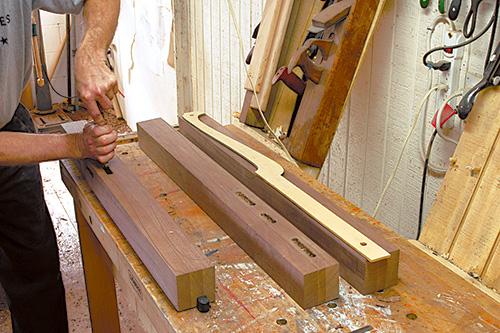
Once the cabriole shapes have been marked on two adjacent faces, mark the locations of the various mortises each post will require. Remember that no two posts have exactly the same mortise arrangement. There is a right and left front post and a right and left back post, with each of these four requiring a different mortise layout.
Next, chop each of the mortises. While this can be done after the legs have been shaped, it is much easier to do when the stock is square in cross section. I used a Forstner bit in my drill press to rough in these mortises. I then squared them up with a paring chisel.
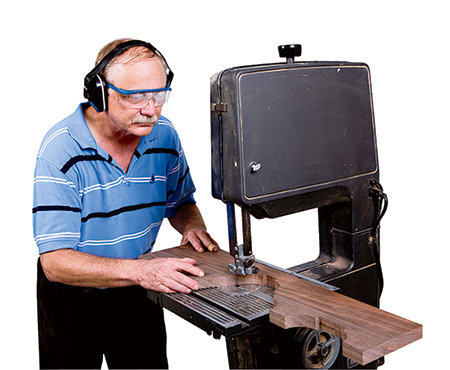
Careful work on the band saw will save you time when you later move to hand tools to fair the surfaces of the cabriole legs. (I would recommend that you not use a skip-tooth blade because you want the surfaces to be reasonably smooth.) Plan your cuts so that the pieces will fall from the band saw in large sections, because you’re going to need them when you make the next set of cuts.
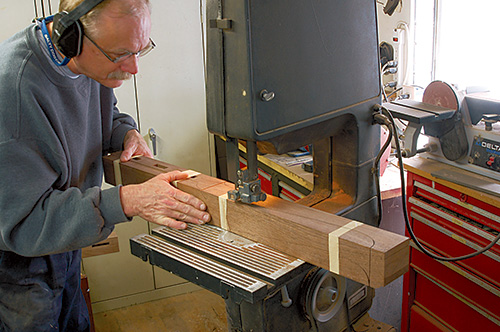
After making all the cuts on the first face, tape the cut-offs back into place. This way you’ll have a square blank to maneuver under the band saw blade when you rotate that blank 90 degrees. (You can discard the very small pieces from under the foot.)
Lay the pattern back into place on the adjacent face, and re-mark any areas that have been concealed by the tape. Then begin sawing the adjacent face. You may need to re-tape some of the pieces as you make the second set of cuts — it’s essential that you maintain a square blank throughout the sawing process.
There are two ways to shape the round foot and the round pad beneath the foot. You can lay out the foot using a compass to delineate the pad on the end grain at the bottom of the leg and then — using the circle as a reference — shape the pad and foot with carving tools and rasps. This is an effective approach, although it is time-consuming.
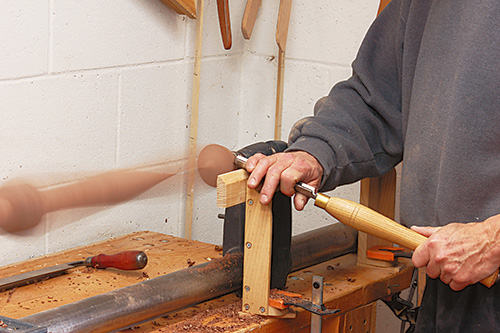
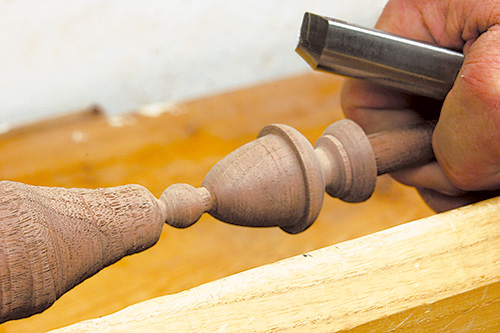
I prefer to shape the foot and pad on the lathe because it’s quicker and produces feet and pads that are truly round. I should point out, however, that this is not a technique that should be attempted by anyone who lacks experience in lathe work, because it requires you to work against an asymmetrically mounted and unbalanced form in the lathe.
To perform this work on the lathe, you must mount the centered top of the post against the drive center of the lathe and the centered bottom of the pad below the foot against the tailstock of the lathe. Place a toolrest into position and manually turn the part through several rotations to ensure that this eccentric form misses the rest all the way around.
Then — very cautiously — begin to turn the pad and foot with a roughing gouge and scraping tools. I have found that this turning process works best if you periodically remove some of the excess material above the heel of the foot with a drawknife as the foot emerges.
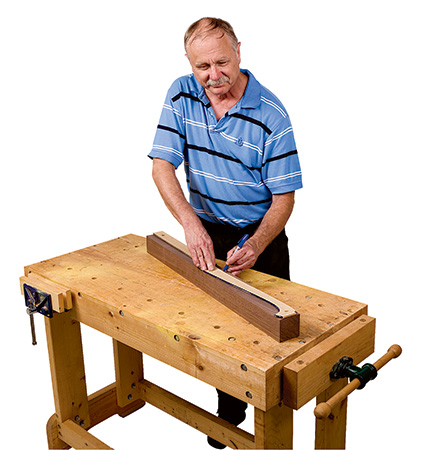
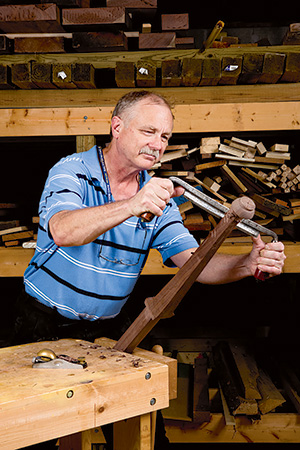
When the pad and foot have been shaped, you’re ready to create the finished shape of your cabriole leg. I find this process to be among the most pleasurable of woodshop experiences, in part because it allows me an extended opportunity to put a variety of hand tools through their paces. I typically do this work with the leg still mounted in the lathe, although it can also be done with the leg mounted between V-blocks in a bench vise.
I shape the post at the top of the leg with a block plane, finishing the bottom section of the post (just above the knee) with a wide paring chisel and a scraper. The shaping of the leg itself requires a variety of hand tools: a block plane for the convex work and a drawknife and/or spokeshave for the concave work. Use rasps, card scrapers and sandpaper to clean up any areas of torn-out grain.
If you study Queen Anne legs on period originals, you’ll see that this form is articulated in many different ways. Some makers kept hard lines where the sides of the leg meet the front of the leg. Others softened these intersections, and some, in fact, rounded them. I tend to keep these intersections quite crisp up high beneath the knee, softening them as the lines descend to the floor.
Understanding the Jigsaw Puzzle
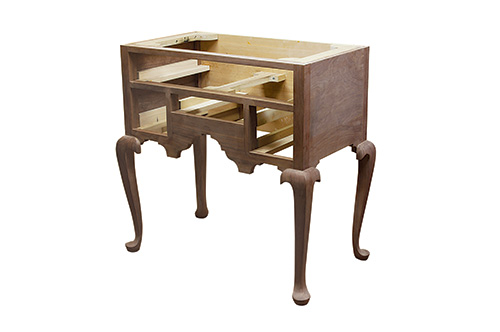
The back and sides of the highboy are simply glued-up panels tenoned into the posts. Each end of each of these wide panels is triple-tenoned into the post, and I always leave a little bit of shrinkage space on the bottom edge of the top tenon and the top edge of the bottom tenon in order to accommodate shrinkage across the grain. Sometimes I assemble the base with glue on only the middle tenon on each end of each part. At other times, I’ll glue all three tenons. It doesn’t seem to make much difference. Even though the highboys I’ve built are all living in homes with forced air heat, none — so far — have developed cracked side or back panels, something quite common in period originals.
The front of the base unit is composed of only five parts, in addition to the legs, but the fabrication of these five parts involves the cutting of quite a bit of complicated joinery, so please take some time to study the Drawings before cutting your stock. The rail beneath the top drawer of this section, for example, is double-tenoned on each end. It is cut on its back edge with mortises for two drawer runners and one kicker strip. Plus, its front edge is cut to receive the dovetail at the top of the stiles on either side of the center drawer. And the top rail has a fat dovetail cut on either end which is fit into a dovetail socket chopped into the end grain at the top of each of the two front posts. It’s complicated, but if you study the Drawings, the parts will begin to make sense.
The lower unit should be assembled in three stages. First, glue up the very simple back assembly, taking pains to ensure that the panel is square and that the posts at the top of the back legs lie in the same plane. You can check this by laying the back assembly on a flat surface, like a workbench — and it is essential that you make this check, because a back panel that is not truly flat will impart a twist to the unit of which it will later become a part. Then glue up the front of the lower unit, making the same flatness and squareness checks that you made in the case of the back panel. Gluing up these two subassemblies is a pretty straightforward process. The next one, however, is much more challenging.
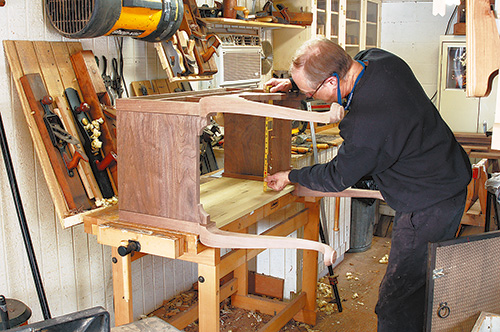
Before you can join the front and back panels, you must lay out, cut, and fit all the mortises for the drawer runners because these must be glued into place at the same time you glue the end panels into place.
When you glue the two end panels into place, you must — at the same time — glue into place all the drawer runners, as well as the kicker strip for the top drawer. Although I accomplished this glue-up working alone, it was a harrowing process, and I recommend that you have help because there are so many parts to glue up and fit simultaneously.
Once you have glued the front and back panels to the end panels and installed the many drawer runners, carefully check the alignment of the lower case before you allow it to dry. First, check to see that the front panel is exactly perpendicular to each of the side panels. You can do this with a framing square or by measuring diagonals. Then check to see that the four feet all touch the floor at the same time. You can make some corrections by racking the uncured frame, but any racking correction you make will necessarily create some slight gaps in joinery.
Finishing Touches
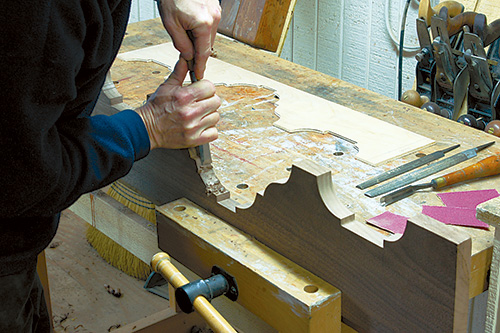
The drawer guides and knee blocks are the final steps in the construction of the lower case.
The knee blocks — which allow you to complete the lines of the leg knees — are glued to both sides of each leg at the knees, with the exception of the back sides of the two back legs which are left without knee blocks.
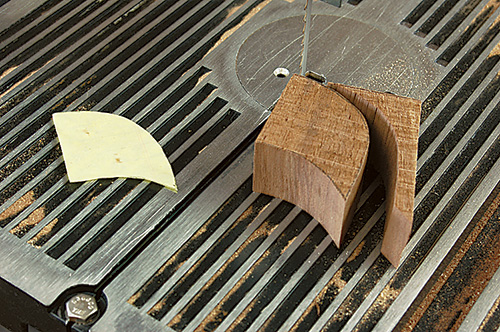
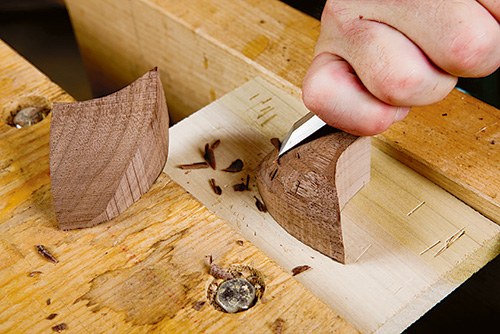
Like the cabriole legs to which they’re joined, these blocks are bandsawn in two adjacent planes, then finished with hand tools. I do the preliminary hand tool work with the knee block screwed to a bit of vise-held scrap. I then glue and press-fit the knee block into place. After waiting for an hour, I go back to that knee block and fair it into the leg’s knee with a paring chisel and sandpaper.
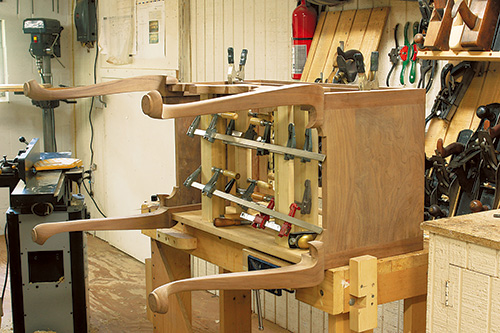
The various drawer guides should be glued to the sides of the drawer runners at this time. Because it involves so many clamps, it looks much more complicated than it is.
Once you’ve got all that done, take a deep breath, because next issue we’ll move on to the drawers and the upper section of the highboy.


