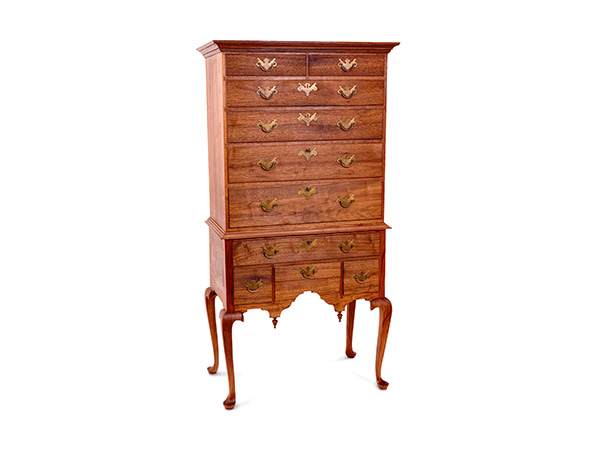
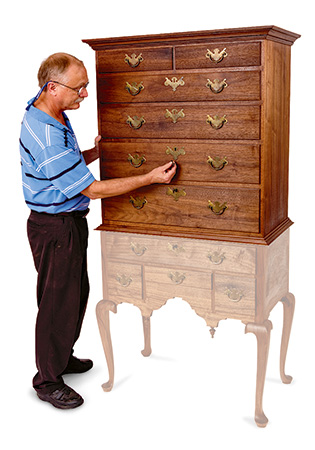
In an ideal world, I would have limitless space and time to describe the process of building this period-style highboy. As neither you nor I live in that realm, however, a reasonable compromise is this two-part tale of its construction. And this presentation has the advantage of allowing us to draw a breath in the midst of its construction.
While my highboy’s appearance varies somewhat from its historical predecessor — my moldings are more bold, my hardware of a different style — both the builder of yesterday and I, myself, are, in essence, after the same goal.
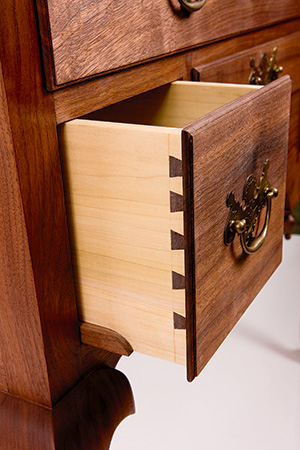
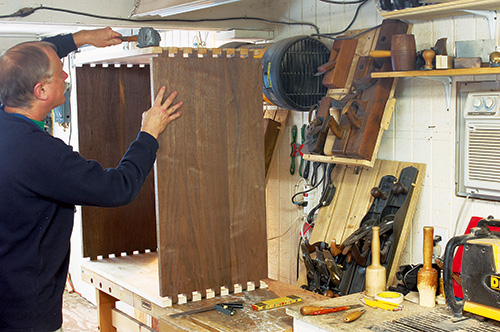
One way to look at the upper case and the drawers is that they are a study in dovetailing. A dovetail joint is more than a mechanical union of two pieces of wood. The joint also has a strong aesthetic presence, adding detail and an appealing visual rhythm to a joined corner.
In addition, because it’s widely seen as one of the defining characteristics of fine craftsmanship in wood, the joint carries a symbolic significance of great weight in the woodworking world. (Is there any one of us who hasn’t pulled a drawer from a chest to look to see if there are dovetails?)
For these reasons, many craftsmen with long personal experience with dovetail joinery have spent at least some time reflecting on the subject, thinking about how dovetails might best be used to join, to add detail and rhythm, to speak about craftsmanship. I know I have, and the upper case of this highboy is a kind of three-dimensional essay in which I articulate the principles by which I now make use of the dovetail joint in my shop.
There is Strength in Size
High-style period casework features refined dovetail work, which is typically characterized by wide tails and little slivers of pins. Although the aesthetic appeal of these diminutive pins is unmistakable, their size offers little protection against the destructive force of, for example, a drawer being accidentally dropped onto its corner. Therefore, for the most practical of reasons, I prefer more robust pins and tails, which — if executed cleanly — can be attractive as well as resistant to shock.
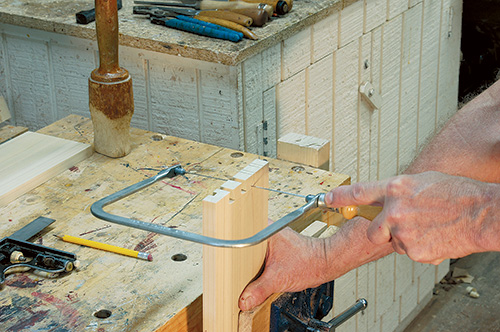
The upper case of this highboy is held together with hand-cut through dovetails at each corner. Each pin and tail is thick enough in cross-section to individually provide resistance to shock. Plus there are enough pins and tails to provide extensive gluing surface. (Although it’s probably unnecessary, I laid out my tails on the top and bottom of the case, rather than the sides, so that the case could better resist separation force in the only direction in which it could occur: laterally.)
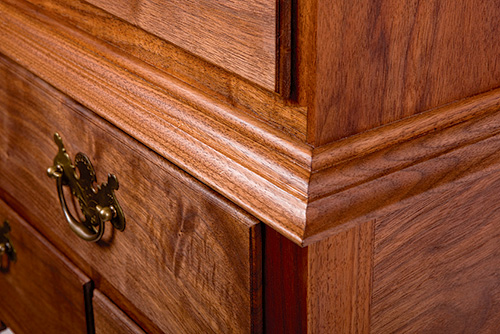
The rails separating the drawers in the upper case are fastened to the case sides with oversized dovetails, one of the very few locations on this highboy in which dovetails are visible to the viewer of the assembled piece. Here, too, the tails are robust in size to provide strong mechanical resistance to separation.
Authentic Hand-cut Dovetails
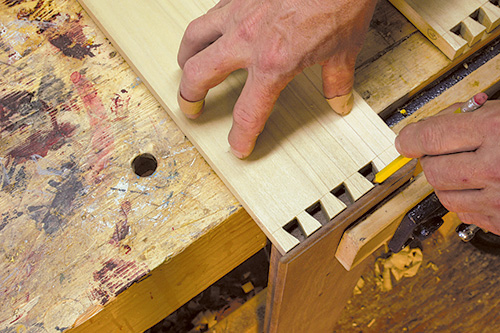
The drawers are constructed with through dovetails at the back and half-blind dovetails at the front. Hand-cut dovetails shouldn’t mimic machine-cut dovetails. So, I cut these and all the other dovetails on the case not only by hand but also freehand.
That is, I sawed them out without the aid of an angle jig or an angled reference line because, in an era in which handwork is becoming increasingly scarce, I want my joinery to be verifiably the result of the human hand.
Finally, the drawer dovetails — like the drawer dovetails on most of my recent casework — are laid out so that the tails get narrower as they ascend the side of a drawer. In fact, those tails at the bottom of a wide drawer side might be twice as wide as those at the top. Applied consistently, this approach adds a unifying element, not only to the drawers in a single case piece but also to all drawers made by my hand.
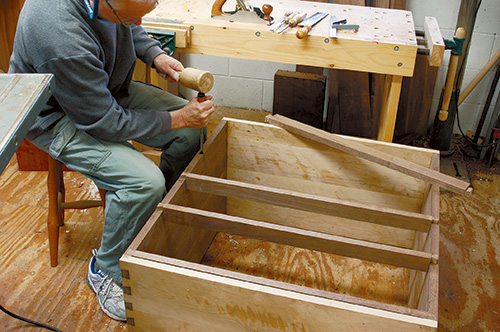
Starting with the Big Box
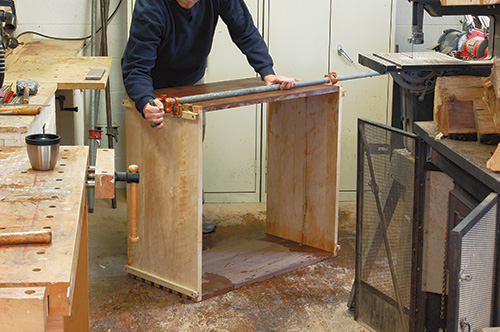
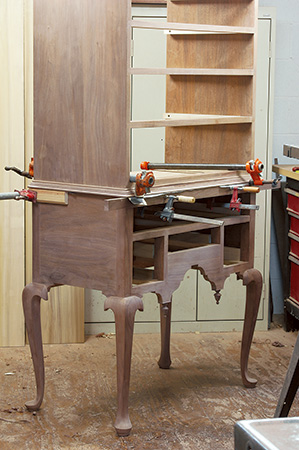
After gluing up and leveling the four panels that comprise the upper case shell, I cut through rabbets on the inside back edge of the top, bottom, and two sides. (Through rabbets were acceptable because the waist and cornice moldings would later conceal the ends of those rabbets.) I next cut and carefully fit the long rows of dovetails at the corners and glued up the case, pressing each dovetail home with a pipe clamp I moved back and forth across the joinery. After the dovetails were fully seated, I checked diagonals to verify that the case was square, and then I set it aside to cure.
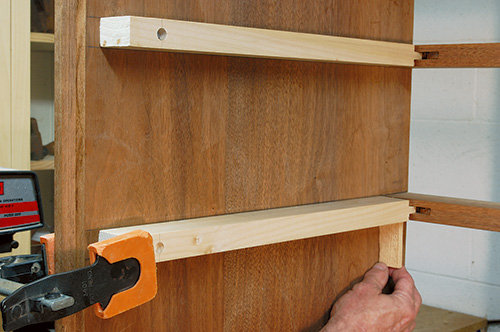
After planing the surplus length from the ends of the upper case’s pins and tails, I prepped the drawer rails. First, I plowed grooves on the back side of each rail — grooves which would later accept a tongue on the ends of the drawer runners. I then cut dovetails on the ends of each rail. Finally, I marked and cut the dovetail sockets in the front edges of the case sides to receive each of the dovetails and glued the rails in place.
The drawer runners went in next. I installed them by sliding the tongue on the end of each into its groove on the back side of the drawer rail, fastening the back end of the runner to the case side with a single heavy screw. In the case of the two top drawers, I assembled the drawer runner/kicker strip unit before attaching the whole thing in place with two screws driven up into the top of the upper case, through the kicker strips. Additionally, tenons fit into the backs of the two uppermost drawer rails. When all those members were installed, I went ahead and fit the back.
Adding Various Moldings
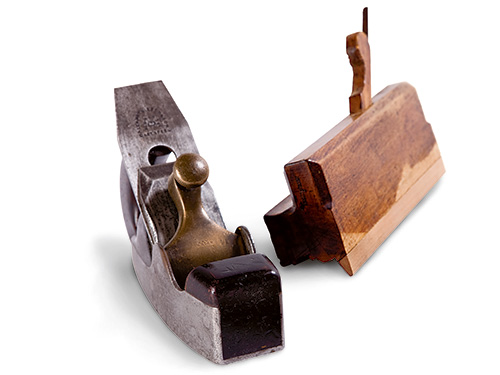
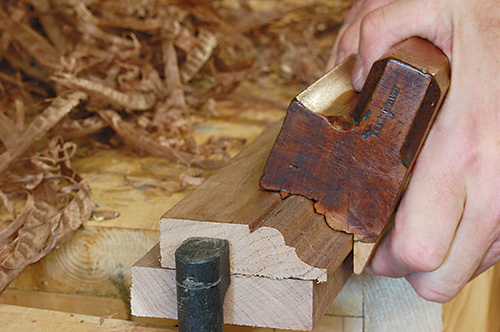
Through the years, I’ve created moldings with a router, a table saw with molding heads, scratch stocks, bench planes, and so forth. But for the last five years, I’ve been making them primarily with molding planes because, first, I think antique molding planes offer modern makers the richest available variety of shapes. Second, these antique planes are so much fun to play with. But I don’t think it much matters how a craftsman arrives at appropriate shapes, as long as those shapes can be arranged into harmonious wholes.
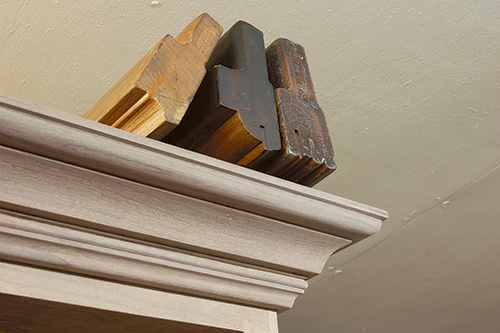
My waist molding, which wraps around the bottom of the upper case, is simply a little bubble of ascending beads marking and smoothing the transition between the lower and upper cases. The cornice molding on top of the upper case is a bit more complicated, consisting of three parts: a narrow cluster of shadow lines at the bottom, a simple cove in the middle, with a thumbnail molding at the top.
Molding installation on a solid wood highboy is inherently tricky because the horizontal grain direction of the moldings is perpendicular to the vertical grain direction of the upper case side to which they must be fastened. Obviously, the moldings can’t simply be glued in place, because after six months in a home with forced-air heat, cross-grain shrinkage of the upper case side would cause the glue to fail, and the moldings would simply pop off. This is not a problem on the front of the highboy’s upper case, because there the grain in the case and the grain in the moldings run in the same direction. Here, I simply glued the moldings in place.
It is possible to circumvent the cross-grain problem by nailing the moldings to the case side, but that approach results in unsightly nail holes that must be filled. Plus, it puts the craftsman in the position of swinging a hammer at delicate molded shapes, something that should be avoided whenever possible.
I’ve developed a different approach that allows me to install my highboy moldings securely, without visible nail holes and without any risk of moldings popping off. I do it by combining glue and hidden nails.
Nailing works in a cross-grain application like this because nails are flexible. The shanks of thin nails can bend to accommodate movement, and the holes in the material through which those shanks pass can also enlarge to allow movement. In fact, it would be possible to fasten moldings to the sides of a highboy using a technique known as “blind nailing,” which is nailing under a lifted sliver of wood which is then glued back into place over the nail head. (In fact, Stanley once made a plane-like tool — the #96 — for this express purpose.)
But blind nailing alone wouldn’t work in this application because movement across the whole width of the highboy side would almost certainly destroy a tight molding miter at the front of the case. My method involves both blind nailing and gluing. Let me explain by detailing the installation of the waist molding.
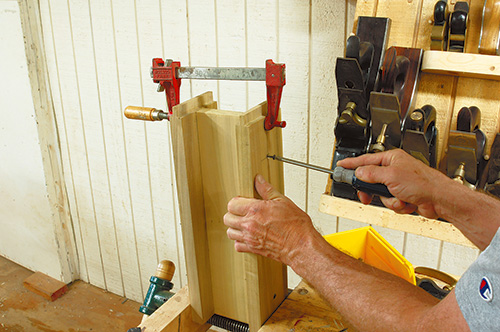
The only element of the waist molding that contacts the case side is a strip of 1/4″-thick stock with a half bead cut onto the top edge. (That bead is the only part of this strip that is visible in the completed molding.) The front two inches of that strip are glued in place so that the inevitable cross-grain shrinkage will necessarily occur at the unglued back end of the strip, leaving the miter, at the front, tight. The rest of that strip is held in place by eight to 10 small nails, so the case side underneath the strip is free to move. The nails are placed below the visible half bead and are concealed by the next layer of molding which is glued, positioned, and press fitted for a 60 count. From there, the tackiness of the glue holds the molding in place on its own.
Successive layers of molding are then glued to the outside of this first strip.
I used the same attachment process to install the cornice molding around the top of the upper case.
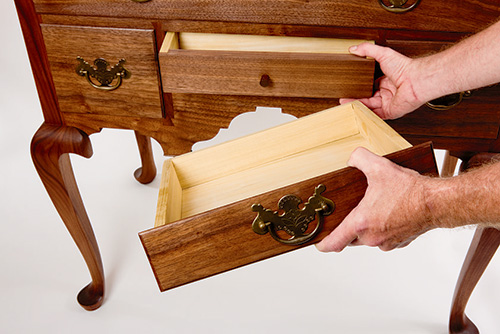
Building the Drawers
The drawers on this case are constructed with (non-period) fitting strips glued to each side. These 3/8″ x 5/8″ hardwood strips are glued to both sides of the drawers for two reasons: First, they reduce the friction when the drawers are opened and closed, and second, their presence reduces the amount of material that must be planed to fit when installing the drawers. The presence of these strips means the rabbets on the back side of each end of each of the drawer fronts must be wide enough to accommodate both the drawer lip and the fitting strip.
The front side of each of the drawer fronts has a molded edge all around with a rabbet on the back side on only the top and each end. I assembled the drawers with half-blind dovetails in the front and through dovetails in the back.
The 9/16″-thick drawer bottoms are tapered to a 1/4″ thickness on the front and both sides. These 1/4″ edges are slid into matching grooves plowed on the inside of the drawer sides and the back of the drawer fronts. The bottoms are held in place with screws that pass through notches into the bottom edge of the drawer back.
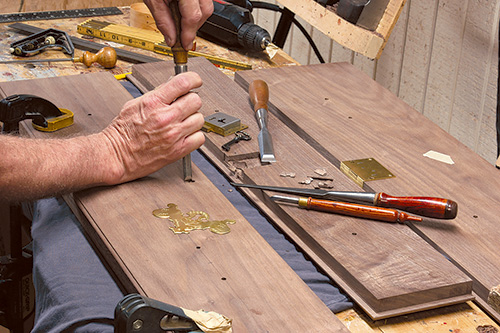
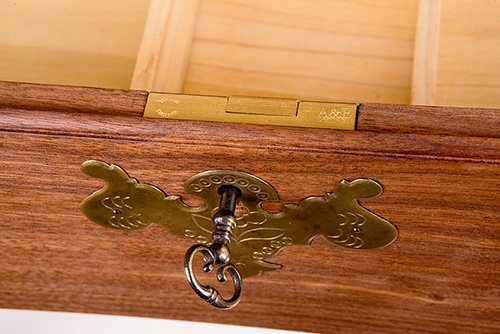
Three of the drawers have locks with escutcheon plates integrated with their respective hardware. If you choose to include this detail, you must lay out the mortise for the lock on the back of the drawer face. The lock will have a mortise and escutcheon on the adjacent rail to accept the bolt.
When the drawers are complete and fitted, attach the ship-lap back pieces and move on to finishing.
Finishing
A successful finish depends on successful prep work…in other words, sanding. I think most unsatisfactory finishes are the result of insufficient sanding. Sanding doesn’t begin after the piece is assembled. It’s an ongoing process that begins — in the case of this highboy — with the creation of the cabriole legs. After surfacing those forms with a plane, a drawknife, a spokeshave, scrapers and rasps, I sanded them with 100-grit paper, followed by 150- and 220-grit papers, each grit removing the scratches left by the previous grit. Similarly, every other part of the highboy was sanded before installation, and sanding of assembled parts occurred periodically throughout the construction process to clean up the inevitable dings and scratches that occur as a piece is constructed.
Then, when the piece was officially done, every surface was resanded, beginning with whatever grit was necessary, and progressing up through a number of grits, ending with 400-grit paper on exterior surfaces and 220-grit paper on interior surfaces like drawer sides.
I then brushed on and wiped off a blended poly designed for that style of application. When the first coat had dried thoroughly — at least 24 hours in humid Ohio — I sanded again with 400- and then 600 grit paper on exterior surfaces, 220 on interior surfaces. A second coat of finish went on next, followed by more sanding. I then applied the last coat of finish.
Once the finish has cured, I think you have earned a moment or two of proud reflection on a job well done. Like your predecessors in woodworking, you have crafted a significant project.


