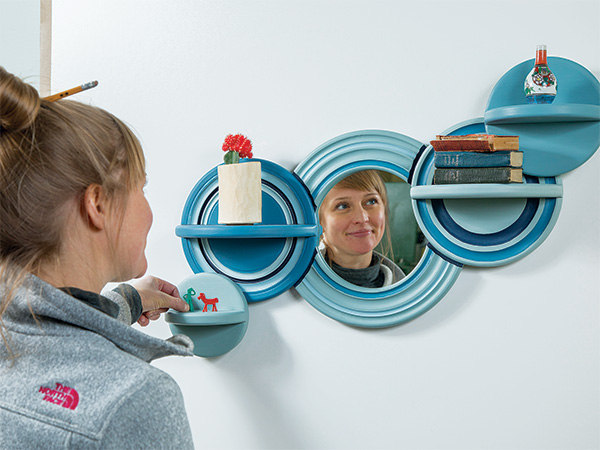
My gratitude and appreciation for living in a place where I have plenty of clean water inspired the design of this small wall shelf. When you take a moment to ruminate on it, water is the most abundant and beneficial substance on the planet! Few sounds are as soothing as running water, and perhaps that’s because all living organisms depend upon it. So, every time I see this wall shelf, or think about the process of making its rippling circular shapes, I will remember how fortunate I am to have clean water to enjoy and conserve.
I’ll also recall how handy it was to have a circle-cutting jig for my compact router — I used it extensively to shape this project’s single-piece back panel and to cut out the outermost “floating” circles and rounded shelves. The circle-cutting jig also makes it easy to mill lots of concentric ripple details. I highly recommend this fun and easy jig for building this project.
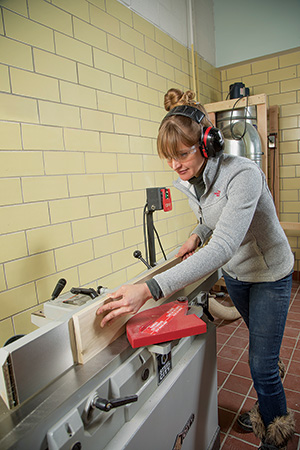
While there are larger router circle-cutting jigs that are intended for mid-size machines, this smaller version I used was just right for the job and fit my compact DeWALT router perfectly. A larger jig size and bigger router would be more cumbersome to use here.
For this project, I used up some pre-milled poplar left over from another project. It’s economical, easy to find at home centers and is an excellent hardwood choice for painted projects.
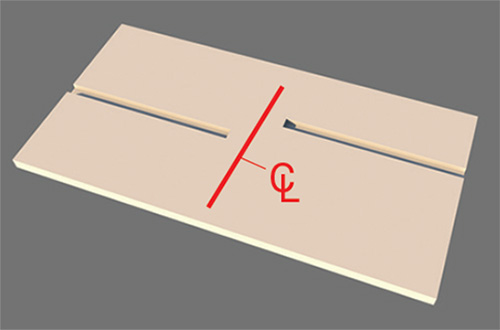
To get your wall shelf underway, start by gluing up a 13-1/2″ x 26″ blank. And while you’re at it, rip and crosscut blanks that will produce the two floating circles and four shelves (pieces 2 and 3). Take a look at the Drawings and you’ll see that the big glued-up panel forms the largest inner circle with the mirror cutout, plus two smaller circles that flank it. These three circles remain as one piece.
Please keep in mind that while the dimensions for my project are outlined here, your circle sizes don’t have to exactly match mine. Just like real puddles, everyone’s shelves will turn out differently. For that matter, you might not even want to duplicate my water theme. You could use this basic approach to make lovely picture frames that are simply connected circles, too.
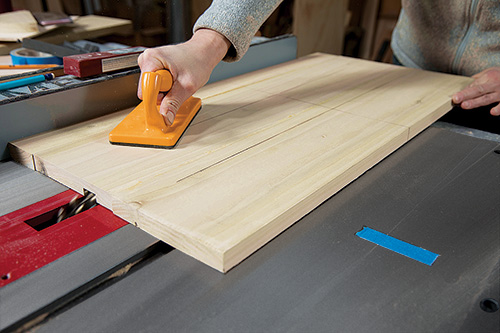
Gluing Up a Panel
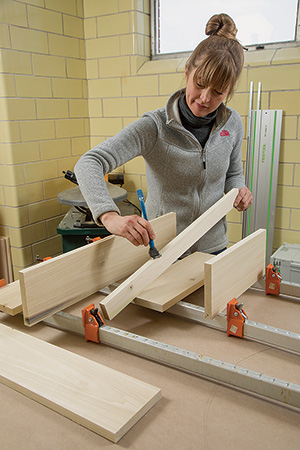
Then, spread glue on both contact surfaces of each joint, and apply clamps uniformly along the panel’s length to distribute the clamping pressure evenly.
Laying Out the Shapes
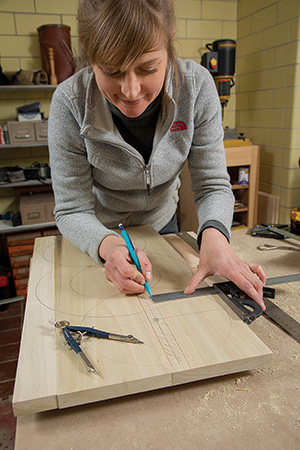
Once your back panel comes out of the clamps, grab your combination square and a compass so you can lay out the three connected circles on it. When those are drawn, scribe pairs of parallel lines across the outer circles to mark a 3/4″-wide shelf dado on each. I centered these dadoes on the circles for two reasons: first, with one end of each dado terminating where the mirror opening will be, I would be able to mill them without worrying too much about stopping the dado cuts precisely. Second, centering the dadoes will make it easy to set the radii for routing these shelves.
I’ll also recommend that you draw at least one line on the back of this panel, parallel with its long edges, so you can reference it later when aligning the French cleat (ensuring that the shelves will hang level). If you don’t draw a guide line now, you’ll lose all of the panel’s square reference edges once the circle routing is underway.
Milling Dadoes
Now go ahead and cut both 3/8″-deep dadoes on the table saw. Use your dado layout lines to figure out where to set the rip fence for each of these stopped dadoes. Put a piece of tape down on the saw table to mark where to stop cutting each dado (stop them a couple of inches shy of the middle circle’s centerpoint).
You will have to reset the fence and move the piece of tape before ripping the second dado. Then mark and plow a centered groove of the same size along the length of the floating circle blank as well.
Routing the Connected Circles
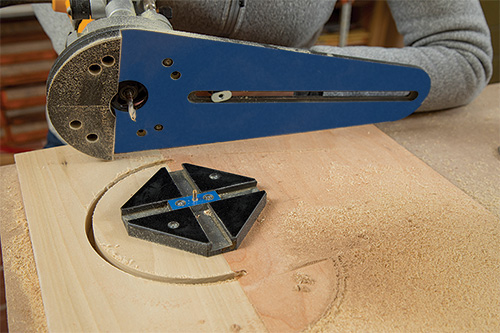
Here’s when the fun really begins! Fasten the jig’s arm to your router base and install a 1/4″ up-cut spiral bit. Clamp the back panel securely to a sacrificial surface on your workbench.
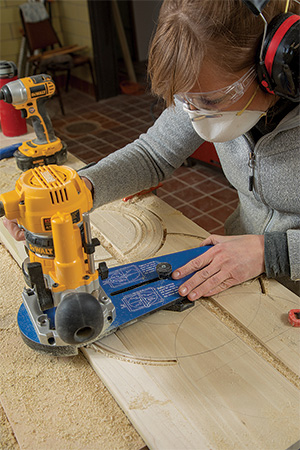
We’ll begin by routing one of the outer circles, so use the screws it came with to fasten the jig’s base to the center of one of these two circles. Now, keep in mind that you won’t be cutting this circle off of the large blank — it stays connected.

Adjust the jig so the bit will cut on the waste side of the circle’s layout line, and rout the circle 1/4″ deep all the way around by taking many small passes no deeper than 1/16″.
Then, continue routing all the way down through the blank where the two circles don’t overlap (this creates most of the first circle’s outer profile). Then, rout completely down though where the outer circle extends over the mirrored area.
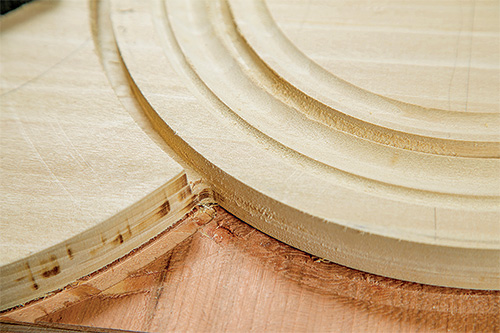
Get Your Grooves On
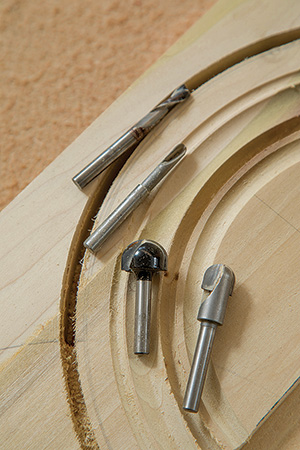
At this point, you can switch to round nose, core box or other end-profiling bits to create concentric grooves and details in this outer circle. Just change the length of the jig arm setting as you like to cut these ring designs. You can see what sorts and sizes of bits I used.
Sometimes I only took one pass to create a slight concave groove, and other times I would go as deep as 5/16″. Don’t rout deeper than this, though, because you will be attaching the French cleat with screws, and you don’t want a screw to poke through the front! Repeat all of your concentric detailing before unscrewing the jig base.
Now install the jig base at the center of the large mirrored circle. Rout all the way down through the blank to form this circle’s outer upper and lower curves with the up-cut bit, stopping these cuts where they meet the other two circles. Then switch bits to form the mirrored circle’s concentric rings. Finish up its routing with the up-cut bit again to cut down through its top and bottom portion of the mirrored area.
Repeat the whole routing process for the third connected circle. Its “mirror” cut will release the center waste piece.
Switch to the second dadoed blank and rout the two floating circles from it. When those are done, rout the four half-circle shelves from the third blank.
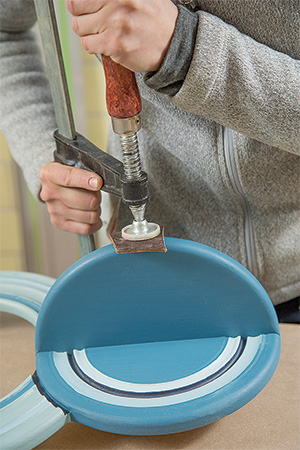
Creating a Mirror Recess
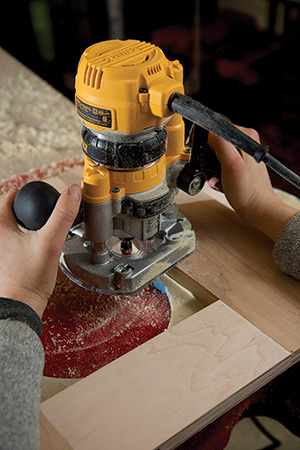
We still need to rout a recess into the back of the middle circle that’s deep enough to house a piece of 1/8″-thick mirror glass and a 1/8″-thick backer board to cover it. I assembled a square framework from 1x scrap wood with a 8-1/8″ x 8-1/8″ inside opening, using pocket screws. Clamping this “template” evenly over the mirror opening on the back of the shelf frame, I was able to use a pattern bit with ,a shank-mounted bearing to rout out the 1/4″-deep mirror recess. A sharp chisel helped me square up the rounded corners that the bit left behind.
With the recess done, I bought a piece of mirror glass and tried my hand at cutting the size I needed. Cut a hardboard backer piece to match.
Cutting Glass
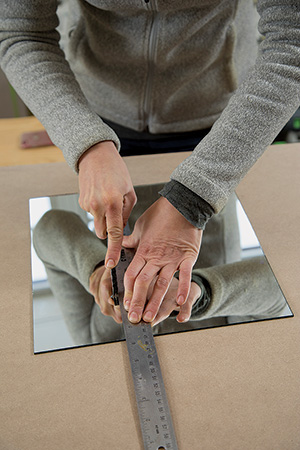
Here’s how: thoroughly clean the mirror and the surface you are going to be scoring the glass on. Dust and dirt can cause a bad score line and break.
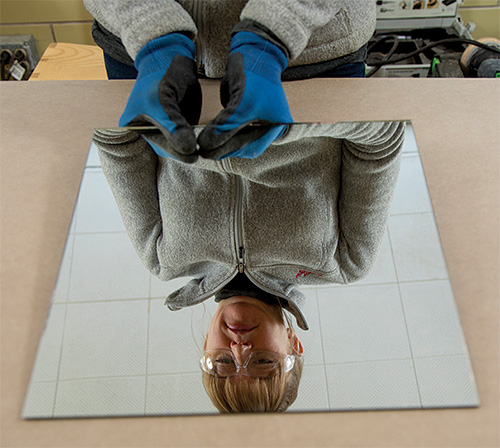
Use a straightedge to guide the glass cutter to score the top of the mirror in one pass. You will hear a soft crunching sound as the surface is scored.
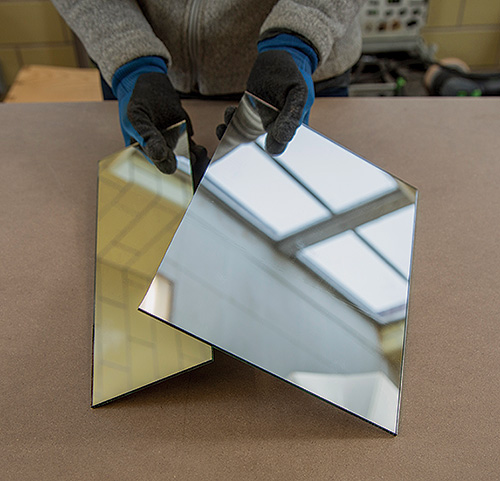
Then, with gloves and eye protection on, flex the mirror along the score line gently to snap it cleanly in two. Practice this first to get the hang of it.
Adding Floating Circles, Shelves
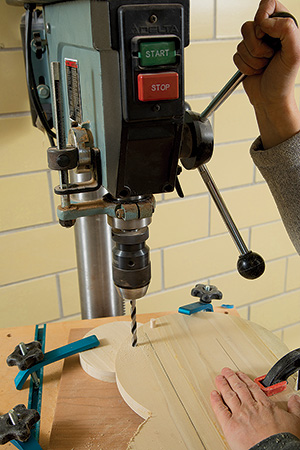
Dowels are an easy way to attach the two floating circles to the larger back panel. To mount them, clamp the small circles into place so their dadoes are parallel with those on the larger circles. Then flip the assembly over and draw alignment lines and arrows as needed to mark positions and the dowel locations. Chuck a 5/16″-dia. brad point bit in your drill press or drill/driver, and bore 1-1/8″-deep holes at your marked spots.
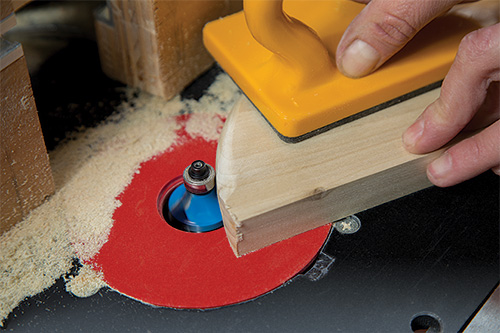
Before assembling anything, take some time now to ease the sharp front edges of the three connected circles and the floating circles. I did this on my router table with a 5/16″-dia. roundover bit. Before you rout the edges of the half-circle shelves, insert them into their dadoes so you can mark them for where to stop routing — you don’t want to remove the back corners of the shelves where they insert into the dadoes.
It was then time to use some wood putty to fill all of the screw holes left behind by the circle jig base. I also glued the half-round shelves into the floating circles but decided to wait until after painting to install the shelves in the larger pair of circles. After that came sanding! I only sanded up to 180-grit, since all the wood would be covered with paint; I was mostly just concerned with getting everything smooth. Spend time hand sanding to get the concentric circle details nice and smooth, too.
Bring on the Milk Paint!
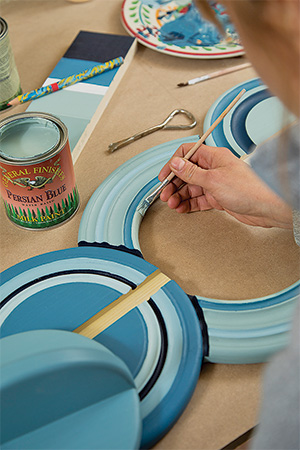
While sanding is never my favorite part of a project, I loved the next step: painting! I used General Finishes Milk Paint in Persian Blue and Coastal Blue as the base colors. Then I mixed in some Snow White color to create lighter blue tones for a few of the contoured details.
I turned on my current favorite album and let the afternoon fade away as I brushed on those beautiful colors. Milk paint doesn’t emit toxic fumes, and this pre-mixed brand has a lovely thick consistency. It brushes on smoothly, without leaving any globs.
Finishing Up with a French Cleat
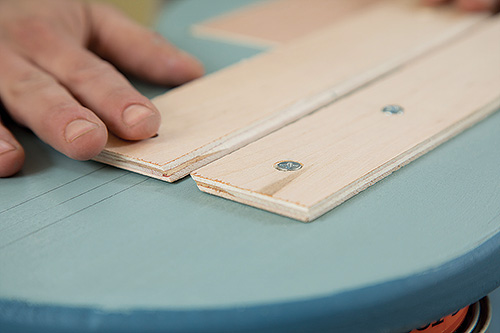
The last pieces to make and install are a pair of French cleats to hang this project on the wall. I made mine from strips of 1/4″ plywood. Bevel-rip one long edge of each strip at 45° so these edges can engage one another when one cleat is mounted on the project and the other is on the wall.
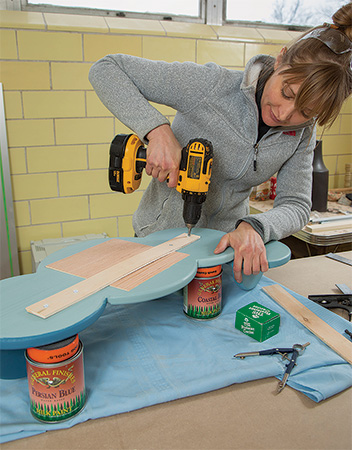
Once the paint thoroughly dries, glue the remaining two shelves into their circle dadoes, and attach the floating circles with glue and dowels. Then set the mirror and backer into place and fasten the French cleat to the back panel with short countersunk screws (it overlaps and secures the backer). Be sure to face the cleat’s bevel downward and inward.
Screw the mating cleat to the wall, with its bevel edge facing up and inward. Be sure to level it first and hit two wall studs, if possible. Now set the shelf into place and push it down to engage the cleats. Then step back and look in the mirror, remembering how much we all owe to clean and plentiful water!
Click Here to Download the Materials List and Drawings.
Hard to Find Hardware
Rockler Compact Router Ellipse and Circle Jig (1) #55819
Rockler Roundover/Beading Bit – 1/2″ H x 5/16″ R x 1/4″ Shank (1) #26628
Rockler Core Box Router Bits – 1/4″ Shank (1) #90935
1/4″ D x 1″ H x 1/4″ Shank Onsrud Carbide Up-Cut Spiral Bit (1) #82652
Rockler Pattern Router Bit – 1/2″ Dia x 1/4″ H x 1/4″ Shank (1) #33536
GF Milk Paint, Snow White, Pint (1) #35877
GF Milk Paint, Coastal Blue, Pint (1) #39130
GF Milk Paint, Persian Blue, Pint (1) #55917
E-Z Ancor® Wall Anchors with Screws, 2-Pack (1) #47987


