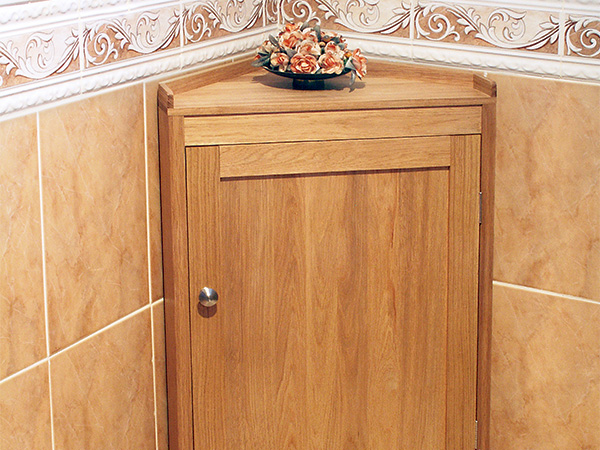
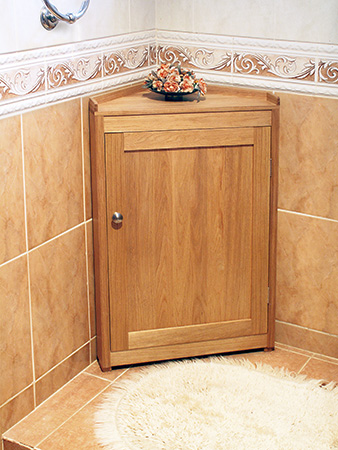
Our guest bathroom is not over-generous, but as our Spanish house has brick walls inside and out, we cannot change its size without major alterations. With space so restricted, the only spot available to place a small cabinet was in a corner of the room by the shower entrance. This cabinet, while not large, at least gives us somewhere to store soaps, shampoos, shower gels and paper, so that guests are well-equipped while using the smallest room. The piece is triangular and is made of American red oak with a simple frame-and-panel door.
Getting Started
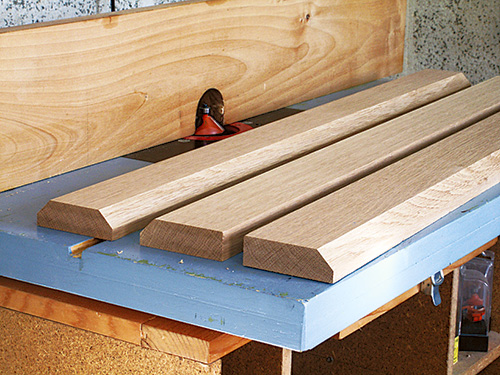
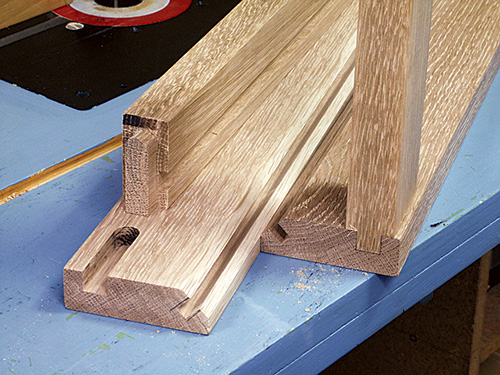
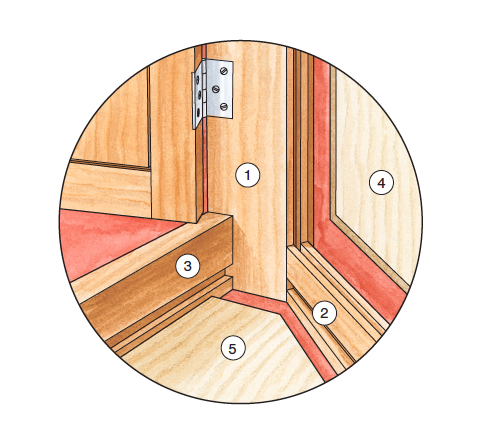
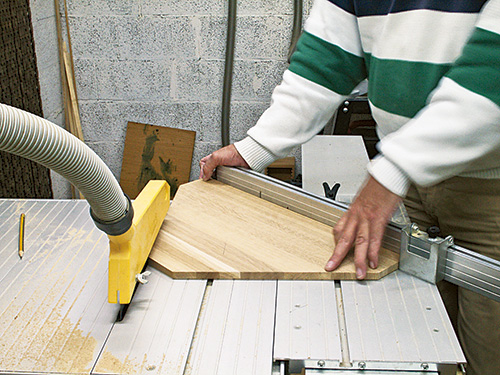
The basis of the framework is the three main frame stiles (pieces 1). Find all of the dimensions for these parts in the Material List. On two of these stiles use a 45° bearing-guided router bit to put a chamfer on one long edge. Set the chamfer depth to leave a 3/8″ flat plane on the edge. On the third stile, this chamfer should be put on two matching edges.
Each of these chamfered edges now needs a centered groove plowed along its entire length. This is difficult to do freehand, so I moved to the router table. I took about four passes of increasing depth to mill each groove using the built-in depth stop of my router. Rout the grooves 3/8″ deep.
Next, make the four side rails that connect the three stiles together (pieces 2). Looking to the Drawings, plow grooves that will later accept the side panels (pieces 4). It is vitally important that this groove is centered, so I used an offcut to set up the router table. It took three passes to cut the grooves to depth, turning the components end for end with each pass. This actually made the slots a few thousandths of an inch oversize but, as the panels are a loose fit, it isn’t problematic.
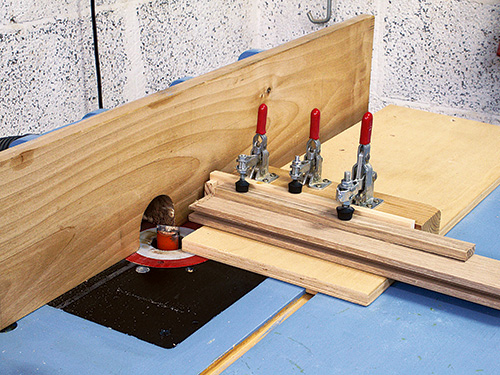
These four side rails now need a stub tenon cut on each end. I used a homemade jig on the router table for this operation, employing a 1″ straight cutter to raise the tenons. This jig consists of a plywood base with a crosspiece attached at 90°. Two clamps lock the workpiece into place; the third holds a replaceable, sacrificial backer.
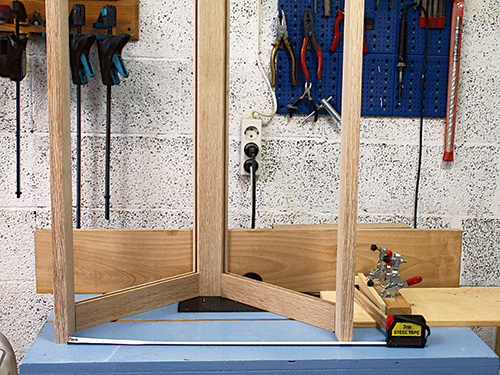
With these components completed, you can now dry assemble the framework and accurately establish the length of the front rails — pieces 3. Mine worked out to be 20″ including the 1/2″ stub tenon on each end. Next, I machined the open mortises by laying the two frame stiles flat on the router table and milling stopped grooves. The stub tenons on the front rails were made on the jig as described earlier. They must be “carved” round to fit the curved ends of the mortises.
All six of the rails also need another groove plowed into them to capture the plywood sub-top and bottom (pieces 5) that will help to keep the whole structure rigid. When that’s done, test fit the front rails to ensure that the parts fit. Next, cut the sub-top and bottom to fit their openings. Experience has taught me it’s better to dry-assemble the framework and take your measurements from that than to rigidly follow a material list.
At the same time, you can take the measurements for the two side panels (pieces 4). I made mine from 1/2″ plywood and then trimmed them down on the router table on all the edges to fit the 1/4″ grooves in the framework.
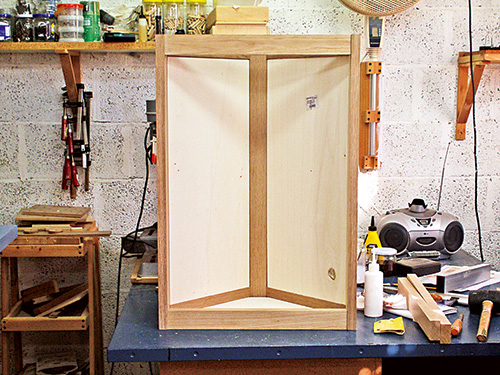
When everything fits, you can then go for glue-up. I used a combination of strap clamps and hand-operated clamps to do this. I made sure the bottom of the framework was all in correct alignment with the plywood bottom panel and left that portion of the assembly to set. I then slid in the side plywood panels from the top and made sure they were correctly seated. Next, I dropped in the frame side rails and slid in the sub-top (from the front) and finished by dropping in the front rail. I held it all together with a strap clamp, but this would not pull everything in as tightly as was needed. I added three hand-operated clamps to further tighten the assembly and then retightened the strap clamp. This completed the body of the cabinet. Once the glue dries, you are ready to move on to the door.
Making the Door
The door is made of a 1″ x 2″ rail-and-stile framework with a 3/8″-thick oak panel (pieces 6 through 8). Check the measurements in the Material List against your actual cabinet to be sure everything fits correctly. The stiles and rails of the door are joined with stub tenons, so remember to account for the tenon lengths if you stray from the Material List dimensions. I used my jig again to raise the stub tenons. I plowed the door panel grooves on the router table.
I find that making large, thin panels in stock as hard as oak can be a bit difficult. No matter how well dried oak is, it will usually take on some sort of curved distortion when I resaw it thinly. My small band saw will only resaw material up to 5″ in depth, so I cut my stock in 4″-wide strips. I planed these until they were 1/64″ oversize.
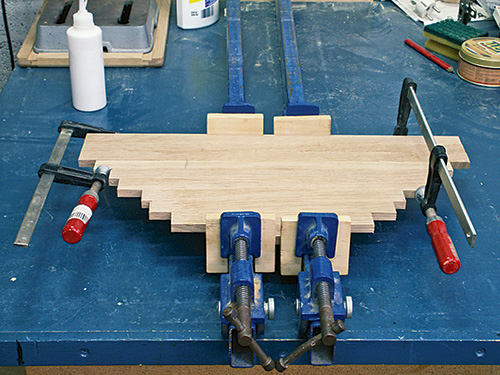
If you do not have a specialized panel-making jig, I find the best way to deal with minor distortions starts at glue-up. Lay your strips out so that any bows they have taken are set at opposites. This will exaggerate the bowing, but do not worry. Glue up the strips, and then tighten up your central clamps. Then quickly use small hand clamps to align the edges of the individual strips. Have your preferred grain face upwards and use a damp sponge to remove any excess glue from your “show” surface. Allow the glue to cure.
I have a small drum sander that I use for flattening panels like this. If you do not have one of these, then a belt sander followed by an orbital down through the grits is the way to go. You can then cut your panel to size and assemble the door.
Finishing Up the Cabinet
The last job is to make the two shelves and the top (pieces 9 and 10). The bottom shelf is really only there to cover the ugliness of the plywood floor and just drops into place (not shown in the Drawings). The middle shelf is exactly the same size and sits on supports that are glued halfway up the frame stiles. The last piece is the top.
All these pieces are triangular, and they are a chance to use up all of your offcuts. They are all 5/8″ thick. I planed the stock square and glued up the three components. This method makes very strong panels that are unlikely to warp or twist. Take your measurements off the finished cabinet. After you sand the panels down, cut the square sides of these panels first on the table saw to absolutely 90° and then cut the angles. I used small blocks (pieces 11) glued to the three frame stiles to support the middle shelf.
The top needs strips of backstop (pieces 12) fitted around it to prevent anything falling off the sides or behind the cabinet. I cut a shallow 3/8″-wide recess around all but the front edge of the top with the router to allow me to accurately seat this rim. Cut the end angles of the backstop pieces on your table saw or miter saw. Glue and brad-nail the pieces in place. Sand off any projecting corners, then attach the top to the cabinet with screws driven up through the sub-top panel.
I hung my cabinet door using two standard stainless-steel hinges and a stainless door knob (pieces 13 and 14). A magnetic catch (piece 15) keeps the door closed.
Tiled bathrooms can be very humid places. To raise the cabinet up off the damp floor, I glued and screwed three small feet (pieces 16) to the bottoms of the three frame stiles. For the same reason, I finished the whole cabinet off with thinned, satin-sheen polyurethane varnish. Then it was ready for use in the smallest room of our house. You can skip the feet if you use this cabinet elsewhere in your home.
Click Here to Download the Drawings and Materials List.
Don Phillips is a British builder and writer who now manages to live in the sunny plains of Spain.


