
Originally cataloged as a sideboard, this #802 Gustav Stickley Server was a wider, two-drawer version. The full-size form was very popular in the early 1900s and has continued to be prized by collectors. Voorhees Craftsman, a purveyor of antique Arts & Crafts-style furniture in Pasadena, found a rare single-drawer version that they dubbed a small server. It might have been a one-off custom order from the Stickley factory in Syracuse, New York, or perhaps a rare uncatalogued form. At any rate, its compact size functions perfectly as a server for a smaller home. It would also make a nice entry table or nightstand. If you’ve built other tables with drawers, this project should be well within your skill set.
Preparing Quartersawn Stock
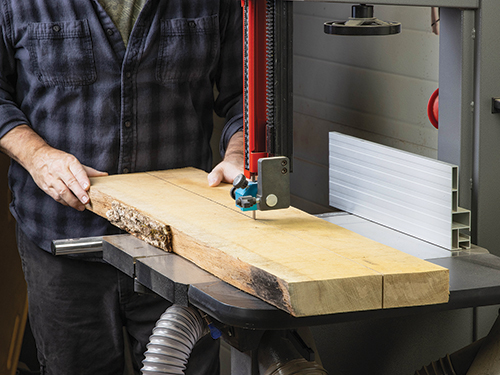
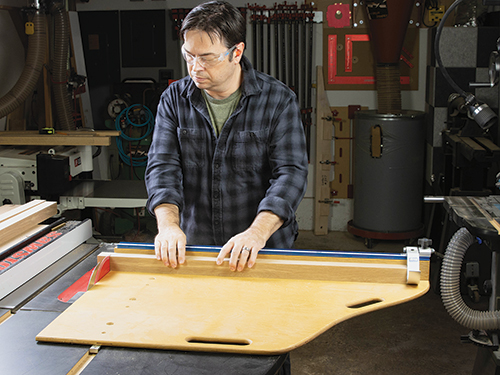
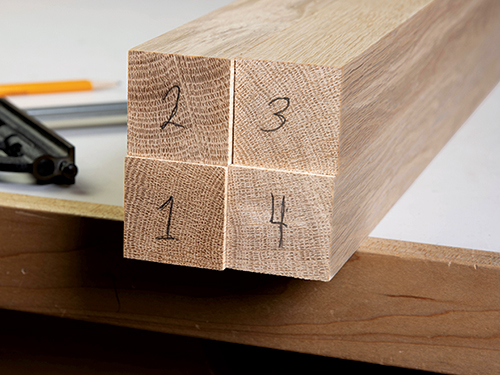
Round up some attractive 4/4 quartersawn white oak so you can make the four big panels for this project — the top, two side rails and the shelf. The top is large enough that if you don’t have a large planer or drum sander, you might need to glue it up in sections. While the panels are in clamps, mill the 1-3/4″-thick leg blanks from some 8/4 stock, making sure they come out flat and square. Go ahead and make blanks for the front, back and shelf rails as well as the backsplash from 3/4″ material.
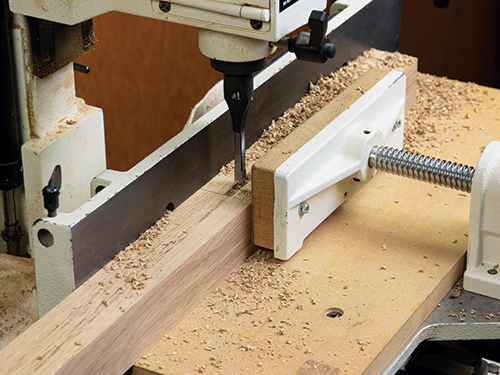
I often mutter, “Joinery before curves” and “Mortises before tenons,” and we’ll take both of those mottoes to heart with this build. Lay out the 1/4″-wide mortises as shown in the Leg Mortise/Taper Detail Drawings, and machine or chop them with your best method. Cut 1/4″-wide x 3-1/2″-long mortises on the inside of the front legs to receive the curved front rail. Start these mortises 4-1/4″ from the tops of the legs, and inset them 3/8″ from the front faces. The back rail requires 1/4″ x 4-1/2″ mortises that start 1/2″ from the top of the legs. Position them 1/2″ in from the back faces of the back of the legs so the outward face of the back rail will be flush with the back faces of the legs. The mortises for the shelf rails need to be 2-1/2″ long, and they start 7-3/4″ up from the bottom of the legs. Locate these mortises 5/8″ away from the inside edge of the leg so they will be properly positioned once the legs are tapered.
I was tempted to make the centered 11″-long mortises for the side rails with a router and edge guide, but clamping the workpiece for that operation is sometimes problematic. So, I used a 1/4″ hollow chisel in my mortising machine instead. Take note that the mortises for the side rails are only 3/4″ deep, while all the other mortises are 1″ deep.
Once the mortises are chopped and cleaned out, it makes sense to work on the tenons next. When you look over the plans for this project, there are admittedly some cross-grain issues, and it would be difficult to build this form conventionally without violating some rules of wood movement. That’s why, as with the original, the grain of the side rails runs vertically and not horizontally. With a dado stack installed on the table saw, cut 3/4″-long tenons on the side panels to fit the long mortises.

Aim for an easy friction fit, because these long-grain tenons are somewhat vulnerable to breaking until the frame is glued together, if they are flexed. Then reset the rip fence for making 1″-long tenons on the front, back and shelf rails. The front rail has a simple centered “blind” tenon, however the back rail is a little different.
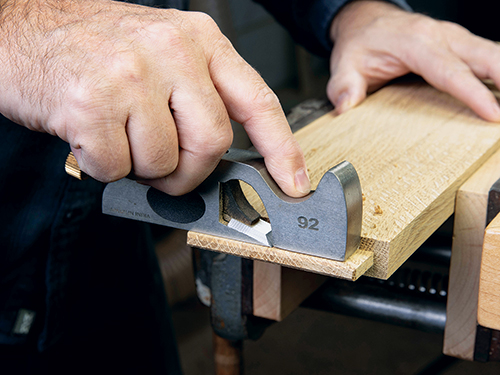
To position the outer face of the back rail flush with the outer faces of the back legs, an off set tenon is required. So, raise the blade incrementally to cut those tenons until they fit the 4-1/2″-long mortises you made in the back legs. When all the tenons are sawn, fine-tune their fit with a shoulder plane until they slide easily but not sloppily into their mortises.
More Preliminary Details
Now that the basic joinery for the server is complete, go ahead and mark out the curve on the front rail. Use a flexible strip of wood or a thin metal yardstick to lay out this line so it creates a smooth, flowing arch and leaves the front rail just 1-1/2″ wide at the apex of the curve.
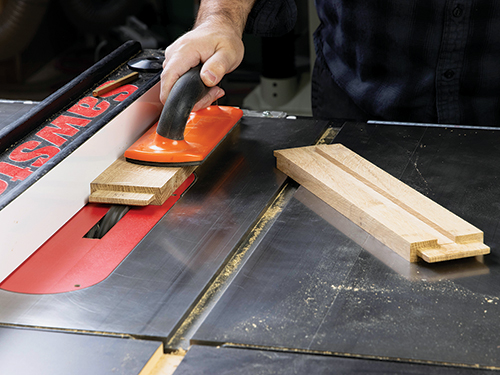
Cut the arch at your band saw or with a handheld jigsaw, sawing just to the waste side of the layout line. Then fair and smooth the curve up to your layout line using a drum or spindle sander. Start with 80- or 100-grit, and work up from there.
This is also a good time to cut 1/4″-deep grooves along the inside faces of the side rails to receive the shelf. Center these 3/4″-wide grooves on the rail widths. I have found it easiest to cut the grooves first, then plane the shelf’s thickness down until it fits the grooves without gaps. Then, assemble all the parts you’ve made so far to confirm the actual size of the shelf. Measuring directly off the project will give you confidence to proceed with trimming the shelf to final size.
Next up, we need to taper the legs on two sides. There’s a long taper on the front face of the front legs and on the back face of the back legs.
The left or right outer faces of all four legs have two tapers instead of one: a short one on top and a long one below it, which matches the long tapers on the adjacent faces of the legs. The four long tapers remove 1/2” of material at the bottom of the legs, reducing them to 1-1/4″ x 1-1/4″ at the floor.
These primary tapers are 25″ long, stopping just short of the upper rail joinery. The subtle top outer tapers are 4″ long, and they remove just 1/8″ of material from the top left or right faces of the legs. This gives the server “hips” when viewed from the front.
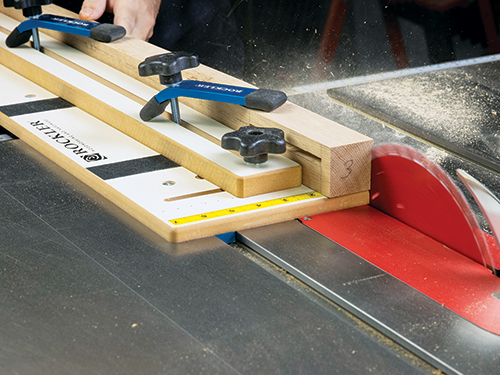
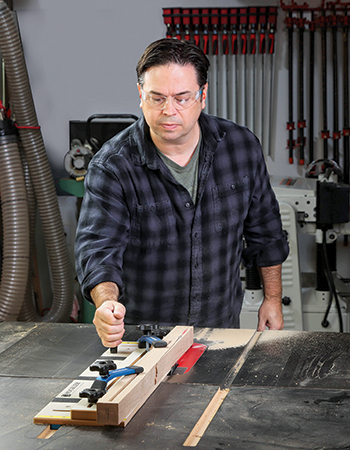
While you could certainly band-saw the tapers, I like the precision of using a tapering jig at the table saw. Mark the taper cuts carefully and saw the first long one on each leg. Then rotate the leg blank away from the blade to make the second long taper cut. The single short side taper at the top of each leg can be completed in the same way.
Take a little time now to ease edges of the parts you’ve made. Pay particular attention to “safe edges” or areas you don’t want to round over. Notably, these are where the back legs intersect the back rail. Likewise, the back edge of the top panel stays crisp for the addition of the backsplash. None of the shelf edges should be eased, either. Finish-sand all the parts up to 150- or 180-grit.
Assembling the Sideboard Framework
Retrieve the backsplash workpiece you made earlier so you can round both of its top corners to a 1/4″ radius before attaching it permanently to the top panel. Finish-sand both of these workpieces up to 150- or 180-grit first.
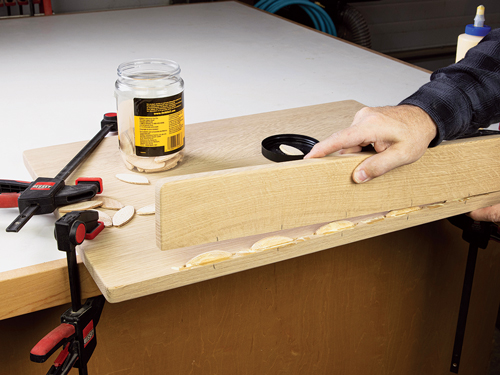
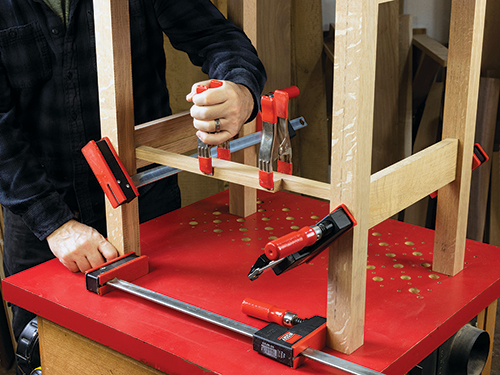
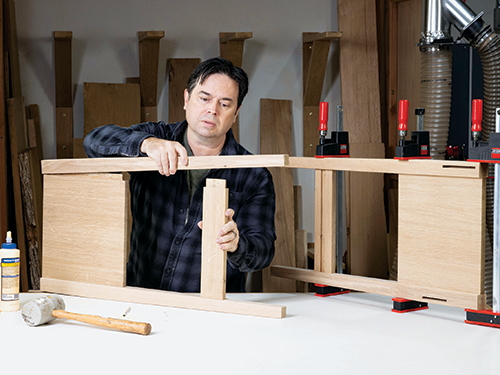
Glue alone is sufficient for strength, but I always add a row of #20 biscuits for alignment when attaching a backsplash in this manner, so cut those mating biscuit slots if you decide to do the same. Glue and clamp the backsplash to the top panel with the biscuits installed, then start assembling the server’s frame. First, create a pair of side assemblies by gluing two pairs of legs together with their side and shelf rails. Be sure the top edges of the side rails are flush with the tops of the legs as you draw the clamps tight. Allow those joints to dry.
When the side assemblies come out of the clamps, bring the two together by gluing the front and back rail tenons into their mortises and the shelf in its rail grooves. Double-check the height between the top of the front rail and the tops of the front legs, which should be 4″. Tighten the clamps, and set the frame aside to dry overnight. Then drill 7/8″-deep holes through the long tenons, centered 3/8″ from the edge of the leg, so you can peg the joints with 3/8″-diameter dowels. The front and shelf rails receive two pegs per joint.
Building a Side-Hung, Center-Guided Drawer
You can construct the drawer box however you like, but I thought half-blind dovetails were a proper choice for a Stickley-style reproduction. You can see the dovetail layout I used with my router dovetail jig in the Dovetail Detail Drawing. The original server appears to have a “piston-fit” drawer, but I elected to use a different Stickley hallmark: a side-hung
and center-guided drawer. While there’s a little more work constructing a drawer with these features, it promises trouble-free operation for a long time. The center runner prevents racking and conveniently acts as a drawer stop, while the top edges of the side runners are the only points of contact when sliding the drawer in or out. (To see side-hung, center-guided drawers in action, look for a video on my YouTube channel, The Thoughtful Woodworker.)
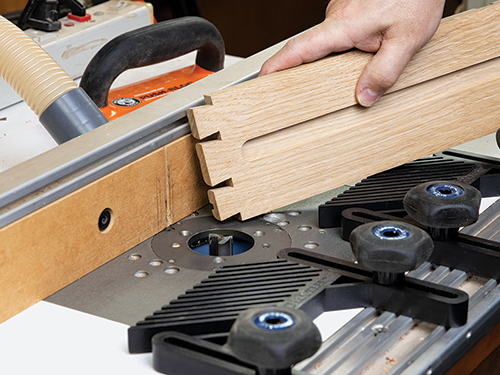
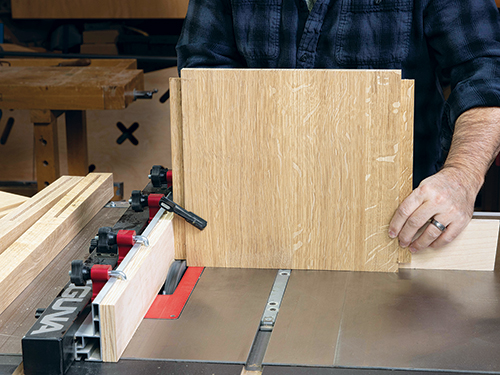
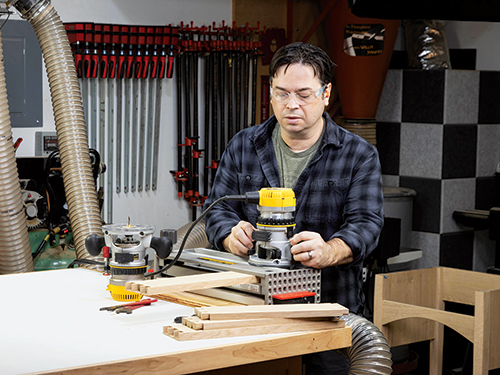
Now rout a groove in the drawer sides to receive the side runners. This 3/4″-wide groove needs to stop about 1-1/4″ from the front of the drawer sides, and it’s best cut on the router table. Make sure to use a router bit capable of making plunge cuts, as one of the grooves should be made by tipping the drawer down over the bit with the drawer standing on its side and against the router table fence (often referred to as a “drop cut”). The groove in the other drawer side can be cut in the traditional fashion, starting the groove from the back edge of the drawer instead of at the stopped end of the cut. Set the length of these groove cuts with a stop block clamped to the router table fence. The reason for routing these two side runner grooves differently — a drop cut for one and a typical groove cut for the other — is to ensure that both grooves line up exactly with one another across the drawer so it will hang evenly in its opening and slide smoothly.
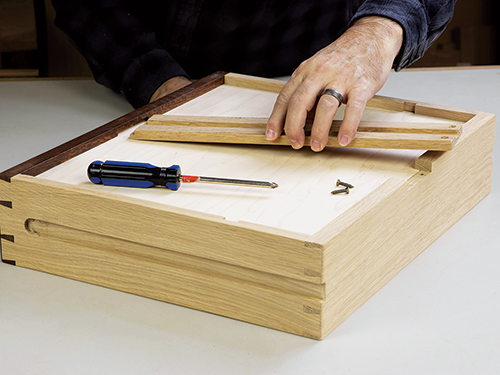
Loosely assemble the drawer to check the final sizing of the drawer bottom panel. Cut a plywood panel for it to size Finish-sand all the drawer parts, then prefinish the drawer front. Once the finish dries, glue the drawer together with the bottom and divider in place.
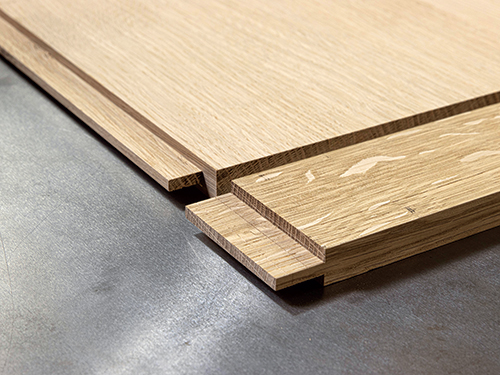
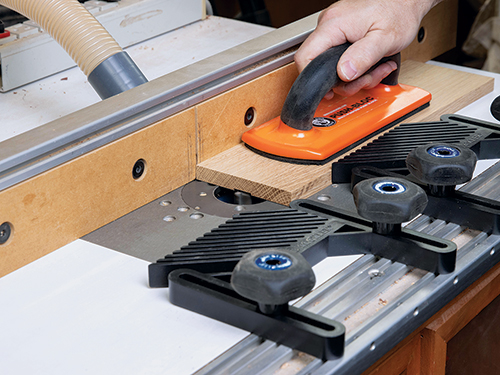
The secret to fitting this type of drawer is to mill the 1/2″-thick filler strips with the same router table setup as the side runner grooves you just made. So, make up a pair of filler strips from scrap stock and lower the router bit height to 1/16″. Rout a groove into one face of each filler strip along its full length. Mark the edge of each filler strip that was against the router table fence “top.” Then bore three pocket holes that face the “top” edge of the filler strips for attaching the top panel later. Fasten the filler strips to the inside faces of the side rails with screws. Set their marked “top” edges flush with the top edges of the rails. Then head to the table saw and trim 1/16″ of width from the drawer parts on both the top and bottom edges to set the drawer reveal. Hand-plane the divider’s top edge flush with the other edges.
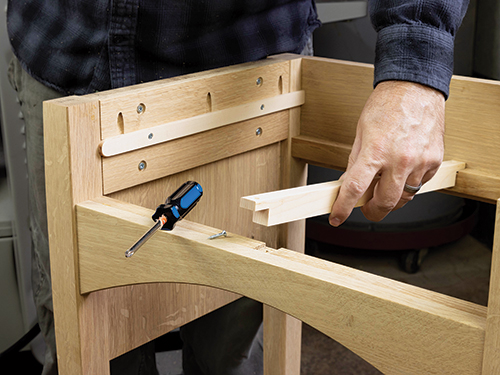
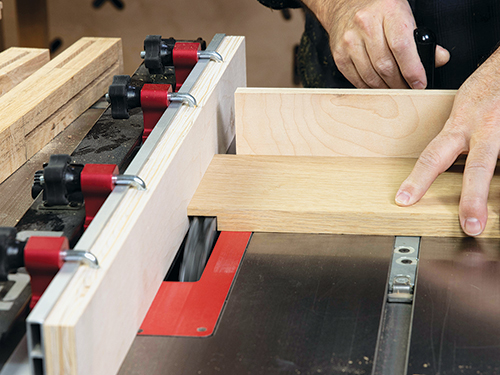
At this point we’ve laid the groundwork for a really nice drawer, and there are just a few remaining parts to build. Make up a pair of drawer runners from maple or other dimensionally stable hardwood. Size them to slide easily in the drawer grooves, and notch their back ends so they’ll fit around the back legs. Mount them in the filler strip grooves with countersunk screws.
The back of the drawer also needs a 1/4″ x 2-1/2″ centered notch to make room for the track that’s mounted underneath it. Saw that notch now. Then make the drawer track component from 1/2″ stock, and cut a tongue on one end to fit the mortise you made earlier beneath the bottom panel groove in the drawer front. The track also needs a 1/4″-deep x 2-1/2″-wide groove plowed into its bottom face and centered on its width to receive the center slide. Install the track on the drawer by fitting its tongue into the drawer front mortise and securing the back end in the notch in the drawer back with a couple of small screws.
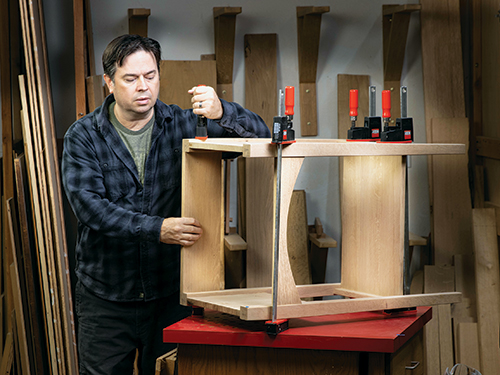
You’re ready to install cleats in the server to support the center slide. Make up the 1″-wide cleats from scrap stock. Cut centered notches, about 1/16″ deep, into the top edges of both cleats to register the slide before fastening the cleats to the inside faces of the front and back rails with screws. Locate them so the top edge of the front cleat is flush with the top edge of the front rail. Position the back cleat’s top edge 4″ down from the top edge of the back rail.
Make up the center slide from a piece of dimensionally stable hardwood. Cut a notch into its front and back bottom edges, leaving a 3/8″-thick tongue to fit into the slide cleat notches. Set the slide into place in the server and test the drawer action. If it opens and closes smoothly, fasten the slide’s tongues to the cleats with countersunk screws.
Applying a Multi-step Finish
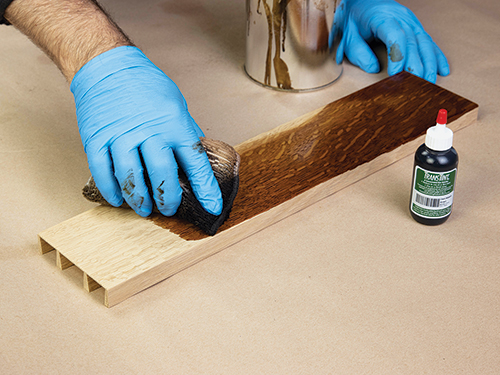
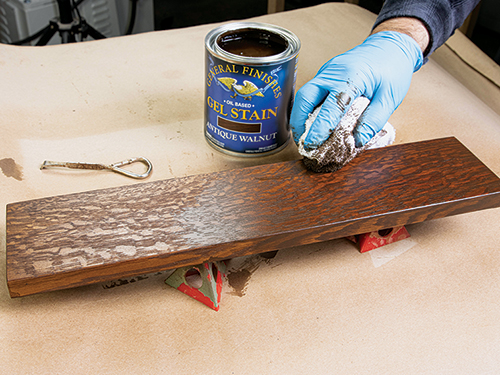
I use a multi-step stain-over-dye technique, which enhances the figure of quartersawn white oak and lends a vintage appearance to the piece. I start with TransTint Dark Mission Brown Dye. To avoid raising the grain, I mix 1-1/2 ounces of concentrated dye into a quart of a 50/50 mix of denatured alcohol and lacquer thinner. Apply the dye with a terrycloth-wrapped sponge. Adding five to 10 percent lacquer retarder will slow the drying time and help avoid lap marks. I then seal the dye with a light coat of sprayed shellac (don’t wipe or brush on the shellac, as it will resuspend the alcohol-based dye) before applying General Finishes Antique Walnut Gel Stain. I complete the finish by spraying on two coats of satin lacquer.
Attach the top panel to the server’s frame by driving 1-1/4″ pocket screws up into the filler strip pocket holes. You will notice that I added dowel pins to the tops of the front legs. They are optional but do help to register the top evenly. Complete this lovely little server by installing a reproduction Stickley drawer pull, centered on the drawer front.


