The process of edge-gluing boards into larger panels can be a struggle with ordinary pipe clamps. Unless you are using some kind of support system, the clamps are prone to tipping over or slipping out of position, and uneven clamping pressure can lead to panel distortions. Clamped-up and curing panels then take up precious bench space, or create obstacles while drying around the shop.
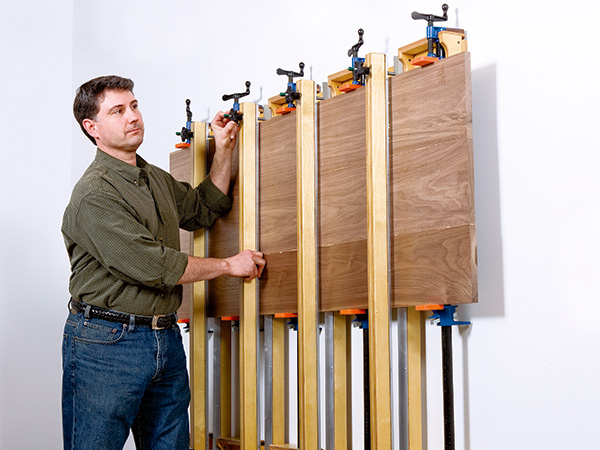
This article will show you how to transform five ordinary 3/4″ pipe clamps into a vertical clamping press. The press uses pairs of long platens and press bars to squeeze the panel flat as well as hold it securely, and the pipe clamps close the glue joints. To use the press, you spread glue onto your boards, slide them into place between the platens and press bars and tighten everything up. No more wasted bench space! As it’s sized here, this press can handle 2″-thick panels up to 40″ wide and any reasonable length.
Making the Platens and Press Bars
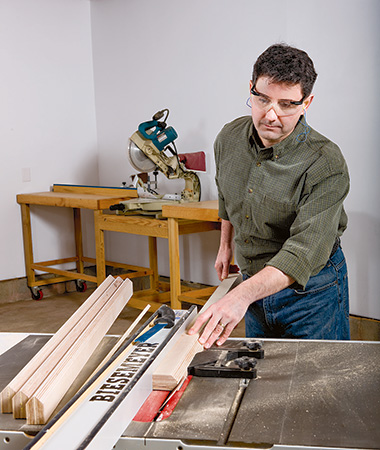
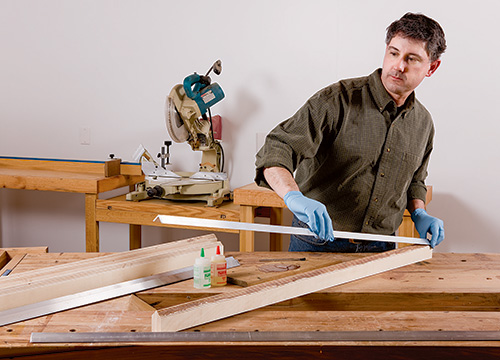
Your first task is to make four pairs of platens and press bars (pieces 1). Each of these eight parts consists of a wooden base edged with a piece of aluminum angle stock. To make blanks for the platens and press bars, I glued two strips of 3/4″ plywood together. When the glue dries, mill opposing 45° chamfers along one edge of each base, being careful to leave a 3/16″-wide flat area between the chamfers to accommodate any fillet inside the aluminum angle. (Do not use angle iron here, as it may react with glue and leave stains.) Epoxy the aluminum angles (pieces 2) to the bases. Designate four of them as “platens” and the other four as “press bars.”
The platens and press bars will be drawn together by long carriage bolts and star knobs, so the next step is to drill holes for these bolts. I made a simple V-shaped drill press cradle to ensure that these bolt holes would be straight, perpendicular and pass precisely through the center of the aluminum facings. Drill 1/2″-diameter centered holes, 2″ from each end, completely through the four press bars. Set them aside.
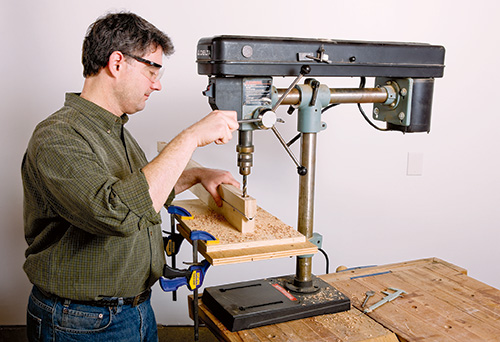
Switching to the platens, use a 1″-diameter bit to bore 1-1/2″-deep, centered counterbore holes 2″ from each end. Extend bolt holes the rest of the way with a 3/8″-diameter bit. Now, spread a bead of epoxy under the carriage bolt heads (pieces 3) and insert the bolts into the counterbores. Thread a star knob onto each bolt and tighten it to hold the bolts perpendicular until the epoxy sets.
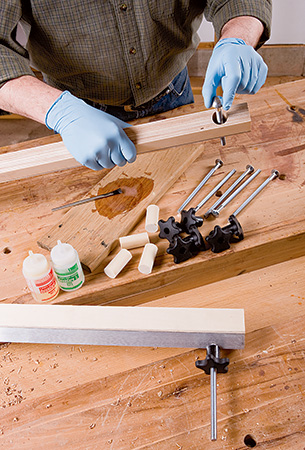
Fill each counterbore with a dowel plug (pieces 4) glued in place. Wrap up your work on the platens and press bars by driving screws (pieces 5) along the outer edges of the aluminum facings about every 8″ to reinforce the epoxy joints.
Building Large and Small Brackets
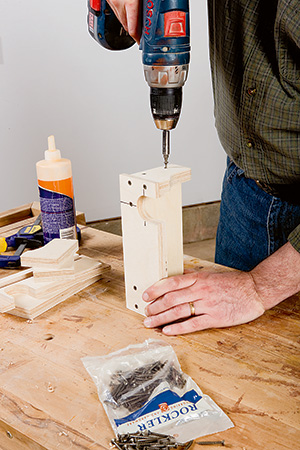
The press requires four pairs of large upper and lower brackets, plus one pair of smaller brackets, to hold the pipe clamps. Make the tops (pieces 6 and 7) of the large brackets first. I saved time by gang-cutting the tops from a plywood blank about 30″ long and ripped to 8-3/8″ wide. Start by penciling a line along the length of the blank, located 1-5/8″ in from one long edge. Mill 3/4″-wide x 3/8″ deep rabbets into both long bottom edges. Crosscut the eight large bracket tops to 3″ wide, and designate four of them “uppers” and the rest as “lowers.” For each upper bracket top, drill a 1-1/2″-diameter hole centered on the pencil line and 1-5/16″ in from the front edge of the workpieces. Then, convert these holes into U-shaped openings by sawing away the material to the front edge. Repeat the process for the lower bracket tops, only this time drill 1-1/8″- diameter clamp holes on the pencil line, 1-5/16″ from the front edges. Don’t open them up into U shapes.
Complete the large bracket tops by cutting a 3/4″-wide x 3/8″-deep dado into their bottom faces to house the bracket backs. Inset these dadoes 1/2″ from the back edges.
Use the leftover section of plywood blank from the larger tops to make tops for the upper and lower small brackets (pieces 8 and 9). Bore the pipe clamp holes, open one into a U-shape and mill the rabbets and back dadoes just as you did for the larger bracket tops.
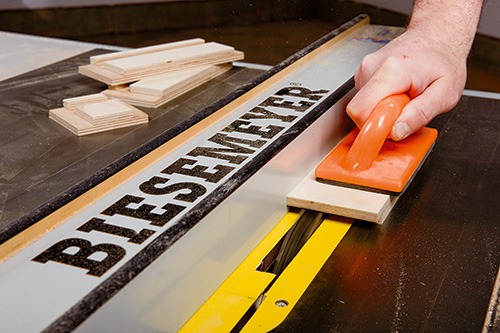
Next, make 10 pairs of side braces (pieces 10) for all of the brackets. Study the Drawings to mark and cut a 3/8″ deep scallop along the front edge of each brace. Rip and crosscut large and small bracket backs (pieces 11 and 12) to size.
Sand the parts before you glue and fasten the tops, backs and braces together with screws (pieces 13) to make up the five pairs of brackets.
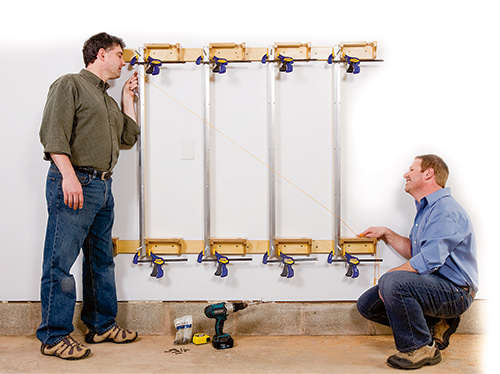
Installing the Press
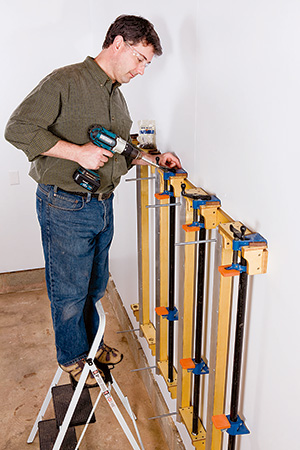
The brackets, press bars, platens and clamps are all secured to a pair of mounting rails (pieces 14) fastened to the wall. Rip and crosscut your rails to size now, and apply your choice of finish to all of the panel press parts. While the finish dries, choose a wall location for your press. You’ll need at least 5 feet of open space to one side of the press for loading panel lumber. Level and attach one of the rails to the wall near the floor with long screws (pieces 15) driven into the wall studs. Align, level and mount the other rail 45″ above the first (measured top edge to top edge).
Hang one of the large upper brackets from its back lip on the top rail, flush with the rail’s right end. Fasten it in place with screws (pieces 16). Position and attach the small upper bracket to the opposite end of the top rail. Space the other three upper brackets evenly apart along the rail (15″ on centers), and screw them in place.
Now attach the lower brackets to the bottom mounting rail. Use a long level or plumb bob to make certain each lower bracket is aligned properly with its mate on the top rail.
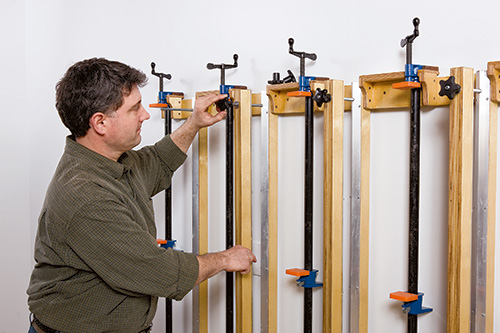
Temporarily clamp the four platens in place against the left sides of the brackets. Make the top ends of the platens flush with the top brackets. Pull a taught string across the platen facings to align them in a common plane. Work the string diagonally as well as horizontally. Adjust and re-clamp as needed, then screw the platens to the brackets.
Next, slide the press bars onto the carriage bolts; they should move freely along the bolts. If necessary, improve the sliding action by carefully bending the carriage bolts or enlarging the holes in the press bars slightly. When you are satisfied with the fit, add washers and star knobs (pieces 17 and 18). Cover the exposed bolt ends with plastic caps (pieces 19).
Finally, hang a pipe clamp (pieces 20) on each upper bracket and screw pairs of mounting lugs (pieces 21) on the upper brackets against the clamp heads. These lugs prevent the clamps from twisting or falling off the brackets. On my press, I made the lugs from pieces of hardwood to accommodate the flared flanks of my Rockler “Sure-Foot™” clamp heads. I also kept the bracket tops 1/4″ shy of the wall to accommodate their built-in clamp hooks. With a little ingenuity, you can fashion lugs for any brand of clamp you own.
For example, you can make lugs for the curved indentations on Pony clamp heads using 1/2″-thick pieces of 1″-diameter dowel. When locating the lugs, make sure the clamp head is pushed all the way to the back of the U-shaped cut-out, and provide a little clearance so the clamp head lifts easily out of the bracket. Install rubber clamp pads (pieces 22) on your clamp hardware, if you prefer.
TIP: After mounting your rails, draw a pattern of horizontal lines on the wall every 2″. They’ll provide a handy visual reference for lining up the clamp tails to prepare for a glue-up.
Using the Press
Here’s how to put your new panel press to work: pull the press bars far enough out on the bolts so boards will slide in easily. Open the pipe clamps about 1″ wider than the width of the overall glue-up. Spread glue along one edge of the first board and slide it into place between the platens and press bars. Rest it on the clamp tail stops. Load the remaining edge-glued boards.
Before tightening the pipe clamps, push the press bars and panel boards against the platens. Tighten the star knobs just enough to hold the boards in place. Try to tighten the star knobs evenly to equalize the clamping pressure. If your boards aren’t warped and have been properly surfaced for edge gluing, it shouldn’t require much force to hold them flat against the platens. If you tighten the press bars excessively, you can overstress the components and even dent the boards, so go easy on those knobs.
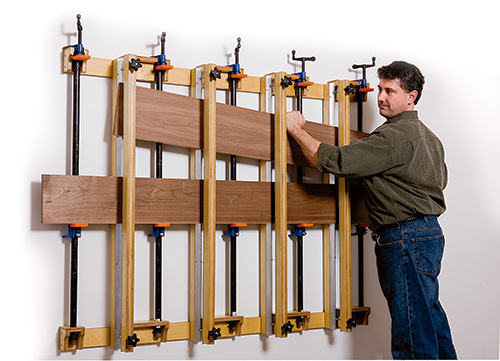
With the panel held flat against the platens, tighten the clamp screws until glue begins to squeeze out. If your panel is longer than the press is wide, add a few more clamps to secure the glue joints at the ends of the panel. We all have an opinion about the best way to handle glue squeeze-out. I like to wait until the glue is rubbery, and then scrape away the squeeze-out while the boards are still in the press. Unless your forearms are built like Popeye’s, you should be able to reach glue squeeze-out on the backside of the panel with a handled paint scraper or a damp cloth on the end of a stick.
Once you get the hang of using your press, those big panel glue-ups will be more efficient and enjoyable. You’ll never trip over or work around panels leaning precariously against a wall. Best of all, you can free up your bench from messy glue-ups and use it for more productive work.


