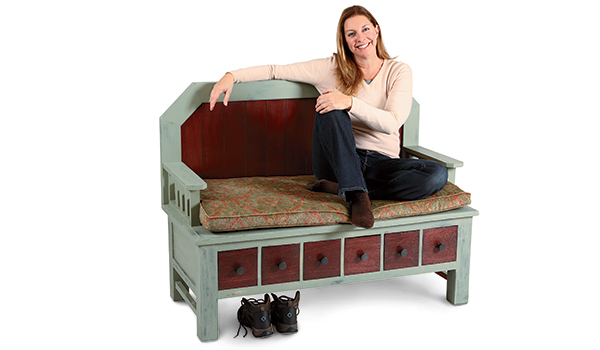
It’s got dirty, back-door secrets. Neglected and unseemly, it’s the dumping ground for filthy footwear, mismatched gloves and outerwear. I’m talking about the back entry, or what architects call the mudroom.
I should also mention it’s mahogany, a beautiful species of wood that deserves to be buffed up, polished and shown off. With structural bones like that, this coffee table was ideal for recycling, repurposing, rebuilding and repainting.
The idea was to clean up the mahogany drawers, give it a two-step distressed paint finish and build our own backrest and arms. I’m no fine woodworker, but these are basic techniques and within anyone’s grasp. Besides, by reusing a piece of furniture, this was an affordable makeover.
Reinvention Begins
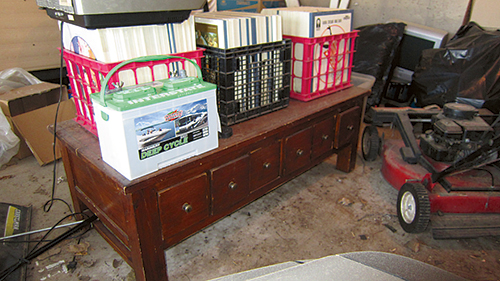
The coffee table had been languishing for decades in a garage. The finish was worn. There were a couple of dings and dents. A family of mice made a condo out of the drawers. But there was no water damage or warping. So it was a good starting base.
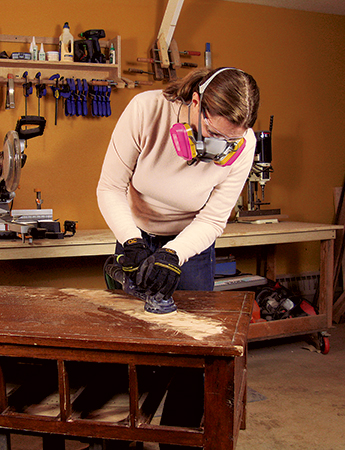
The first step was to clean up the surfaces for painting. This was a relatively easy sanding job since they needed only to be residue-free and smooth. A palm sander and 120-grit paper did the trick.
Sanding the mahogany drawer fronts was a little more intensive. It took three passes with 80-, 120- and 220-grit sandpaper to remove the old varnish and prepare them for a new finish facelift.
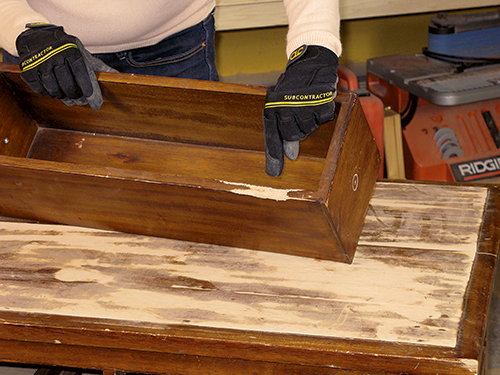
The interior drawer bottoms were another story. Their condition ranged from “OK” to “disgusting.” Some sort of unidentified gummy-gluey-gobs were stuck on the surface — and probably had been since the Reagan administration.
Thank goodness for a cabinet scraper. It was the tool for getting into those narrow drawers to scrape out the gunk.
The last step on the drawers was dealing with those chewed-up sides. A good 1/2″ to 3/4″ was completely missing thanks to some toothy little mouse. The solution? Clean up and cut down all the drawer side profiles so they’d match.
To do that, I clamped a pair of drawers face to face and drilled two holes at their intersection for jigsaw access. I marked for the 3/4″ cut and clamped a straightedge to guide the saw’s base plate. Just a quick note about that: I can’t be trusted to cut a clean, straight line without some help. The guide was the perfect solution.

All the drawers were reshaped, with the result that each drawer side now has a shallow, U-shaped profile on its top edge. Somewhere in rodent world, a mouse is laughing at the extra work his drawer-chewing caused.
Coffee and Tea to an Almost-Settee
Of course, the most transformative part of this project was to build a back and arms.
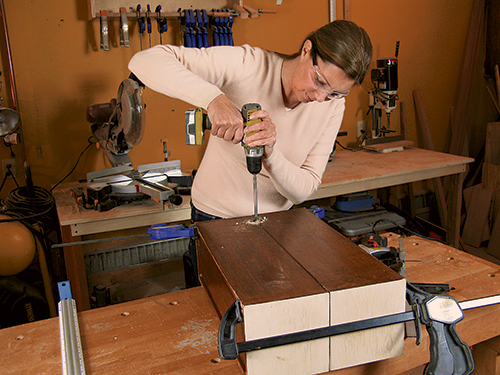
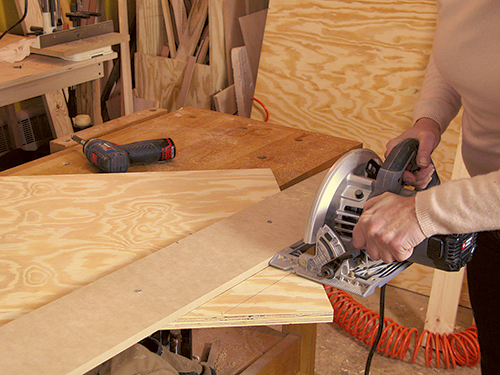
I used 3/4″ plywood for the back panel and got some help cutting it to size. That’s because the table saw is a power tool I still find unnerving. Plus, big old honkin’ sheets of plywood are awkward. So it’s nice to have extra hands for this. Next, I measured for and cut angled corners. Here, a shop-made fence was secured to help make an accurate cut.
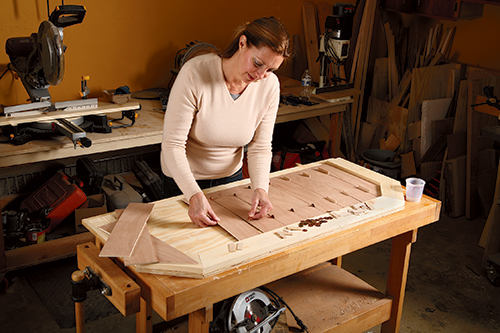
The angled corners were the beginning of filling out some design details on this piece. 1 x 4 pine was cut to “picture-frame” the five exposed edges of the back. To soften the hard lines and angles, I gave a little bevel to the edges using a sharp block plane. Then they were glued and pinned in place, which set the stage for the centerpiece: mahogany slats. Talk about a miser’s dream! I used 1/4″-thick lauan mahogany plywood, which only costs $12 a sheet. The slats were ripped to four-inch widths and cut to length.
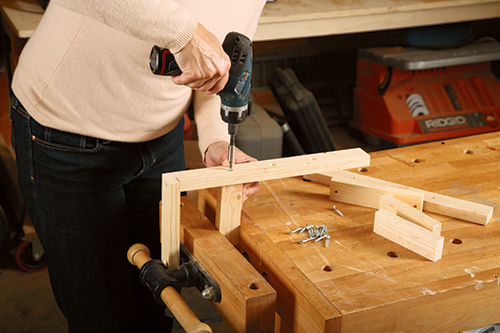
The arm assemblies were constructed from 1 x 2 pine pieces (see the Drawings) and screwed together as a simple box. They got a decorative kiss with some angle-cut 1 x 4 armrests.
Painting and Staining
The seat, back and arms were already sanded to accept the two-step paint finish — a black undercoat topped by a basil green color. The green complements the mahogany’s red tones, so it’s a nice contrast for the wood. It also has a muted, neutral quality to it. That means it should be able to withstand the shifting winds of color trends over the years.
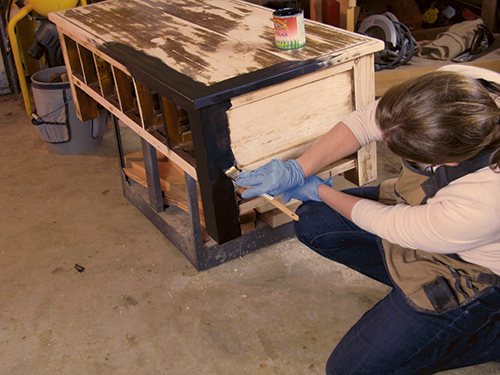
With a two-step distressed finish, you don’t have to knock yourself out painting the undercoat over the entire structure. Only hints of it will be revealed. So the base coat painting focused on areas where the natural wear patterns would be: edges and corners.
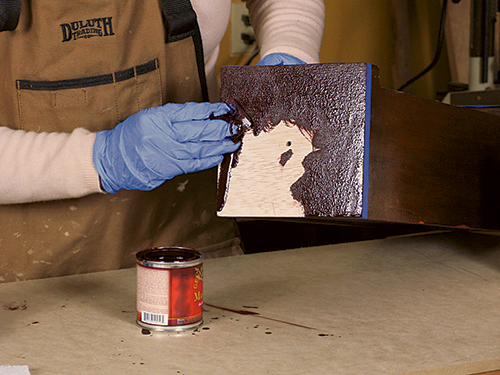
For the drawer fronts and slats, I went with a mahogany colored stain. That rich, ruddy color is also beautiful. The stain was flooded on and wiped off. The job was finished with a topcoat of spray of shellac followed by sprayed lacquer.
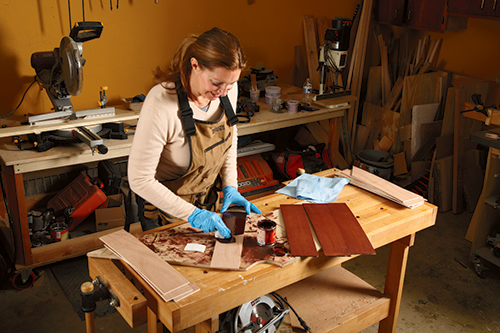
Staining and finishing before assembly is a good practice. You know darn well that fluctuations in humidity mean wood expands and contracts.
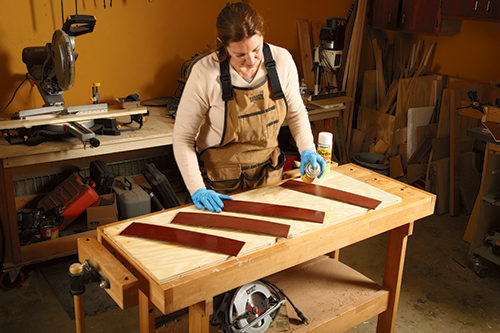
By coloring and finishing all the pieces, you won’t see any telltale bare-wood lines when the wood shrinks. Leave the tan line to that kid in the old Coppertone® ads.
Putting it Together
Mahogany plywood might be affordable and nice-looking, but it’s a bit flimsy. Face-nailing the slats onto the back panel wouldn’t look great, so securing the slats with glue was the only reasonable option.
I played around with the spacing — opting for a penny’s width separation or so between each one — then glued them in place with yellow glue. To get good adhesion, a 2 x 4 was laid over the top of the slats with a brick or two on top of it working as a “clamp.” Once the glue was dry, I secured the subassemblies to the base. The picture frame detailed backrest was held back 1″ so it could sit on top of the coffee table base and locate the plywood accurately. A few countersunk screws driven in from the backside of the piece definitely turned this former table into a bench.
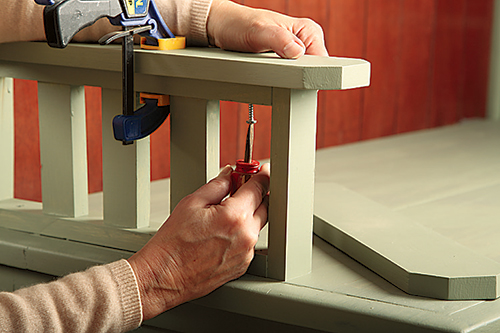
Securing the arms provided rock-solid stability. Even though it was awkward to do, the armrest’s screws were driven in from the underside, to hide the fasteners.
Final Flourishes and an Almost-flop
That just left the final decorative touches: hardware, a comfy cushion and distressing the finish. I chose round, hammered iron knobs to echo the undercoat color.
You’d think finding fabric for a cushion would be rote, routine and dull as unbuttered
toast. But it had to be carefully chosen. I considered the design (traditional), the colors (basil green and red wood tones) and the design elements (mahogany as the star attraction). A muted paisley-patterned corduroy was the solution.
The last step was to distress the finish so hints of the black undercoat would show. The protocol called for steel wool and denatured alcohol to gently take down the topcoat. My first attempt didn’t go well. The topcoat seemed resistant to the alcohol. So I slathered on more and rubbed harder. When the topcoat finally began to dissolve, it did so without grace. Blotchy, skunky chunks of green paint came off. It even got down to bare wood.
I’ll blame it on a combination of poor technique and the wrong applicator, because when I switched to a Scotch-Brite™ abrasive pad, the results were much more controllable and attractive. It enabled me to get that gently distressed finish that I’d envisioned from the beginning of the project.
So at the end of the day, here’s how this coffee table transformation stacked up: It took about three days to complete. The cost of supplies and materials was under $100. And as a solution to a problem area, it’s pretty and practical. Best of all, a beautiful piece of mahogany craftsmanship was rescued, recycled and given new life. I hope it inspires you to find an old piece of furniture and use your skills to give it a second chance. It’s fun, practical and affordable. You can’t beat that!
Click Here to download a PDF of the related drawings and Materials List.

