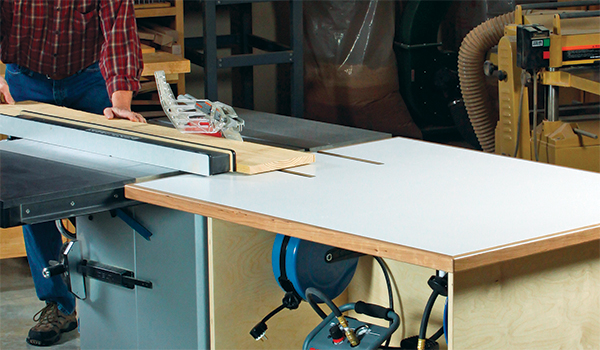
While not every shop project can do double-duty, this versatile cart is an exception. First, it provides a huge laminated surface behind your table saw when sizing down full-size sheet goods or making long rip cuts. Drawer storage underneath can stow away all manner of sawing accessories — dado blade, featherboards, throatplates, and so forth. Now, imagine the convenience of using this same outfeed cart as a full-service assembly station, too!
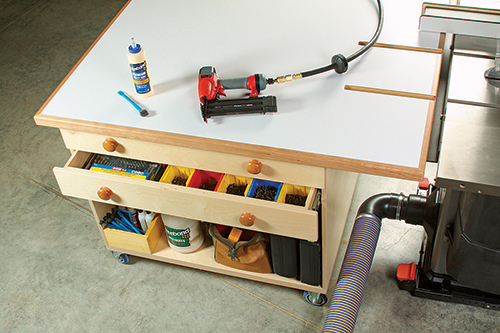
Here’s how I’m making that a reality. In one storage bay I’ve installed Rockler’s 12-gauge extension cord rewinder and an outlet strip to power small corded tools and battery chargers right where I’m working. Next to that is an air compressor, which plugs into the outlet strip. And in the other corner, an air hose reel services my air nailers without a tangle of hose on the floor.
On the cart’s flip side, I’ve loaded the two top drawers with bins of fasteners, biscuits and dowels, plus a drill bit collection and various cordless drivers. Down below, there’s storage space for tool cases and gluing supplies. Short of clamps, this cart holds all of my assembly supplies in one tidy place, ready for work. If this two-in-one convenience looks appealing, follow along to build one of these carts for your shop.
Making the Carcass
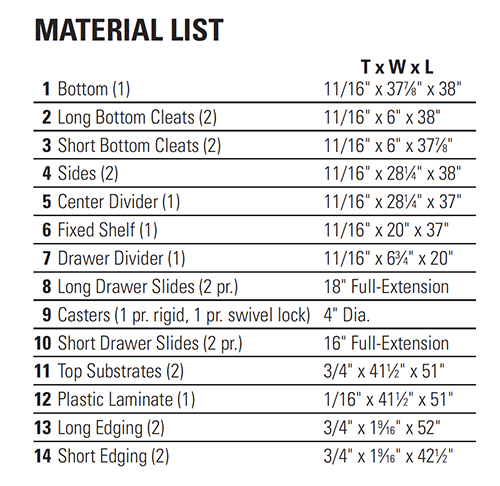
I used 3/4″ Baltic birch plywood for the cart’s main carcass parts (pieces 1 through 5); Baltic birch actually measures just 11/16″ thick. Keep that in mind if you use ordinary plywood instead, which is typically 23/32″, or MDF, which is a true 3/4″. Start by cutting the bottom panel to size.
For strength as well as easier alignment of the big carcass parts during assembly, I milled 1/4″-deep rabbets along the longer edges of the bottom panel for the carcass sides, using a dado blade. Then I plowed two 1/4″-deep dadoes into the bottom panel for the center and drawer dividers. A simple slotted routing jig and piloted mortising bit created dadoes that fit my 11/16″-thick plywood perfectly.
Long and short cleats, fastened to the bottom panel, will stiffen it while also building up its edges for attaching the casters with long lag screws, later. Rip and miter-cut these cleats, and attach them to the bottom panel’s bottom face with glue and 1-1∕4″ brad nails.
Next up, cut the carcass side panels to size. (Note: This cart is sized for a saw that’s 36-1∕4″ tall. Adjust part sizes accordingly in the Material List to suit your saw.) Then mill 1/4″-deep dadoes in the side panels for the center divider and fixed shelf.
At this point, you can cut the center divider and fixed shelf to shape, but keep in mind that the exact depth of your dadoes in the other carcass parts may influence the final dimensions of these two components. Choose a bottom face for the fixed shelf, and cut a dado across its width for the drawer divider.
When these parts are ready, dry-assemble the carcass to assess your progress. This also will help you determine the exact width of the drawer divider, which fi ts into two dadoes. Measure carefully and cut it to size.
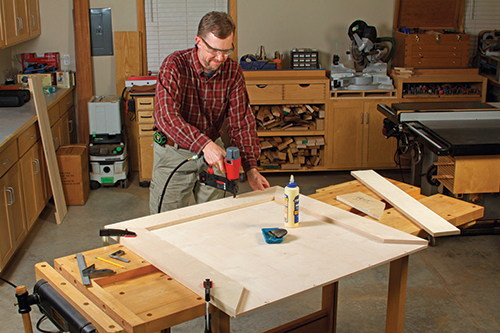
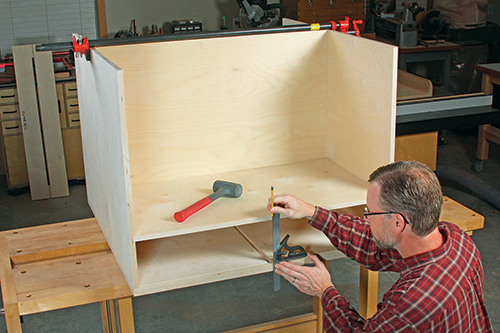
Disassemble the carcass parts, and finish-sand them with 120- or 150- grit paper. Ease the sharp edges that will be exposed in the final cart to keep them from splintering. Take time now to topcoat the carcass parts while they’re still fl at and accessible, but keep the joinery surfaces bare.
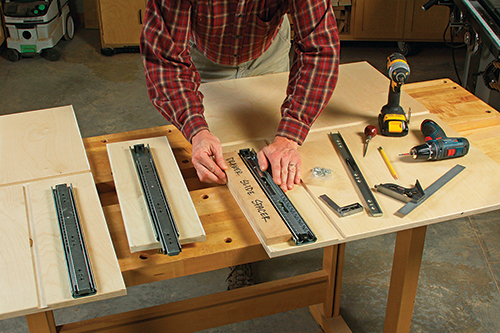
I chose water-based poly for a durable, quick-drying solution. Next, install the long drawer slides on the side panels and drawer divider for the two short bottom drawers (those under the fixed shelf). I centered them vertically. You’re now ready to glue and clamp the carcass together.
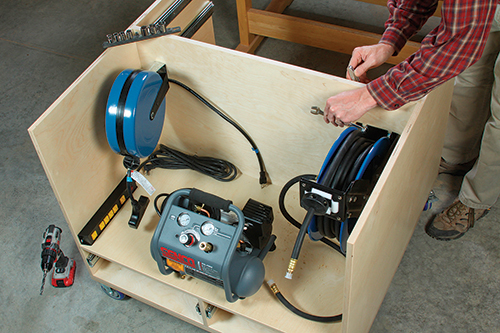
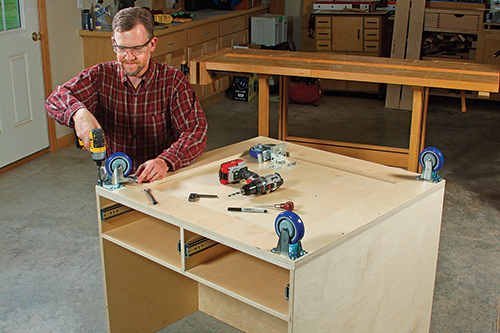
I brad-nailed the joints to help make this big glue-up easier, then reinforced the center divider and fixed-shelf joints with countersunk screws. Make sure the carcass is square before the glue sets, and adjust clamping pressure carefully to correct for any racking. Then flip the carcass over and attach the casters with 5/16″ x 1″ lag screws. I installed two rigid casters on the end that would be closest to the table saw and two swiveling, locking versions opposite those. If you plan to install a cord and/or hose rewinder, now is a good time to bolt those fixtures onto the center divider. Wrap up the carcass construction by mounting the two pairs of short drawer slides to the cart’s other side, up on top, for the full-length drawers.
Plug Revamp
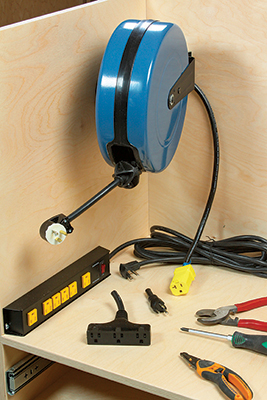
Cord reels come with a three receptacle “female” plug on the long rewinder end and the pronged “male” plug on the shorter fixed cord. The author reversed this confi guration by splicing on new plugs so the long cord extends and plugs into wall outlets without moving the cart. The short end energizes the outlet strip.
Building a Heavy-duty Laminated Top
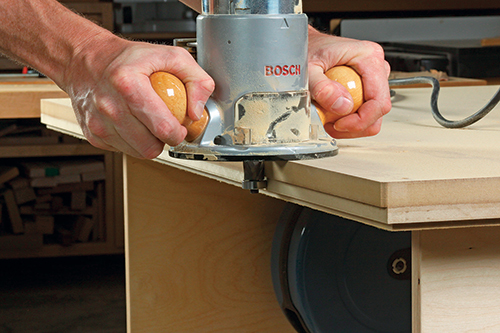
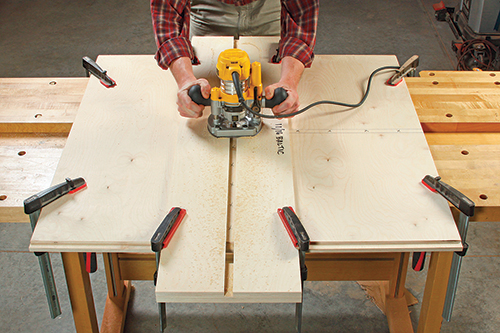
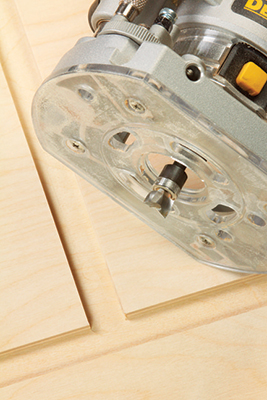
The top of this cart is a sandwich of two layers of 3/4″ MDF substrate chosen for flatness and heft, topped off with a sheet of plastic laminate to make it slick and impervious to spills. Notice in the Drawings and photos that I milled 1/4″ x 1/4″ rabbets around one edge of each of these MDF substrates.
It’s an approach I’ve used many times before to give the edging on a worktop like this a self-aligning “tongue” to fit around. I milled the rabbet along the bottom edge of the bottom substrate after cutting it to size. I screwed that sheet to the carcass so it overhangs the cart by 1-3∕4″ on its open sides and one end (the other end overhangs by 11-1∕2″ to make room for the saw’s rear dust port hose).
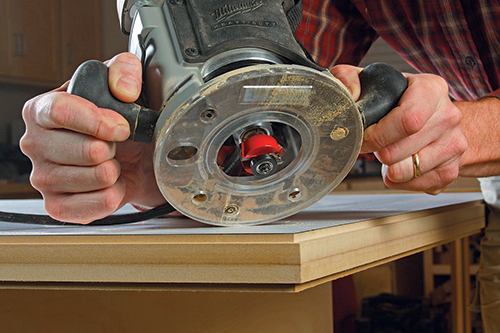
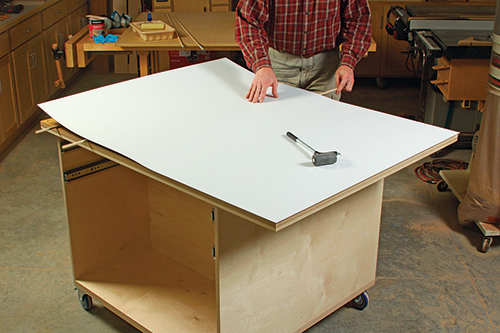
I cut the top MDF substrate about 1/4″ oversize, gluing and tacking it to the bottom layer (If you plan to cut miter slots in your cart’s top, be sure to keep fasteners out of these slot areas.) Once the glue dried, I routed the top substrate fush with the bottom layer before installing a sheet of plastic laminate on top with contact cement. Trim the laminate fush, then rout the other rabbet around the cart’s top edge to complete the “tongue” for the edging.
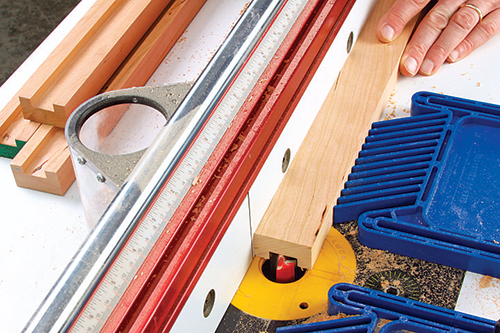
The top’s solid wood edging adds durability and hides the MDF/laminate core. It can be any solid stock you want — I used cherry. Rip long strips of it to width, and plow a groove into one face that’s just wide enough to wrap around the tongue you’ve just created.
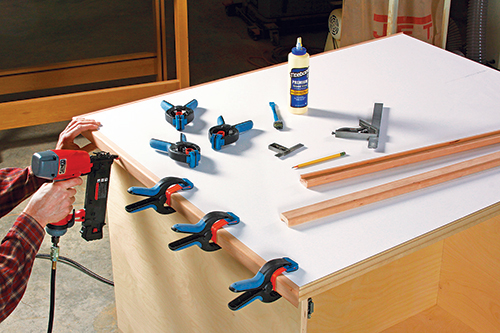
Ease its sharp edges with a 1/4″ roundover bit in your router. Miter the edging to length, glue and nail it in place, and round over the sharp corners. Wrap up the top by sanding the edging and applying finish to it.
Constructing the Drawers
A workaday cart like this deserves sturdy drawers, but dovetails are just plain overkill. I built the boxes using simple, durable rabbet-and-dado joints. After I had my stack of drawer fronts, backs and sides cut to size from 1/2″ Baltic ply, I started the joinery by cutting 1/4″ x 1/4″ dadoes across the inside faces of the drawer box sides at the table saw.
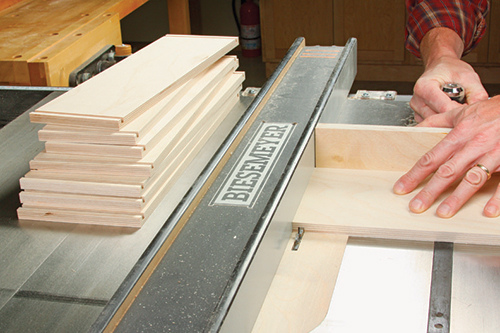
When that dust clears, use the exact same saw setup to mill drawer bottom grooves into the inside faces of all the box parts from end to end, 1/4″ up from the bottom.
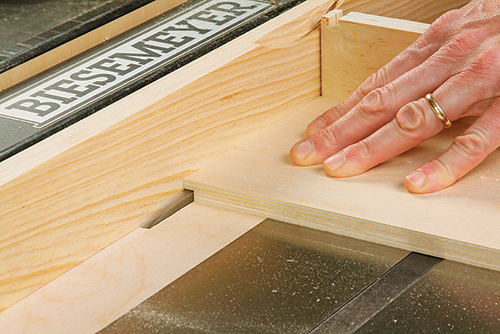
Then reset your saw for cutting rabbets into the ends of the drawer box fronts and backs, aiming for a snug, push-ft of these rabbets in their dadoes. Now cut the two sizes of drawer bottoms from more 1/2″ ply, and trim a 1/4″ x 1/4″ rabbet all around one face to fit the drawer bottom grooves.
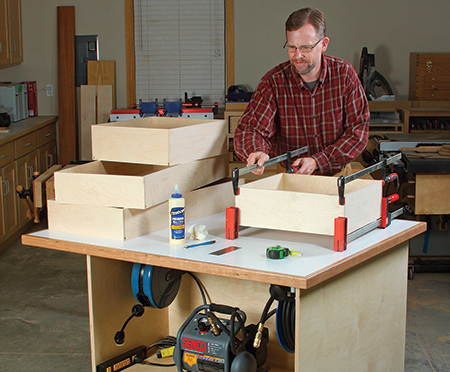
Dry-assemble the four drawers for a final check with the bottom panels in place. Then break them down for sanding. After that, glue and assemble the boxes, and apply two coats of fnish when the clamps come off.
Wrapping this Project Up
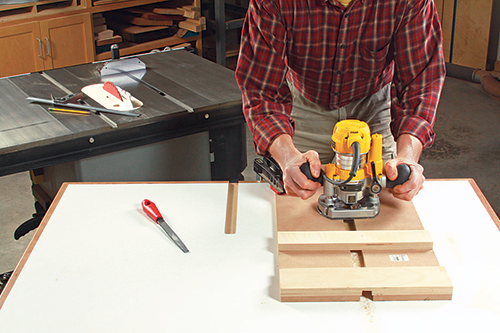
You are now in the homestretch! Install slides on the drawers to hang them, and add drawer faces with countersunk screws driven from inside the drawer boxes. Top off the drawers with wooden knobs. You’ll also need to decide if miter slots would be useful enhancements to the top. Then load this cart up with your compressor, assembly tools and plenty of fasteners!
Click Here to download a PDF of the related drawings.
Hard to Find Hardware
4” Polyurethane Casters, Swivel (1 pr.) #23030
4” Polyurethane Casters, Rigid (1 pr.) #23802
16” Heavy-Duty Full-Extension Slides (2 pr.) #46899
18” Heavy-Duty Full-Extension Slides (2 pr.) #46277
2” Cherry Face Grain Knobs (6) #61719
Retractable Extension Cord Reel (1) #20323


