In spite of my kids’ disbelief, it wasn’t so long ago that every speaker in a sound system required a couple of wires plugged into it to make it work. But thanks to Bluetooth® technology, you can sync a smartphone, tablet or laptop to Bluetooth-enabled speakers and have great wireless audio anywhere you want it — in the shop, on your desk at work or wherever you listen to your favorite music, radio or podcasts.
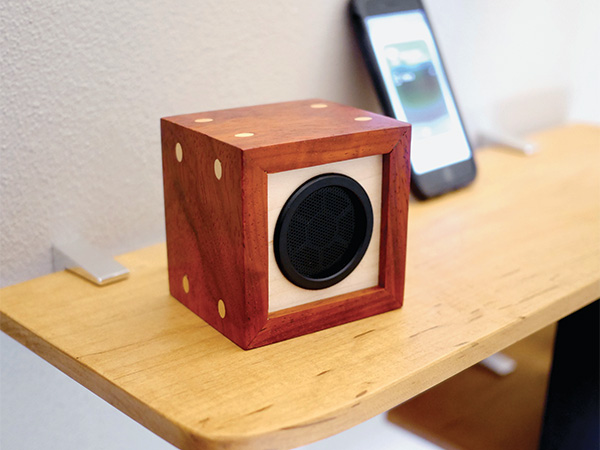
This little Wireless Speaker Kit with Playback/Volume Controls from Rockler comes with all the hardware you need to create a custom speaker that any music lover will appreciate opening this holiday season. Its speaker pod and rear control panel simply friction-fit into 1-7/8″-dia. holes in whatever style of cabinet you choose to make. Quick-connect cables push together without soldering, and an included USB cable recharges the speaker’s internal battery when needed.
Building the Speaker Cabinet
Here’s an idea for a simple cabinet you can build from a piece of 1/2″-thick x 3″- wide x 16″-long scrap in any species you prefer — I used padauk here. That will form the sides of the cabinet. You’ll also need a piece of 1/4″-thick stock for the front and back faces (mine is maple). And, if you choose to dress up the corners with dowels, make sure you have some 1/4″ dowel stock on hand, too. But feel free to use your imagination here — brass or aluminum rods could be cool alternatives to wooden dowels!
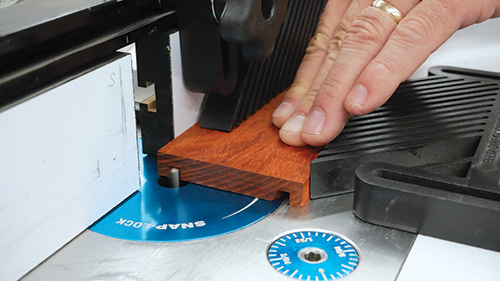
Start the project by routing a pair of 1/4″-deep grooves along the length of one face of the “cabinet sides” workpiece using a 1/4″ straight bit in your router table. Position these grooves 1/4″ in from the workpiece edges.
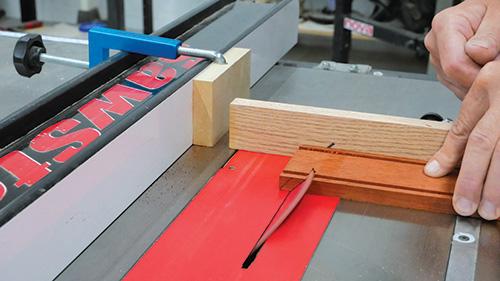
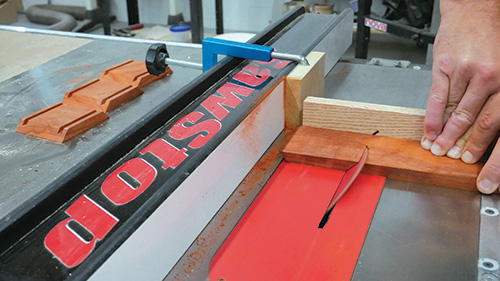
Now, head to the table saw to miter-cut four cabinet sides to length. Tilt your table saw blade to 45° for these cuts, and make sure to orient the workpiece so the grooves will end up on the insides of the cabinet parts (you’ll need to alternate faces when cutting both ends of each workpiece). Use a standoff block, clamped to the rip fence on the infeed side of the blade, for safety and setting the length of the cabinet sides to ensure that they’ll match.
Next, check that the 1/4″ stock you’ll use for the front and back faces slips easily into the grooves in the sides. Sand or plane it thinner, if necessary.
Then, carefully cut two 3″-square pieces for the faces. These require a 1-7/8″-dia. hole drilled through the center of each one to hold the speaker and control panel pods. Use a sharp Forstner bit to bore these holes, backing up the exit side with a scrap board to help minimize tearout there.
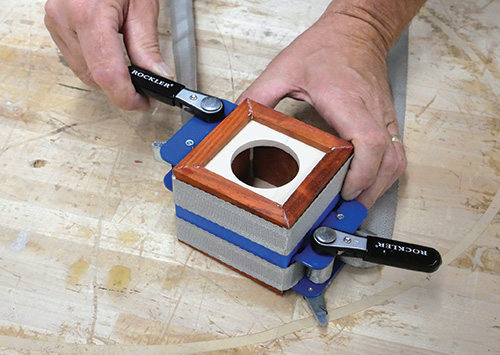
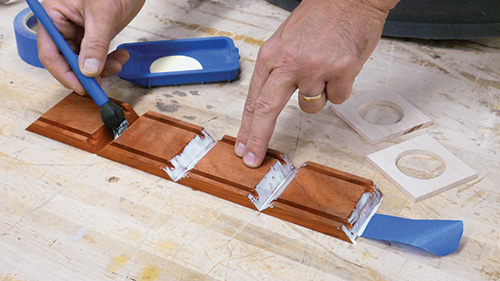
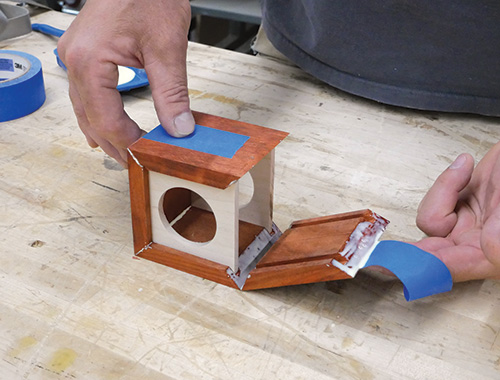
Finish-sand the cabinet sides and faces to prepare for assembly. Gluing up this little box is easy if you first stick the cabinet sides together, end-to-end, to a wide piece of painter’s tape. Then spread glue on the mitered ends, set the front and back faces in the grooves of one side, and simply wrap the other sides around the faces. You can hold the joints closed with tape, but a couple of small band clamps are even better to pull the joints together tightly.
Dressing Up the Corners
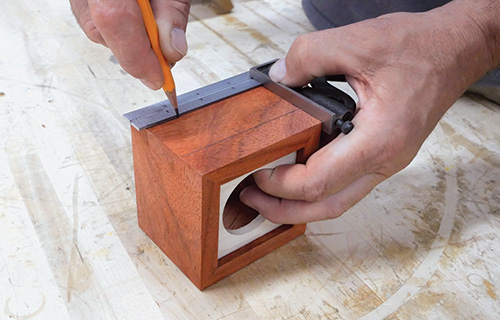
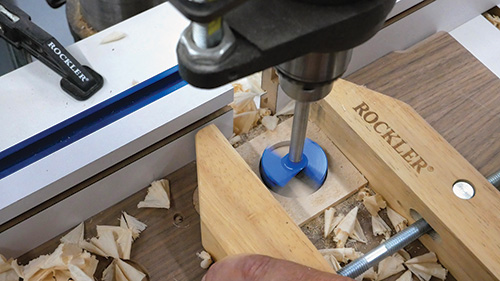
Rockler’s Corner Key Doweling Jig offers a unique way to spruce up the corners of this cabinet box with oval-shaped details. These “keys” add some mechanical strength to the glued miter joints, too. As you can see in the photo on the facing page, by clamping the adjustable jig in place and using its 1/4″ drill guide bushing, you can drill an angled hole at 45° across the corner joints for dowels or metal rods.

When they’re cut flush, the angled cross sections of these keys look like ovals. I marked layout lines around the cabinet, 3/4″ in from its front and back faces, then drilled a hole through all eight corners. Be sure to use Rockler’s extra-long 1/4″ bit for this task — it’s designed for the jig.
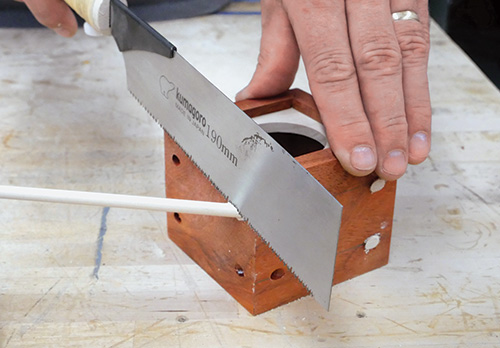
Insert your dowel or metal rod stock into each hole with a bit of wood glue for dowels or epoxy for metal. Leave the protruding ends of the keys a bit long, sawing them off close to the cabinet sides. Carefully sand or file the keys flush and smooth.
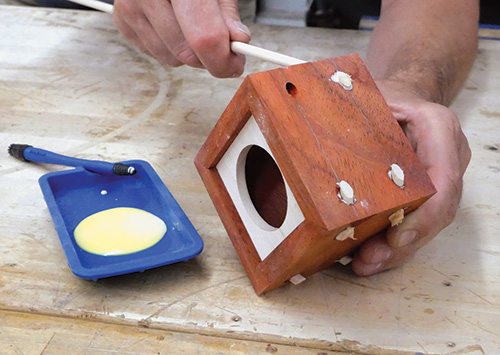
Apply your choice of finish to the cabinet box, and allow it to dry overnight. Then, all that’s left to do is install the speaker components. Thread the wires through the cabinet, and push them into their connectors to tether the speaker pod and control panel together.
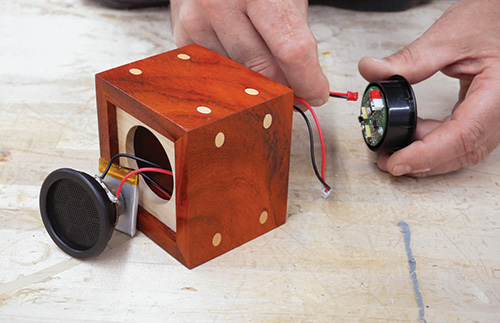
Wrap up the installation by pushing the pods into their holes in the front and back faces of the cabinet — friction holds them in place. Then, charge up the speaker, and this gift is ready for wrapping … that is, if you can resist the urge to enjoy it for a day or two first, before giving it away!
Hard-to-Find Hardware:
Wireless Speaker Kit (1) #57033
1-7/8″ Dia. Forstner Bit (1) #51761
1″ x 15′ Strap Clamps (2) #58432
Corner Key Doweling Jig (1) #59517
1/4″ Premium Extended-Length Drill Bit (1) #63837


